HP StorageWorks 8/80 EZSwitchSetup Administrator's Guide v6.3.0 (53-1001344-01 - Page 22
Discovering the switch, Discover Switch, Switch WWN
 |
View all HP StorageWorks 8/80 manuals
Add to My Manuals
Save this manual to your list of manuals |
Page 22 highlights
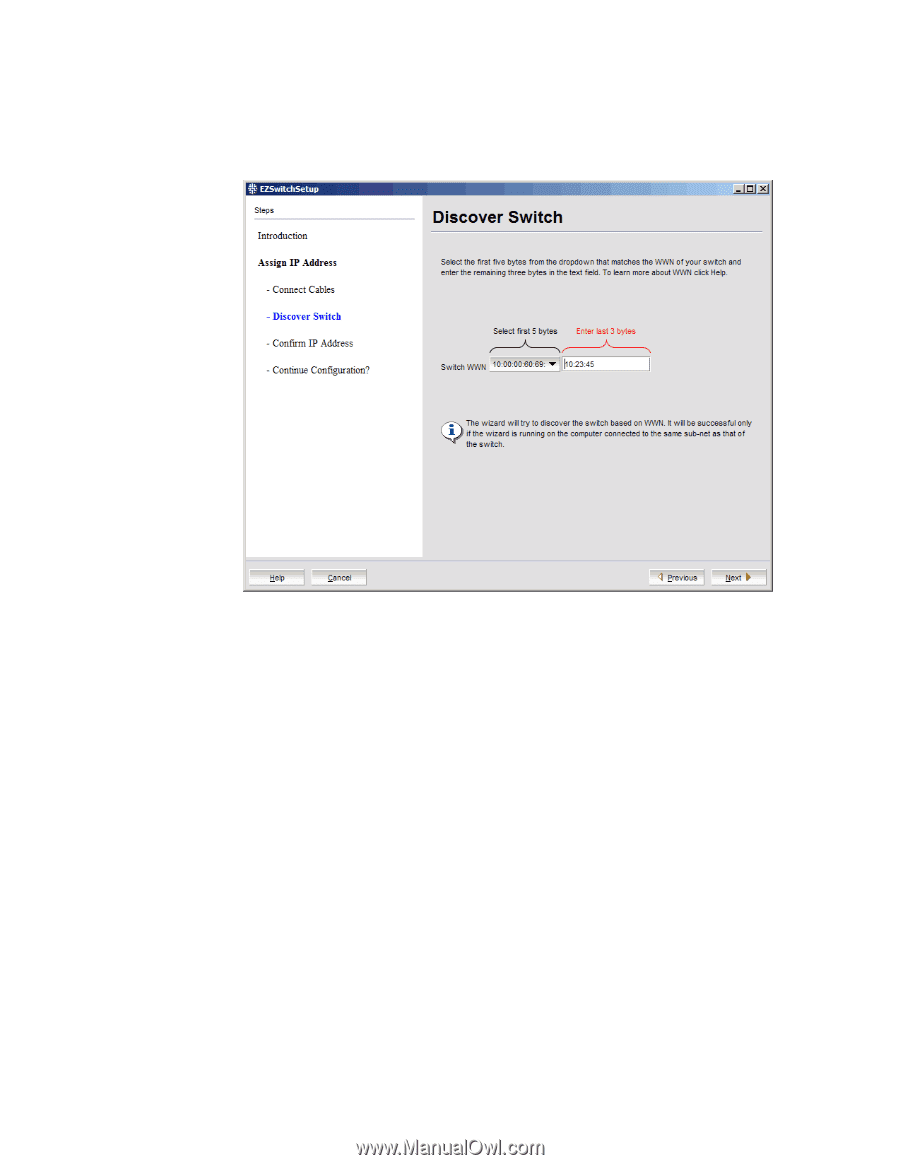
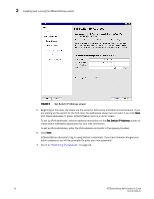
2 Installing and running the EZSwitchSetup wizard If you are using an Ethernet LAN connection, a Discover Switch screen is displayed (Figure 7). Go on to "Discovering the switch.". FIGURE 7 First Discover Switch screen Discovering the switch 1. Locate the WWN for your switch. • Brocade 300, 4100, 4900, 5000, 5100, 5300, 7800, and 8000 switches: Look on the switch ID pull-out tab located on the bottom of the port side of the switch. 2. From the Switch WWN list (Figure 7), choose the switch's WWN prefix numbers and then enter the last six alphanumeric digits of your switch's WWN. Each two alphanumeric digits must be separated by a colon. 3. Click Next. When EZSwitchSetup discovers the switch, it displays the discovered IP addresses (IPv4 and IPv6) on the screen (Figure 8). If you are setting up the switch for the first time, the IP addresses are placeholder addresses that were assigned at the factory and you must provide valid addresses. 10 EZSwitchSetup Administrator's Guide 53-1001344-01
-
 1
1 -
2
-
3
-
4
-
5
-
6
-
7
-
8
-
9
-
10
-
11
-
12
-
13
-
14
-
15
-
16
-
 17
17 -
 18
18 -
 19
19 -
 20
20 -
 21
21 -
 22
22 -
 23
23 -
 24
24 -
 25
25 -
 26
26 -
 27
27 -
28
-
29
-
30
-
31
-
32
-
33
-
34
-
35
-
36
-
37
-
38
-
39
-
40
-
41
-
42
-
43
-
44
-
45
-
46
-
47
-
48
-
49
-
50
-
51
-
52
-
53
-
54
-
55
-
56
-
57
-
58
-
59
-
60
-
61
-
62
-
63
-
64
 |
 |