HP StorageWorks 8/80 EZSwitchSetup Administrator's Guide v6.3.0 (53-1001344-01 - Page 23
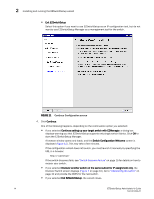
Set Switch IP Address, Confirm IP Address, Second Discover Switch screen
 |
View all HP StorageWorks 8/80 manuals
Add to My Manuals
Save this manual to your list of manuals |
Page 23 highlights
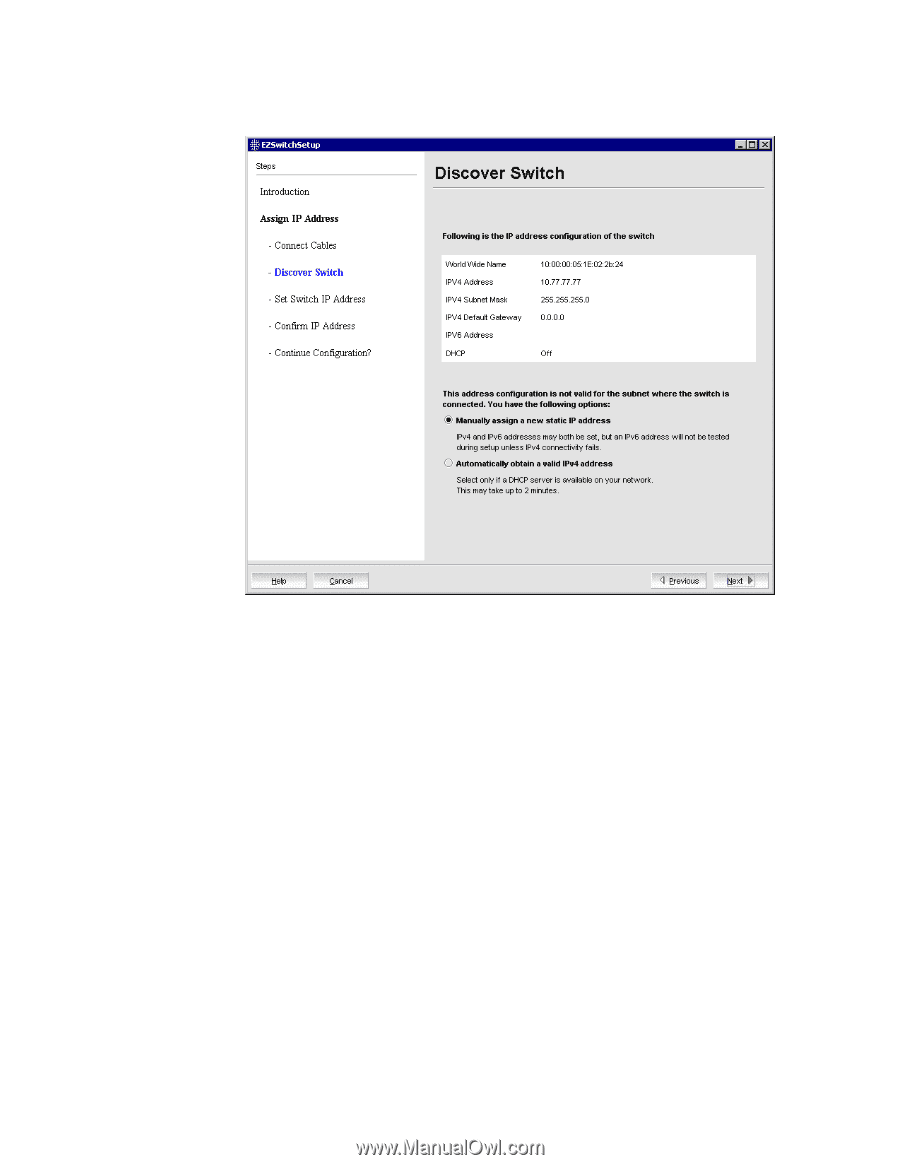
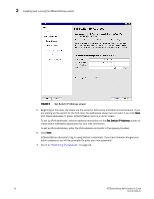
Installing and running the EZSwitchSetup wizard 2 FIGURE 8 Second Discover Switch screen 4. Select an option for assigning the IP address and click Next. The options vary depending on the configuration of your switch: • Keep the current switch IP configuration. This option is available only if EZSwitchSetup detected a valid IP address. Skip to "Confirming IP addresses" on page 13. • Manually assign a new static IP address. If you select this option and click Next, the Set Switch IP Address screen is displayed (Figure 9). Continue with step 5 to enter the IP address. • Automatically obtain a valid IPv4 address. Select this option only if a DHCP server is available on your network. When you click Next, an IP address is automatically obtained from the DHCP server and the Confirm IP Address screen is displayed. Skip to "Confirming IP addresses" on page 13. EZSwitchSetup Administrator's Guide 11 53-1001344-01
-
 1
1 -
2
-
3
-
4
-
5
-
6
-
7
-
8
-
9
-
10
-
11
-
12
-
13
-
14
-
15
-
16
-
17
-
 18
18 -
 19
19 -
 20
20 -
 21
21 -
 22
22 -
 23
23 -
 24
24 -
 25
25 -
 26
26 -
 27
27 -
 28
28 -
29
-
30
-
31
-
32
-
33
-
34
-
35
-
36
-
37
-
38
-
39
-
40
-
41
-
42
-
43
-
44
-
45
-
46
-
47
-
48
-
49
-
50
-
51
-
52
-
53
-
54
-
55
-
56
-
57
-
58
-
59
-
60
-
61
-
62
-
63
-
64
 |
 |