Intermec PD41 PD41 and PD42 Commercial Printer User's Manual - Page 33
Printing a Test Label - flashing blue light
 |
View all Intermec PD41 manuals
Add to My Manuals
Save this manual to your list of manuals |
Page 33 highlights
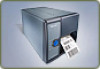
Chapter 1 - Using the Printer 6 Load media in the printer For help, see "Loading Media for TearOff Printing" on page 11 or "Loading Media for Peel-Off (Self-Strip) Printing" on page 12. 7 Press the Print button to advance the media. Printing a Test Label To verify that the printer is fully functional and to obtain the current configuration, you can print the test labels. The test labels contain hardware and software configuration information. To print a set of test labels 1 Turn off the printer. 2 Load media and ribbon (if necessary). For help see, "Loading Media" on page 11 and "Loading Thermal Transfer Ribbon" on page 16. Make sure the printhead is down. 3 Press and hold the Print button. 4 Continue to keep the Print button pressed down and turn on the Power switch. After approximately ten seconds, the printer screen lights up, runs a media setup routine, enters Testmode, and three of the LEDs start to flash one at a time (green, red, and then blue). 5 Continue to press the Print button until the printer starts cycling through the selectable media types: gap, mark and continuous. 6 Select your media type by releasing the Print button when your type of media appears on the screen. SELECT MEDIA GAP SELECT MEDIA MARK SELECT MEDIA CONTINUOUS PD41 and PD42 Commercial Printer User's Manual 19
-
 1
1 -
2
-
3
-
4
-
5
-
6
-
7
-
8
-
9
-
10
-
11
-
12
-
13
-
14
-
15
-
16
-
17
-
18
-
19
-
20
-
21
-
22
-
23
-
24
-
25
-
26
-
27
-
 28
28 -
 29
29 -
 30
30 -
 31
31 -
 32
32 -
 33
33 -
 34
34 -
 35
35 -
 36
36 -
 37
37 -
 38
38 -
39
-
40
-
41
-
42
-
43
-
44
-
45
-
46
-
47
-
48
-
49
-
50
-
51
-
52
-
53
-
54
-
55
-
56
-
57
-
58
-
59
-
60
-
61
-
62
-
63
-
64
-
65
-
66
-
67
-
68
-
69
-
70
-
71
-
72
-
73
-
74
-
75
-
76
-
77
-
78
-
79
-
80
-
81
-
82
-
83
-
84
-
85
-
86
-
87
-
88
-
89
-
90
-
91
-
92
-
93
-
94
-
95
-
96
-
97
-
98
-
99
-
100
-
101
-
102
-
103
-
104
-
105
-
106
-
107
-
108
-
109
-
110
-
111
-
112
-
113
-
114
-
115
-
116
-
117
-
118
-
119
-
120
-
121
-
122
-
123
-
124
-
125
-
126
-
127
-
128
-
129
-
130
-
131
-
132
-
133
-
134
-
135
-
136
-
137
-
138
-
139
-
140
-
141
-
142
-
143
-
144
-
145
-
146
-
147
-
148
-
149
-
150
-
151
-
152
-
153
-
154
-
155
-
156
-
157
-
158
-
159
-
160
-
161
-
162
 |
 |
