Intermec PD41 PD41 and PD42 Commercial Printer User's Manual - Page 63
Configuring SNMP Settings, Network Admin, Delete, Submit SNMP settings
 |
View all Intermec PD41 manuals
Add to My Manuals
Save this manual to your list of manuals |
Page 63 highlights
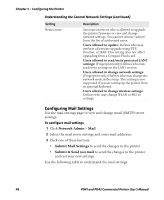
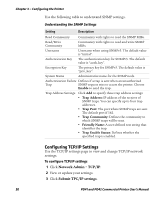
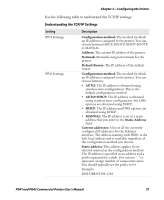
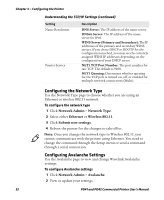
Chapter 3 - Configuring the Printer Understanding the Mail Settings Setting Mail (SMTP) Server Mail addresses Description Choose a configuration method for your mail server settings: • SMTP settings from DHCP: Choose this setting is you want the printer to receive settings automatically from your DHCP server. This setting requires that you choose DHCP and IP Selection in the TCP/IP section. • Manual settings: Choose this option to manually configure the Mail Server address and port. The default port is 25. Defines the email addresses to use when the printer sends alert messages: • From address: The address that displays as the sender of alert messages. Email will be returned to this address if the recipient is unreachable. To prevent email bounces when the recipient is unreachable, leave this field empty. • To address: The recipient of alert messages. To enter several addresses, separate them with a comma (,) or a semicolon (;). Configuring SNMP Settings Use the SNMP page to view and change SNMP settings. To configure SNMP settings 1 Click Network Admin > SNMP. 2 Change the SNMP settings. 3 Click Add to add trap settings. You can define up to four authentication failure traps. After you add a trap, it appears in the Trap Address Settings list. You can edit or delete each trap in the list by clicking Edit or Delete. 4 Click Submit SNMP settings. PD41 and PD42 Commercial Printer User's Manual 49
-
 1
1 -
2
-
3
-
4
-
5
-
6
-
7
-
8
-
9
-
10
-
11
-
12
-
13
-
14
-
15
-
16
-
17
-
18
-
19
-
20
-
21
-
22
-
23
-
24
-
25
-
26
-
27
-
28
-
29
-
30
-
31
-
32
-
33
-
34
-
35
-
36
-
37
-
38
-
39
-
40
-
41
-
42
-
43
-
44
-
45
-
46
-
47
-
48
-
49
-
50
-
51
-
52
-
53
-
54
-
55
-
56
-
57
-
 58
58 -
 59
59 -
 60
60 -
 61
61 -
 62
62 -
 63
63 -
 64
64 -
 65
65 -
 66
66 -
 67
67 -
 68
68 -
69
-
70
-
71
-
72
-
73
-
74
-
75
-
76
-
77
-
78
-
79
-
80
-
81
-
82
-
83
-
84
-
85
-
86
-
87
-
88
-
89
-
90
-
91
-
92
-
93
-
94
-
95
-
96
-
97
-
98
-
99
-
100
-
101
-
102
-
103
-
104
-
105
-
106
-
107
-
108
-
109
-
110
-
111
-
112
-
113
-
114
-
115
-
116
-
117
-
118
-
119
-
120
-
121
-
122
-
123
-
124
-
125
-
126
-
127
-
128
-
129
-
130
-
131
-
132
-
133
-
134
-
135
-
136
-
137
-
138
-
139
-
140
-
141
-
142
-
143
-
144
-
145
-
146
-
147
-
148
-
149
-
150
-
151
-
152
-
153
-
154
-
155
-
156
-
157
-
158
-
159
-
160
-
161
-
162
 |
 |
