JVC DLA-HX1U Instruction Manual - Page 43
Setting the “Resize”, to select Set up
 |
View all JVC DLA-HX1U manuals
Add to My Manuals
Save this manual to your list of manuals |
Page 43 highlights
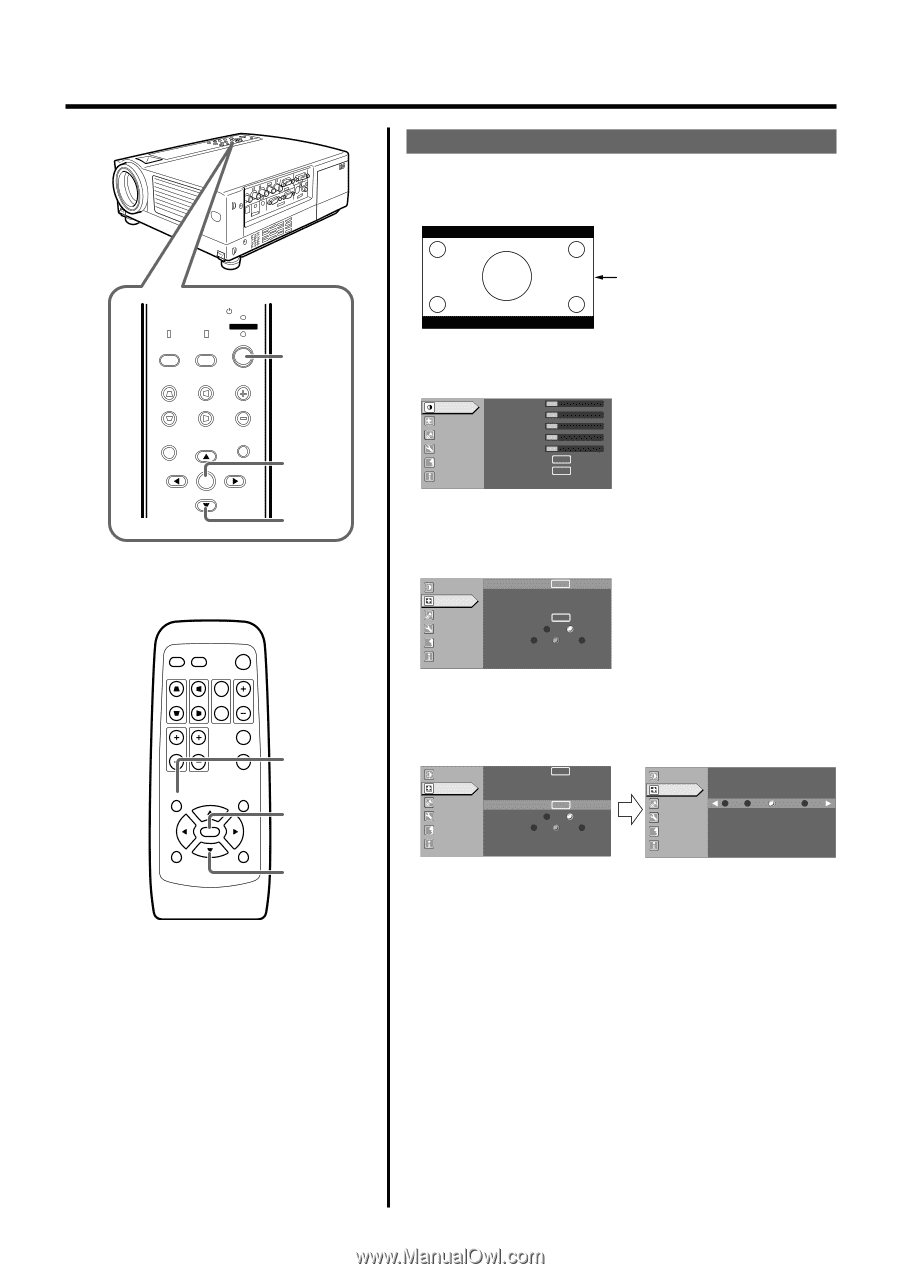
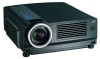
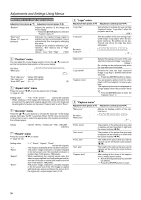
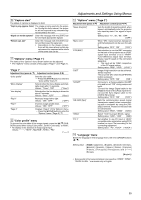
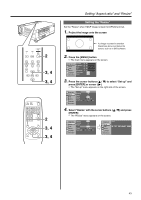
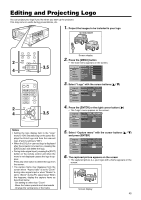
LAMP PC TEMP VIDEO STAND BY OPERATE MENU 2 V-KEYSTONE H-KEYSTONE VOL. MENU EXIT ENTER 3, 4 3, 4 PC VIDEO OPERATE W V-KEYSTONE H-KEYSTONE SCREEN DIGITAL ZOOM S FREEZE VOLUME FOCUS QUICK ALIGN. 2 MENU EXIT ENTER PRESET HIDE 3, 4 3, 4 Setting "Aspect ratio" and "Resize" Setting the "Resize" Set the "Resize" when HDCP image is input from [PC3] terminal. 1. Project the image onto the screen 4:3 image recorded in letterbox (black bars above and below the screen) such as in DVD software. 2. Press the [MENU] button • The main menu appears on the screen. Image adj. Set up Logo Options A Language Information Contrast 12 Brightness 12 Color 12 Tint 12 Sharpness 1 Color temp. Reset ENTER ENTER 3. Press the cursor buttons to select "Set up" and press [ENTER] or cursor ( ᮣ ) • The "Set up" menu appears on the right side of the screen. Image adj. Set up R GB Logo Options A Language Information Position Tracking Phase Resize Clamp Sync level ENTER 123 12 ENTER ST BP Low Std High 4. Select "Resize" with the cursor buttons and press [ENTER] • The "Resize" menu appears on the screen. Image adj. Set up R GB Logo Options A Language Information Position Tracking Phase Resize Clamp Sync level ENTER 123 12 ENTER ST BP Low Std High Image adj. Set up R GB Logo Options A Language Information Resize 1:1 Panel Aspect Zoom 43
-
 1
1 -
2
-
3
-
4
-
5
-
6
-
7
-
8
-
9
-
10
-
11
-
12
-
13
-
14
-
15
-
16
-
17
-
18
-
19
-
20
-
21
-
22
-
23
-
24
-
25
-
26
-
27
-
28
-
29
-
30
-
31
-
32
-
33
-
34
-
35
-
36
-
37
-
 38
38 -
 39
39 -
 40
40 -
 41
41 -
 42
42 -
 43
43 -
 44
44 -
 45
45 -
 46
46 -
 47
47 -
 48
48 -
49
-
50
-
51
-
52
-
53
-
54
-
55
-
56
-
57
-
58
-
59
-
60
-
61
-
62
 |
 |