JVC DLA-HX1U Instruction Manual - Page 50
Cleaning and Replacing the Filter
 |
View all JVC DLA-HX1U manuals
Add to My Manuals
Save this manual to your list of manuals |
Page 50 highlights
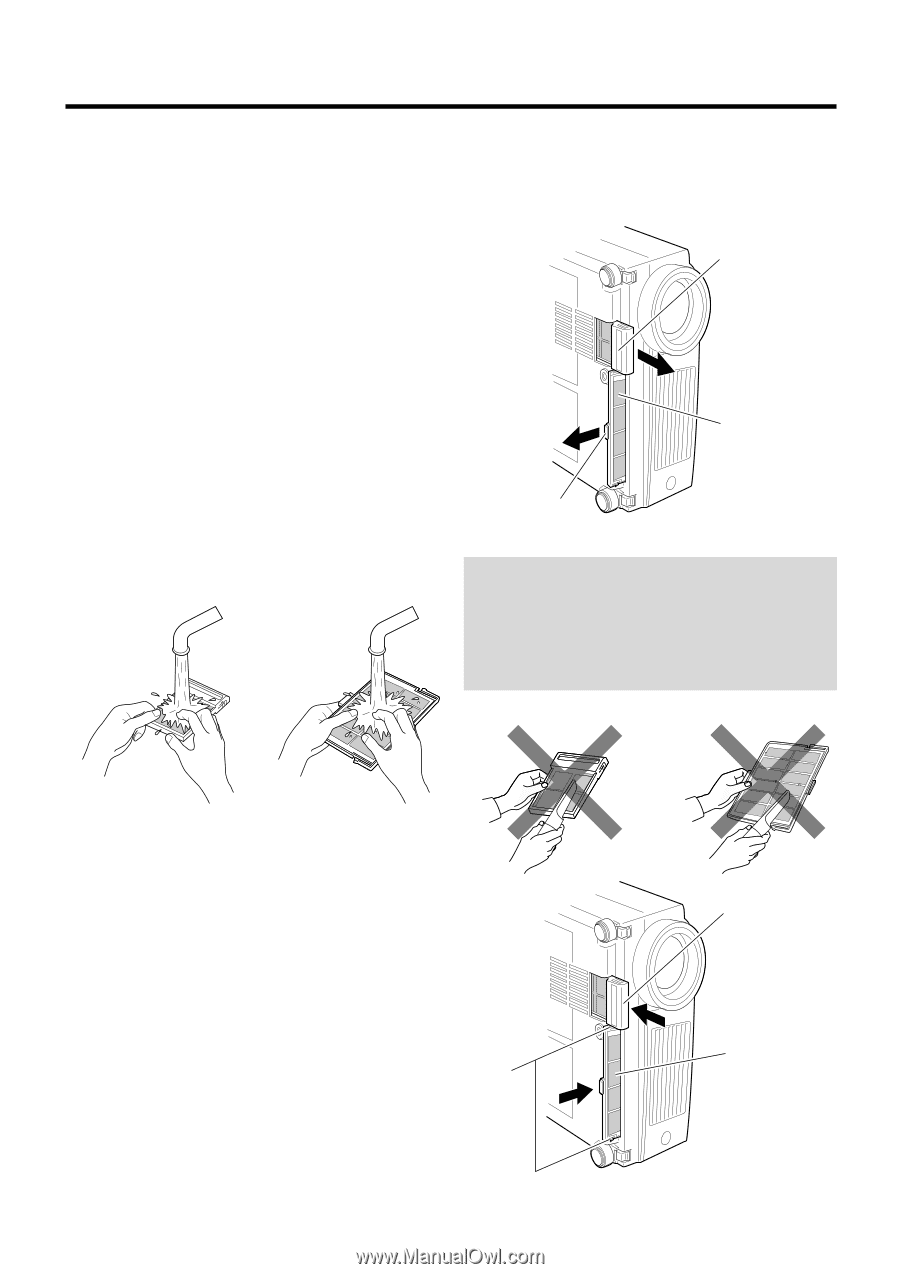
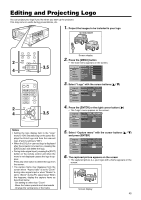
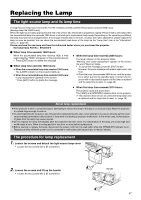
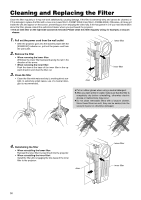
Cleaning and Replacing the Filter Clean the filter regularly or it may not work satisfactorily, causing damage. If the filter is extremely dirty and cannot be cleaned, or if it is damaged, replace the filter with a new one (Lower filter: LC32087-002A/ Inner filter: LC32058-002A). Otherwise, dirt may get inside the unit and appear on the screen, preventing you from enjoying the video fully. If dirt has gotten in or if you need information about the filter, please consult the authorized dealer where you purchased the projector. ❈ The air inlet filter on the right side cannot be removed. Please clean this filter regularly using, for example, a vacuum cleaner. 1. Pull out the power cord from the wall outlet • After the projector goes into the stand-by state with the [STAND BY] indicator on, pull out the power cord from the wall outlet. 2. Remove the filter • When removing the lower filter: Withdraw the lower filter backwards along the rail in the direction of the arrow. • When removing the inner filter: Push the claw at the base of the inner filter in the upward direction and draw the filter out. 3. Clean the filter • Clean the filter with water and dry it, avoiding direct sunlight. In extremely soiled cases, use of a neutral detergent is recommended. claw lower filter inner filter ● Put on rubber gloves when using a neutral detergent. ● After you wash a filter in water, make sure that the filter is completely dry before reinstalling, otherwise electric shocks or malfunctions may occur. ● Do not clean removable filters with a vacuum cleaner. Since these filters are soft, they can be sucked into the vacuum cleaner or otherwise damaged. 4. Reinstalling the filter • When reinstalling the lower filter: Reinstall the lower filter by inserting it into the projector. • When reinstalling the inner filter: Install the filter after engaging the two claws of the inner filter to the projector. claw 50 lower filter inner filter
-
 1
1 -
2
-
3
-
4
-
5
-
6
-
7
-
8
-
9
-
10
-
11
-
12
-
13
-
14
-
15
-
16
-
17
-
18
-
19
-
20
-
21
-
22
-
23
-
24
-
25
-
26
-
27
-
28
-
29
-
30
-
31
-
32
-
33
-
34
-
35
-
36
-
37
-
38
-
39
-
40
-
41
-
42
-
43
-
44
-
 45
45 -
 46
46 -
 47
47 -
 48
48 -
 49
49 -
 50
50 -
 51
51 -
 52
52 -
 53
53 -
 54
54 -
 55
55 -
56
-
57
-
58
-
59
-
60
-
61
-
62
 |
 |