JVC GY-DV300U 42 pg. users guide on the KA-DV300 Network Pack (PDF, 916KB) - Page 23
Protecting a clip file on a CF memory card, To cancel the protection
 |
View all JVC GY-DV300U manuals
Add to My Manuals
Save this manual to your list of manuals |
Page 23 highlights
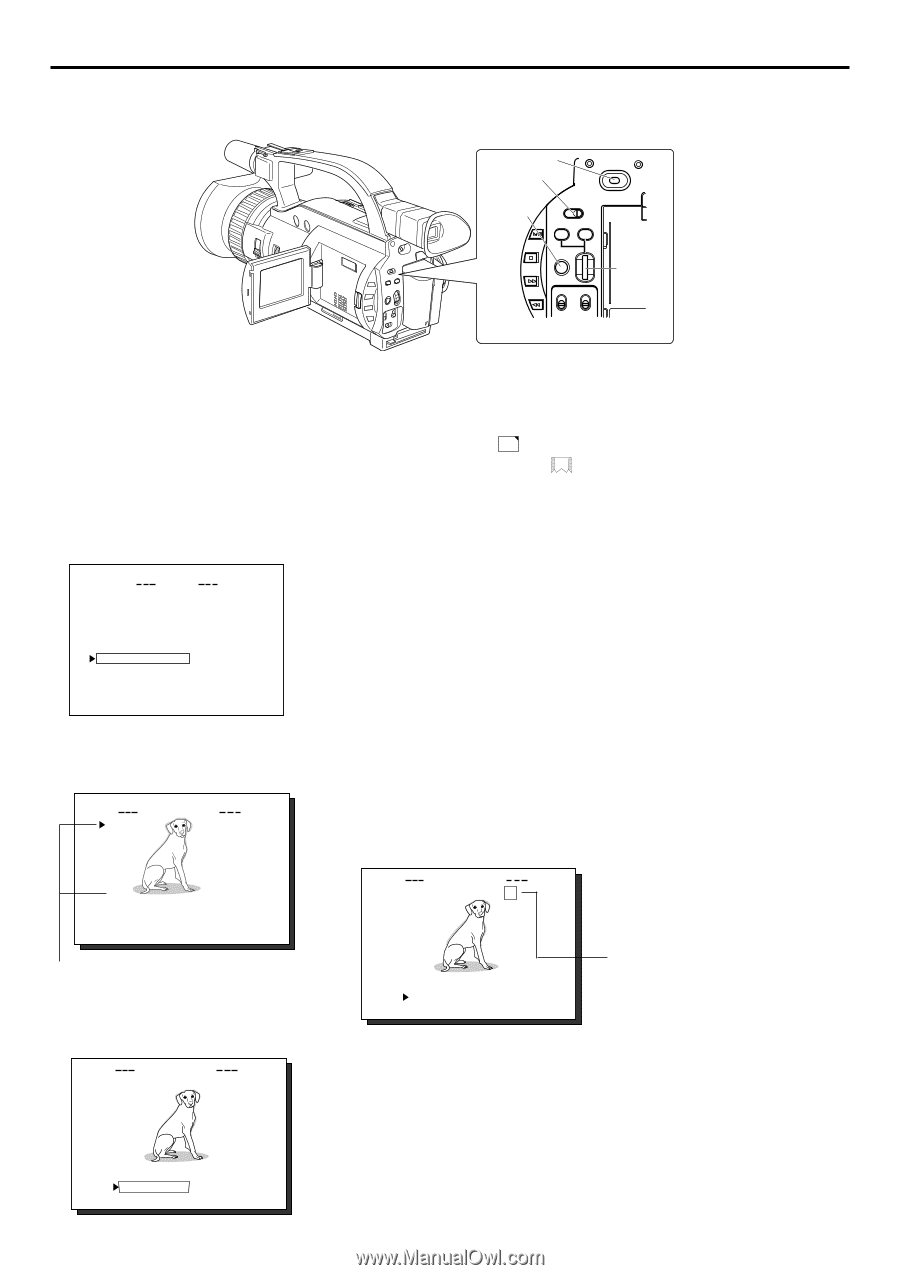
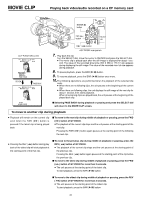
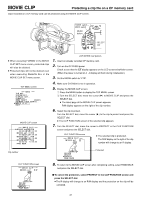
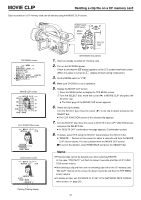
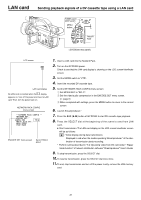
MOVIE CLIP Protecting a clip file on a CF memory card Clips recorded on a CF memory card can be protected using the MOVIE CLIP screen. POWER switch MODE switch POWER OFF ON MENU button MODE CAM-B CAM-A VTR GAIN SHUTTER BAR AW MENU FWD SELECT dial REV ● When executing FORMAT in the MOVIE CLIP SET menu screen, protected clips will also be deleted. ● Protected clips will not be deleted even when executing DELETE ALL in the MOVIE CLIP SET menu screen. TOP MENU screen MENU VTR SET . . SY ST EM S ET . . D I S PL AY SET . . C L OC K / T C . . MENU RESE T CANCE L NETWORK P ACK CONF I G . . MOV I E CL I P . . EX I T MOVIE CLIP screen MOV I E CL I P MC 0 0 0 5 . a s f R / W 02 / 03 / 02 09 : 0 0 : 00 MC 0 0 0 6 . a s f R / W 02 / 03 / 02 09 : 3 0 : 25 MC 0 0 0 7 . a s f R / W 02 / 03 / 02 10 : 1 0 : 55 MC 0 0 0 8 . a s f R / W 02 / 03 / 02 11 : 0 0 : 00 PAGE BACK 1. Insert an already recorded CF memory card. 2. Turn on the GY-DV300 power. Check to see that the C F display appears on the LCD screen/viewfinder screen. (When the power is turned on, display will flash during initialization.) 3. Set the MODE switch to "VTR". 4. Make sure GY-DV300 is not in operation. 5. Display the MOVIE CLIP screen. q Press the MENU button to display the TOP MENU screen. w Turn the SELECT dial, move the cursor (t) to MOVIE CLIP and press the SELECT dial. ● The latest page of the MOVIE CLIP screen appears. R/W display appears on the right of the clip number. 6. Select the clip to protect. Turn the SELECT dial, move the cursor (t) to the clip to protect and press the SELECT dial. ● The CLIP FUNCTION screen of the selected clip appears. 7. Turn the SELECT dial, move the cursor to PROTECT in the CLIP FUNCTION screen and press the SELECT dial. CLIP FUNCTION screen MOV I E CL I P MC 0 0 0 5 . a s f R ● The selected clip is protected. The R/W display on the right of the clip number will change to an R display. Clip number CLIP FUNCTION screen MOV I E CL I P MC 0 0 0 5 . a s f R / W REV IEW DE LE T E P ROT E C T PAGE BACK REV IEW DE LE T E P ROT E C T PAGE BACK Protected 8. To return to the MOVIE CLIP screen after completing setting, select PAGE BACK and press the SELECT dial. \ To cancel the protection, select PROTECT in the CLIP FUNCTION screen and press the SELECT dial. ● The R display will change to an R/W display and the protection on the clip will be canceled. 23
-
 1
1 -
2
-
3
-
4
-
5
-
6
-
7
-
8
-
9
-
10
-
11
-
12
-
13
-
14
-
15
-
16
-
17
-
 18
18 -
 19
19 -
 20
20 -
 21
21 -
 22
22 -
 23
23 -
 24
24 -
 25
25 -
 26
26 -
 27
27 -
 28
28 -
29
-
30
-
31
-
32
-
33
-
34
-
35
-
36
-
37
-
38
-
39
-
40
-
41
-
42
 |
 |