Lenovo A600 Lenovo IdeaCentre A600 Hardware Maintenance Manual - Page 62
Replacing the CPU
 |
UPC - 884942547713
View all Lenovo A600 manuals
Add to My Manuals
Save this manual to your list of manuals |
Page 62 highlights
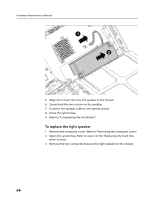
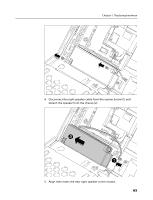
Hardware Maintenance Manual 10. Close the system bay. 11. Refer to "Completing the installation". Replacing the CPU To replace the CPU 1. Remove the computer cover. Refer to "Removing the computer cover". 2. Open the system bay. Refer to step 2 of the "Replacing the hard disk drive" section. 3. Remove the MXM heat sink. Refer to steps 3 to 5 of the "Replacing the MXM heat sink" section. 4. Remove the CPU heat sink. Refer to steps 4 to 6 of the "Replacing the CPU heat sink" section. WARNING The heat sink becomes very hot when the system is on. Never touch the heat sink with any metal or with your hands. 60
-
 1
1 -
2
-
3
-
4
-
5
-
6
-
7
-
8
-
9
-
10
-
11
-
12
-
13
-
14
-
15
-
16
-
17
-
18
-
19
-
20
-
21
-
22
-
23
-
24
-
25
-
26
-
27
-
28
-
29
-
30
-
31
-
32
-
33
-
34
-
35
-
36
-
37
-
38
-
39
-
40
-
41
-
42
-
43
-
44
-
45
-
46
-
47
-
48
-
49
-
50
-
51
-
52
-
53
-
54
-
55
-
56
-
 57
57 -
 58
58 -
 59
59 -
 60
60 -
 61
61 -
 62
62 -
 63
63 -
 64
64 -
 65
65 -
 66
66 -
 67
67 -
68
-
69
-
70
-
71
-
72
-
73
-
74
-
75
-
76
-
77
-
78
-
79
-
80
-
81
-
82
-
83
-
84
-
85
-
86
-
87
-
88
-
89
-
90
-
91
 |
 |

Hardware Maintenance Manual
60
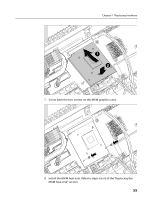
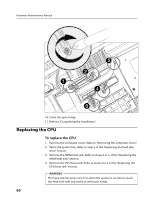
10. Close the system bay.
11. Refer to “Completing the installation”.
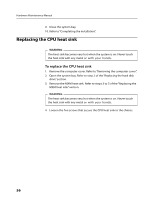
Replacing the CPU
To replace the CPU
1.
Remove the computer cover. Refer to “Removing the computer cover”.
2.
Open the system bay. Refer to step 2 of the “Replacing the hard disk
drive” section.
3.
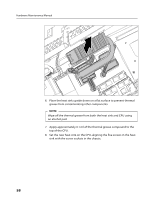
Remove the MXM heat sink. Refer to steps 3 to 5 of the “Replacing the
MXM heat sink” section.
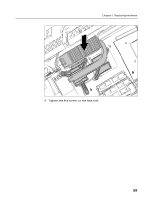
4.
Remove the CPU heat sink. Refer to steps 4 to 6 of the “Replacing the
CPU heat sink” section.
WARNING
The heat sink becomes very hot when the system is on. Never touch
the heat sink with any metal or with your hands.