Lenovo ThinkCentre M50e Hardware Maintenance Manual - Page 108
disconnect
 |
View all Lenovo ThinkCentre M50e manuals
Add to My Manuals
Save this manual to your list of manuals |
Page 108 highlights
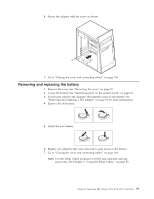
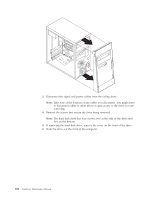
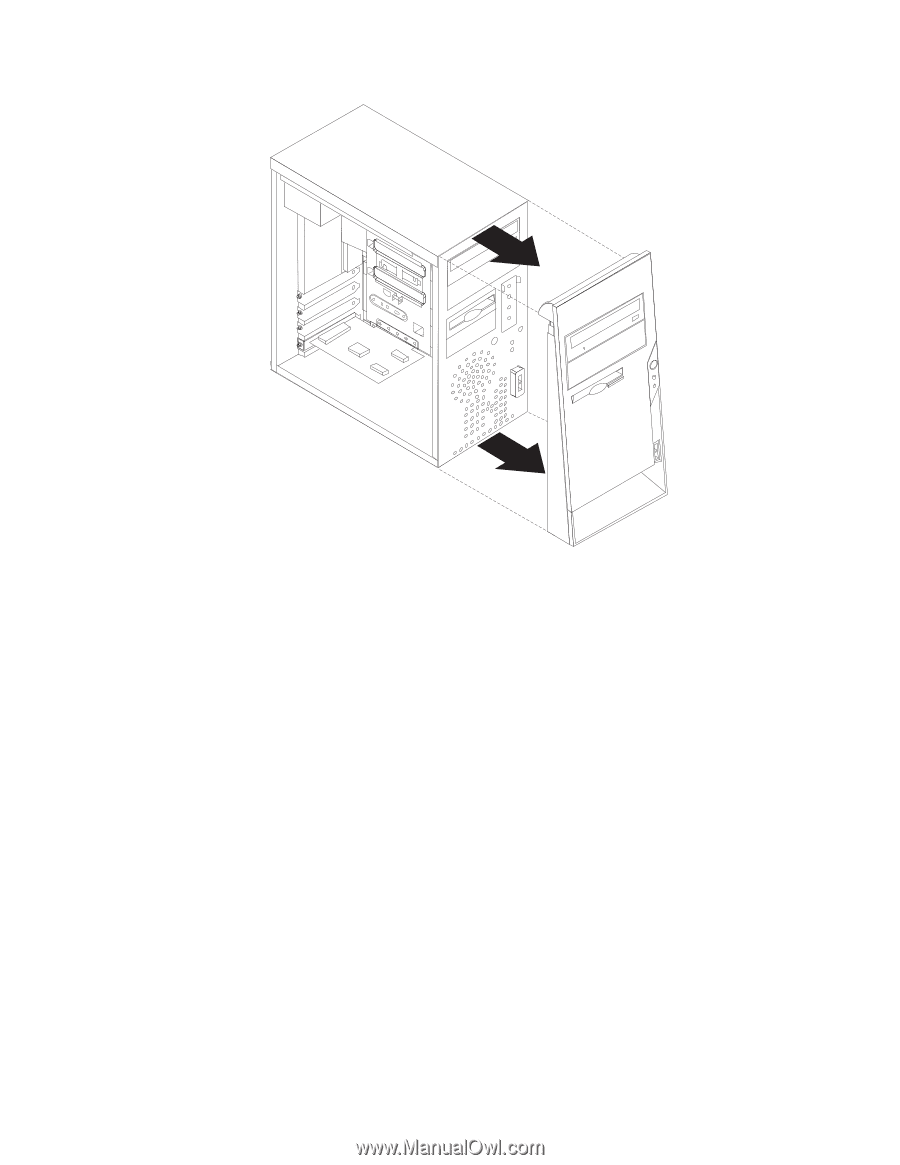
3. Disconnect the signal and power cables from the failing drive. Note: Take note of the location of any cables you disconnect. You might have to disconnect cables to other drives to gain access to the drive you are removing. 4. Remove the screws that secure the drive being removed. Note: The hard disk drive has four screws; two at the side of the drive and two on the bottom. 5. If removing the hard disk drive, remove the cover on the front of the drive. 6. Slide the drive out the front of the computer. 102 Hardware Maintenance Manual
-
 1
1 -
2
-
3
-
4
-
5
-
6
-
7
-
8
-
9
-
10
-
11
-
12
-
13
-
14
-
15
-
16
-
17
-
18
-
19
-
20
-
21
-
22
-
23
-
24
-
25
-
26
-
27
-
28
-
29
-
30
-
31
-
32
-
33
-
34
-
35
-
36
-
37
-
38
-
39
-
40
-
41
-
42
-
43
-
44
-
45
-
46
-
47
-
48
-
49
-
50
-
51
-
52
-
53
-
54
-
55
-
56
-
57
-
58
-
59
-
60
-
61
-
62
-
63
-
64
-
65
-
66
-
67
-
68
-
69
-
70
-
71
-
72
-
73
-
74
-
75
-
76
-
77
-
78
-
79
-
80
-
81
-
82
-
83
-
84
-
85
-
86
-
87
-
88
-
89
-
90
-
91
-
92
-
93
-
94
-
95
-
96
-
97
-
98
-
99
-
100
-
101
-
102
-
 103
103 -
 104
104 -
 105
105 -
 106
106 -
 107
107 -
 108
108 -
 109
109 -
 110
110 -
 111
111 -
 112
112 -
 113
113 -
114
-
115
-
116
-
117
-
118
-
119
-
120
-
121
-
122
-
123
-
124
-
125
-
126
-
127
-
128
-
129
-
130
-
131
-
132
-
133
-
134
-
135
-
136
-
137
-
138
-
139
-
140
-
141
-
142
-
143
-
144
-
145
-
146
-
147
-
148
-
149
-
150
-
151
-
152
-
153
-
154
-
155
-
156
-
157
-
158
-
159
-
160
-
161
-
162
-
163
-
164
-
165
-
166
-
167
-
168
-
169
-
170
-
171
-
172
-
173
-
174
-
175
-
176
-
177
-
178
-
179
-
180
-
181
-
182
-
183
-
184
-
185
-
186
-
187
-
188
-
189
-
190
-
191
-
192
-
193
-
194
-
195
-
196
-
197
-
198
-
199
-
200
-
201
-
202
-
203
-
204
-
205
-
206
-
207
-
208
-
209
-
210
-
211
-
212
-
213
-
214
-
215
-
216
-
217
-
218
-
219
-
220
-
221
-
222
-
223
-
224
-
225
-
226
-
227
-
228
 |
 |
3.
Disconnect
the
signal
and
power
cables
from
the
failing
drive.
Note:
Take
note
of
the
location
of
any
cables
you
disconnect.
You
might
have
to
disconnect
cables
to
other
drives
to
gain
access
to
the
drive
you
are
removing.
4.
Remove
the
screws
that
secure
the
drive
being
removed.
Note:
The
hard
disk
drive
has
four
screws;
two
at
the
side
of
the
drive
and
two
on
the
bottom.
5.
If
removing
the
hard
disk
drive,
remove
the
cover
on
the
front
of
the
drive.
6.
Slide
the
drive
out
the
front
of
the
computer.
102
Hardware
Maintenance
Manual