Lenovo ThinkPad 130 ThinkPad i Series 1200/1300, TP 130 - User's Reference - Page 76
Attaching an external monitor
 |
View all Lenovo ThinkPad 130 manuals
Add to My Manuals
Save this manual to your list of manuals |
Page 76 highlights
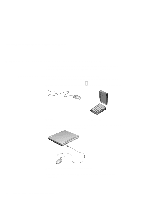
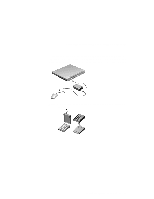
Attaching an external monitor Attaching an external monitor This section provides information about using the computer LCD and an external monitor. It also provides things to consider when using DOS applications. The LCD of your computer uses thin-film transistor (TFT) technology or high performance addressing (HPA) technology. The TFT LCD displays output with XGA (1024x768 resolution) or SVGA (800x600 resolution) video mode and 16M colors, while the HPA LCD displays output with SVGA (800x600 resolution) video mode and 16M colors. If you are attaching an external monitor that supports a resolution higher than XGA mode, you can achieve a maximum of 1280x1024 video resolution. To attach an external monitor, do the following: 1. Connect the external monitor to the external-monitor connector ( ) at the rear of the computer; then connect the monitor to an electrical outlet. 2. Turn on the monitor. 3. Press Fn+F7. Note: You can also change the display output location as follows: 1. Start the Notebook Manager program. (See "Notebook Manager" on page 26.) 2. Click the Display Device tab. 3. Change the display output location by clicking the Both or External monitor radio button in the "Switching display device" section. 4. Click OK. 62 ThinkPad i Series 1200/1300 User's Reference
-
 1
1 -
2
-
3
-
4
-
5
-
6
-
7
-
8
-
9
-
10
-
11
-
12
-
13
-
14
-
15
-
16
-
17
-
18
-
19
-
20
-
21
-
22
-
23
-
24
-
25
-
26
-
27
-
28
-
29
-
30
-
31
-
32
-
33
-
34
-
35
-
36
-
37
-
38
-
39
-
40
-
41
-
42
-
43
-
44
-
45
-
46
-
47
-
48
-
49
-
50
-
51
-
52
-
53
-
54
-
55
-
56
-
57
-
58
-
59
-
60
-
61
-
62
-
63
-
64
-
65
-
66
-
67
-
68
-
69
-
70
-
 71
71 -
 72
72 -
 73
73 -
 74
74 -
 75
75 -
 76
76 -
 77
77 -
 78
78 -
 79
79 -
 80
80 -
 81
81 -
82
-
83
-
84
-
85
-
86
-
87
-
88
-
89
-
90
-
91
-
92
-
93
-
94
-
95
-
96
-
97
-
98
-
99
-
100
-
101
-
102
-
103
-
104
-
105
-
106
-
107
-
108
-
109
-
110
-
111
-
112
-
113
-
114
-
115
-
116
-
117
-
118
-
119
-
120
-
121
-
122
-
123
-
124
-
125
-
126
-
127
-
128
-
129
-
130
-
131
-
132
-
133
-
134
-
135
-
136
-
137
-
138
-
139
-
140
-
141
-
142
-
143
-
144
-
145
-
146
-
147
-
148
-
149
-
150
-
151
-
152
-
153
-
154
-
155
-
156
-
157
-
158
-
159
-
160
-
161
-
162
 |
 |
