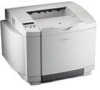
Lexmark 20K1100 User's Reference - Page 129
Using printer menus, Understanding the printer operator panel, Indicator light, Buttons
 |
UPC - 734646641005
View all Lexmark 20K1100 manuals
Add to My Manuals
Save this manual to your list of manuals |
Page 129 highlights
8 Using printer menus Understanding the printer operator panel This section contains information about understanding the operator panel, changing printer settings, and understanding operator panel menus. You can change most printer settings from your software application or printer driver. Settings you change from the application or printer driver apply only to the job you are preparing to send to the printer. Changes made to printer settings from a software application override changes made from the printer operator panel. If you cannot change a setting from your application, use the printer operator panel or the remote operator panel available from MarkVision Professional. Changing a printer setting from the printer operator panel or from MarkVision Professional makes that setting the user default. The printer operator panel has a 2-line by 16-character liquid crystal display (LCD), five buttons, and one indicator light that flashes when the printer is processing a job indicated by the Busy message. Indicator light The indicator light gives information about the status of your printer. If the light is: • Off, the printer is off • On, the printer is on, but idle • Blinking, the printer is on and is busy (indicated also by a blinking Busy message) Buttons Use the five operator panel buttons to open a menu, scroll through a list of values, change printer settings, and respond to printer messages. The numbers 1 through 6 appear beside the operator panel buttons in this illustration. You use these numbers to enter your personal identification number (PIN) after you send a confidential print job from the printer driver. A confidential job is one type of job from the Print and Hold jobs. For more information, see Using the Print and Hold function. Using printer menus 129
-
 1
1 -
2
-
3
-
4
-
5
-
6
-
7
-
8
-
9
-
10
-
11
-
12
-
13
-
14
-
15
-
16
-
17
-
18
-
19
-
20
-
21
-
22
-
23
-
24
-
25
-
26
-
27
-
28
-
29
-
30
-
31
-
32
-
33
-
34
-
35
-
36
-
37
-
38
-
39
-
40
-
41
-
42
-
43
-
44
-
45
-
46
-
47
-
48
-
49
-
50
-
51
-
52
-
53
-
54
-
55
-
56
-
57
-
58
-
59
-
60
-
61
-
62
-
63
-
64
-
65
-
66
-
67
-
68
-
69
-
70
-
71
-
72
-
73
-
74
-
75
-
76
-
77
-
78
-
79
-
80
-
81
-
82
-
83
-
84
-
85
-
86
-
87
-
88
-
89
-
90
-
91
-
92
-
93
-
94
-
95
-
96
-
97
-
98
-
99
-
100
-
101
-
102
-
103
-
104
-
105
-
106
-
107
-
108
-
109
-
110
-
111
-
112
-
113
-
114
-
115
-
116
-
117
-
118
-
119
-
120
-
121
-
122
-
123
-
 124
124 -
 125
125 -
 126
126 -
 127
127 -
 128
128 -
 129
129 -
 130
130 -
 131
131 -
 132
132 -
 133
133 -
 134
134 -
135
-
136
-
137
-
138
-
139
-
140
-
141
-
142
-
143
-
144
-
145
-
146
-
147
-
148
-
149
-
150
-
151
-
152
-
153
-
154
-
155
-
156
-
157
-
158
-
159
-
160
-
161
-
162
-
163
-
164
-
165
-
166
-
167
-
168
-
169
-
170
-
171
-
172
-
173
-
174
-
175
-
176
-
177
-
178
-
179
-
180
-
181
-
182
-
183
-
184
-
185
-
186
-
187
-
188
-
189
-
190
-
191
-
192
-
193
-
194
-
195
-
196
-
197
-
198
 |
 |
