Lexmark BDX5495HSN3 User Guide - Page 112
Clear Carrier Jam, Computer not connected, Could not detect a, proof sheet., Error 1104
 |
UPC - 836367004401
View all Lexmark BDX5495HSN3 manuals
Add to My Manuals
Save this manual to your list of manuals |
Page 112 highlights
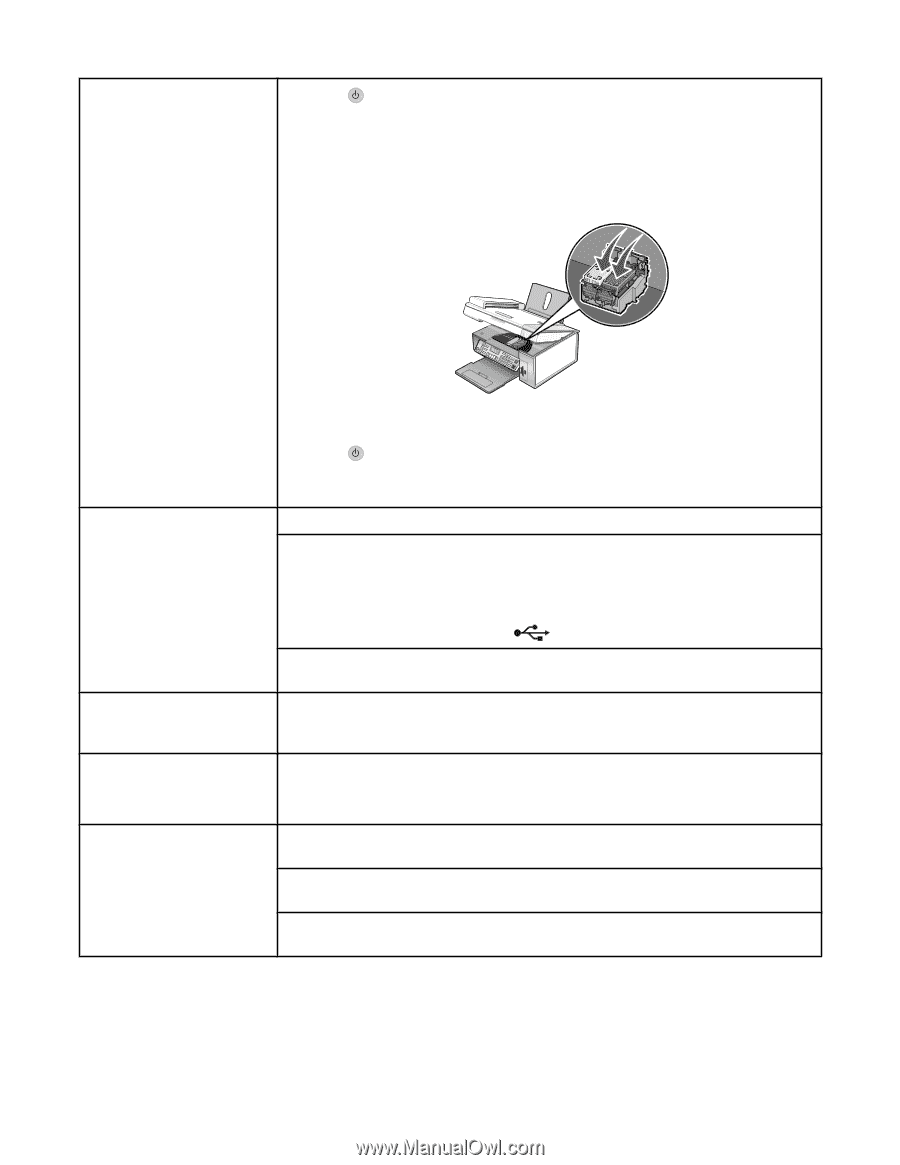
Clear Carrier Jam (remove cartridges) 1 Press to turn the printer off. 2 Disconnect the power cord from the wall outlet. 3 Raise the scanner unit. 4 Remove both print cartridges. For more information, see "Removing a used print cartridge" on page 87. 5 Make sure the cartridge carrier lids are closed. 6 Close the scanner unit. 7 Plug the power cord into the wall outlet. 8 Press to turn the printer on. 9 Reinstall the print cartridges. For more information, see "Installing print cartridges" on page 87. Computer not connected Make sure your computer is connected and turned on. 1 Check the USB cable for any obvious damage. 2 Firmly plug the square end of the USB cable into the USB port on the back of the printer. 3 Firmly plug the rectangular end of the USB cable into the USB port of the computer. The USB port is marked with the USB symbol. If you are using an ENA, make sure it is connected. For more information, see the print server documentation. Could not detect a proof sheet. The document placed on the scanner glass is not a valid proof sheet. For more information, see "Printing photos stored on a memory device using the proof sheet" on page 56. Error 1104 1 Remove the print cartridges. 2 Reinstall the black cartridge or the photo cartridge in the left carrier. 3 Reinstall the color cartridge in the right carrier. Failed to Connect (phone line checklist) Resend the fax. There may have been a problem with the quality of the telephone line connection. Place a test call to the telephone number to which you want to send a fax to make sure that it is working correctly. If the telephone line is being used by another device, wait until the other device is finished before sending the fax. 112
-
 1
1 -
2
-
3
-
4
-
5
-
6
-
7
-
8
-
9
-
10
-
11
-
12
-
13
-
14
-
15
-
16
-
17
-
18
-
19
-
20
-
21
-
22
-
23
-
24
-
25
-
26
-
27
-
28
-
29
-
30
-
31
-
32
-
33
-
34
-
35
-
36
-
37
-
38
-
39
-
40
-
41
-
42
-
43
-
44
-
45
-
46
-
47
-
48
-
49
-
50
-
51
-
52
-
53
-
54
-
55
-
56
-
57
-
58
-
59
-
60
-
61
-
62
-
63
-
64
-
65
-
66
-
67
-
68
-
69
-
70
-
71
-
72
-
73
-
74
-
75
-
76
-
77
-
78
-
79
-
80
-
81
-
82
-
83
-
84
-
85
-
86
-
87
-
88
-
89
-
90
-
91
-
92
-
93
-
94
-
95
-
96
-
97
-
98
-
99
-
100
-
101
-
102
-
103
-
104
-
105
-
106
-
 107
107 -
 108
108 -
 109
109 -
 110
110 -
 111
111 -
 112
112 -
 113
113 -
 114
114 -
 115
115 -
 116
116 -
 117
117 -
118
-
119
-
120
-
121
-
122
-
123
-
124
-
125
-
126
-
127
 |
 |