Lexmark BDX5495HSN3 User Guide - Page 73
Receiving a fax manually, Using Caller ID, Forwarding faxes
 |
UPC - 836367004401
View all Lexmark BDX5495HSN3 manuals
Add to My Manuals
Save this manual to your list of manuals |
Page 73 highlights
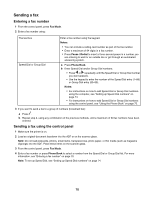
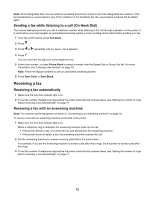
Receiving a fax manually 1 Make sure the Auto Answer light is off. 2 To receive the fax: • Press Start Color or Start Black. or • Press * 9 * on the telephone after you answer it and hear fax tones. 3 Hang up the telephone. The printer receives the fax. Using Caller ID Caller ID is a service provided by some telephone companies that identifies the telephone number (and possibly the name) of the person who is calling. If you subscribe to this service, it works with the printer. When you receive a fax, the telephone number of the person who is sending you the fax appears on the display. Note: Caller ID is available only in some countries and regions. The printer supports two distinct Caller ID patterns: Pattern 1 (FSK) and Pattern 2 (DTMF). Depending on the country or region you live in and the telecommunications company you subscribe to, you may need to switch the pattern to display Caller ID information. 1 From the control panel, press Fax Mode. 2 Press or repeatedly until Tools appears. 3 Press . 4 Press or repeatedly until Device Setup appears. 5 Press . 6 Press or repeatedly until Caller ID Pattern appears. 7 Press . 8 Press or repeatedly until the setting you want appears. 9 Press to save the setting. Forwarding faxes Use the fax forwarding feature if you are going to be away, but still want to receive your faxes. There are three fax forwarding settings: • Off-(Default). • Forward-The printer sends the fax to the designated fax number. • Print & Forward-The printer prints the fax and then sends it to the designated fax number. To set up fax forwarding: 1 From the control panel, press Fax Mode. 2 Press . 3 Press or repeatedly until Fax Setup appears. 4 Press . 73
-
 1
1 -
2
-
3
-
4
-
5
-
6
-
7
-
8
-
9
-
10
-
11
-
12
-
13
-
14
-
15
-
16
-
17
-
18
-
19
-
20
-
21
-
22
-
23
-
24
-
25
-
26
-
27
-
28
-
29
-
30
-
31
-
32
-
33
-
34
-
35
-
36
-
37
-
38
-
39
-
40
-
41
-
42
-
43
-
44
-
45
-
46
-
47
-
48
-
49
-
50
-
51
-
52
-
53
-
54
-
55
-
56
-
57
-
58
-
59
-
60
-
61
-
62
-
63
-
64
-
65
-
66
-
67
-
 68
68 -
 69
69 -
 70
70 -
 71
71 -
 72
72 -
 73
73 -
 74
74 -
 75
75 -
 76
76 -
 77
77 -
 78
78 -
79
-
80
-
81
-
82
-
83
-
84
-
85
-
86
-
87
-
88
-
89
-
90
-
91
-
92
-
93
-
94
-
95
-
96
-
97
-
98
-
99
-
100
-
101
-
102
-
103
-
104
-
105
-
106
-
107
-
108
-
109
-
110
-
111
-
112
-
113
-
114
-
115
-
116
-
117
-
118
-
119
-
120
-
121
-
122
-
123
-
124
-
125
-
126
-
127
 |
 |
