Lexmark BDX5495HSN3 User Guide - Page 50
Printing photos or images from a Web Printing collated copies, Options, Advanced, Photos
 |
UPC - 836367004401
View all Lexmark BDX5495HSN3 manuals
Add to My Manuals
Save this manual to your list of manuals |
Page 50 highlights
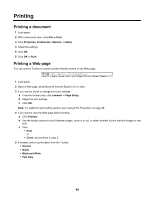
Printing photos or images from a Web page 1 Load paper. For best results, use photo or heavyweight matte paper, with the glossy or printable side facing you. (If you are not sure which side is the printable side, see the instructions that came with the paper.) 2 Open a Web page with Microsoft Internet Explorer 5.5 or later. On the Toolbar, the number of photos valid for printing appears next to Photos. 3 If no number appears next to Photos: a From the Lexmark logo drop-down menu, select Options. b Select the Advanced tab. c Select a lower minimum photo size. d Click OK. The number of photos valid for printing appears next to Photos. 4 Click Photos. The Fast Pics dialog appears. 5 If you want to print all the photos or images using the same settings, select the size you want, the blank paper size in the printer, and the number of copies. 6 If you want to print one photo or image at a time: a Click the photos or images you do not want to print to deselect them. b To make common editing changes: 1 Right click the photo or image. 2 Click Edit. 3 Make your selections. 4 Follow the instructions on the screen. 5 When you are finished making changes, click Done. 6 Select the size you want, the blank paper size in the printer, and the number of copies. 7 Click Print Now. Printing collated copies If you print multiple copies of a document, you can choose to print each copy as a set (collated) or to print the copies as groups of pages (not collated). Collated Not collated 1 Load paper. 2 With a document open, click File ΠPrint. 3 Click Properties, Preferences, Options, or Setup. 4 From the Quality/Copies tab, select the number of copies to print. 5 Select the Collate Copies check box. 50
-
 1
1 -
2
-
3
-
4
-
5
-
6
-
7
-
8
-
9
-
10
-
11
-
12
-
13
-
14
-
15
-
16
-
17
-
18
-
19
-
20
-
21
-
22
-
23
-
24
-
25
-
26
-
27
-
28
-
29
-
30
-
31
-
32
-
33
-
34
-
35
-
36
-
37
-
38
-
39
-
40
-
41
-
42
-
43
-
44
-
 45
45 -
 46
46 -
 47
47 -
 48
48 -
 49
49 -
 50
50 -
 51
51 -
 52
52 -
 53
53 -
 54
54 -
 55
55 -
56
-
57
-
58
-
59
-
60
-
61
-
62
-
63
-
64
-
65
-
66
-
67
-
68
-
69
-
70
-
71
-
72
-
73
-
74
-
75
-
76
-
77
-
78
-
79
-
80
-
81
-
82
-
83
-
84
-
85
-
86
-
87
-
88
-
89
-
90
-
91
-
92
-
93
-
94
-
95
-
96
-
97
-
98
-
99
-
100
-
101
-
102
-
103
-
104
-
105
-
106
-
107
-
108
-
109
-
110
-
111
-
112
-
113
-
114
-
115
-
116
-
117
-
118
-
119
-
120
-
121
-
122
-
123
-
124
-
125
-
126
-
127
 |
 |
