Lexmark Z65n Online User’s Guide for Mac OS 8.6 to 9.2 - Page 42
Step 3: Print your envelopes
 |
View all Lexmark Z65n manuals
Add to My Manuals
Save this manual to your list of manuals |
Page 42 highlights
Lexmark Z65 Lexmark Z65n Printer overview Basic printing Printing ideas Maintenance Troubleshooting Notices Index Printing ideas 35 c From the pop-up menu in the upper left corner, choose Paper Type/Quality. d From the Print Quality area, choose Normal print quality. e If Tray 1 (Front) is set to Automatic, continue with the next step to print your envelopes. For more information, see Using the paper type sensor. If Tray 1 (Front) is not set to Automatic, select Plain for the paper type. Step 3: Print your envelopes Click Print. Note: The paper exit tray holds up to 10 envelopes. To print more than 10 envelopes, remove the first 10 envelopes from the paper exit tray before the others print. Using this Guide... www.lexmark.com
-
 1
1 -
2
-
3
-
4
-
5
-
6
-
7
-
8
-
9
-
10
-
11
-
12
-
13
-
14
-
15
-
16
-
17
-
18
-
19
-
20
-
21
-
22
-
23
-
24
-
25
-
26
-
27
-
28
-
29
-
30
-
31
-
32
-
33
-
34
-
35
-
36
-
 37
37 -
 38
38 -
 39
39 -
 40
40 -
 41
41 -
 42
42 -
 43
43 -
 44
44 -
 45
45 -
 46
46 -
 47
47 -
48
-
49
-
50
-
51
-
52
-
53
-
54
-
55
-
56
-
57
-
58
-
59
-
60
-
61
-
62
-
63
-
64
-
65
-
66
-
67
-
68
-
69
-
70
-
71
-
72
-
73
-
74
-
75
-
76
-
77
-
78
-
79
-
80
-
81
-
82
-
83
-
84
-
85
-
86
-
87
-
88
-
89
-
90
-
91
-
92
-
93
-
94
-
95
-
96
-
97
-
98
-
99
-
100
-
101
-
102
-
103
-
104
-
105
-
106
-
107
-
108
-
109
-
110
-
111
-
112
-
113
-
114
-
115
-
116
-
117
-
118
-
119
-
120
-
121
-
122
-
123
-
124
-
125
-
126
-
127
 |
 |

35
Printing ideas
Printer overview
Basic printing
Printing ideas
Maintenance
Troubleshooting
Notices
Index
Lexmark Z65
Lexmark Z65n
Using this
Guide...
www.lexmark.com
c
From the pop-up menu in the upper left corner, choose Paper Type/Quality.
d
From the Print Quality area, choose Normal print quality.
e
If Tray 1 (Front) is set to Automatic, continue with the next step to print your
envelopes. For more information, see
Using the paper type sensor
.
If Tray 1 (Front) is not set to Automatic, select Plain for the paper type.
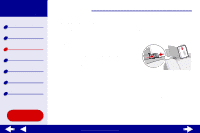
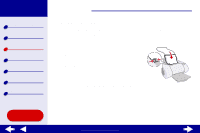
Step 3: Print your envelopes
Click Print.
Note:
The paper exit tray holds up to 10 envelopes. To print more than 10
envelopes, remove the first 10 envelopes from the paper exit tray before
the others print.