Magellan Maestro 3200 Manual - English - Page 39
Enhanced POIs - software
 |
UPC - 763357117912
View all Magellan Maestro 3200 manuals
Add to My Manuals
Save this manual to your list of manuals |
Page 39 highlights
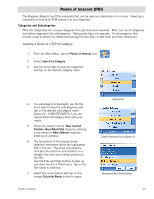
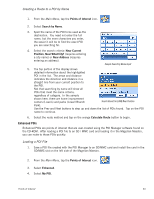
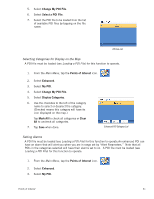
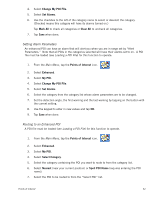
Creating a Route to a POI by Name 1. From the Main Menu, tap the Points of Interest icon. 2. Select Search by Name. 3. Spell the name of the POI to be used as the destination. You need not enter the full name, but the more characters you enter, the easier it will be to find the exact POI you are searching for. 4. Select the search criteria: Near Current Position, Near What City? (requires entering a city name) or Near Address (requires entering an address). Sample Search by Name Input 5. The top portion of the display shows detailed information about the highlighted POI in the list. The arrow and distance indicates the direction and distance in a straight line from your current position to the POI. Not that searching by name will show all POIs that meet the name criteria, regardless of category. In the sample shown here, there are home improvement centers (Lowe's) and parks (Lowell Brandt Search Result for LOWE Near Position Park). Use the Prev and Next buttons to step up and down the list of POIs found. Tap on the POI name to continue. 6. Select the route method and tap on the orange Calculate Route button to begin. Enhanced POIs Enhanced POIs are points of interest that are user-created using the POI Manager software found on the CD-ROM. After loading a POI file to an SD / MMC card and loading it in the Magellan Maestro, you can route to those POIs quickly. Loading a POI File 1. Save a POI file created with the POI Manager to an SD/MMC card and install the card in the SD/MMC slot on the left side of the Magellan Maestro. 2. From the Main Menu, tap the Points of Interest icon. 3. Select Enhanced. 4. Select My POI. Points of Interest 30
-
 1
1 -
2
-
3
-
4
-
5
-
6
-
7
-
8
-
9
-
10
-
11
-
12
-
13
-
14
-
15
-
16
-
17
-
18
-
19
-
20
-
21
-
22
-
23
-
24
-
25
-
26
-
27
-
28
-
29
-
30
-
31
-
32
-
33
-
 34
34 -
 35
35 -
 36
36 -
 37
37 -
 38
38 -
 39
39 -
 40
40 -
 41
41 -
 42
42 -
 43
43 -
 44
44 -
45
-
46
-
47
-
48
-
49
-
50
-
51
-
52
-
53
-
54
-
55
-
56
-
57
-
58
-
59
-
60
 |
 |
