Marantz DR4050 DR4050 USER'S MANUAL - Page 20
English, Autostart recording from external CD player, CD-SYNC
 |
View all Marantz DR4050 manuals
Add to My Manuals
Save this manual to your list of manuals |
Page 20 highlights
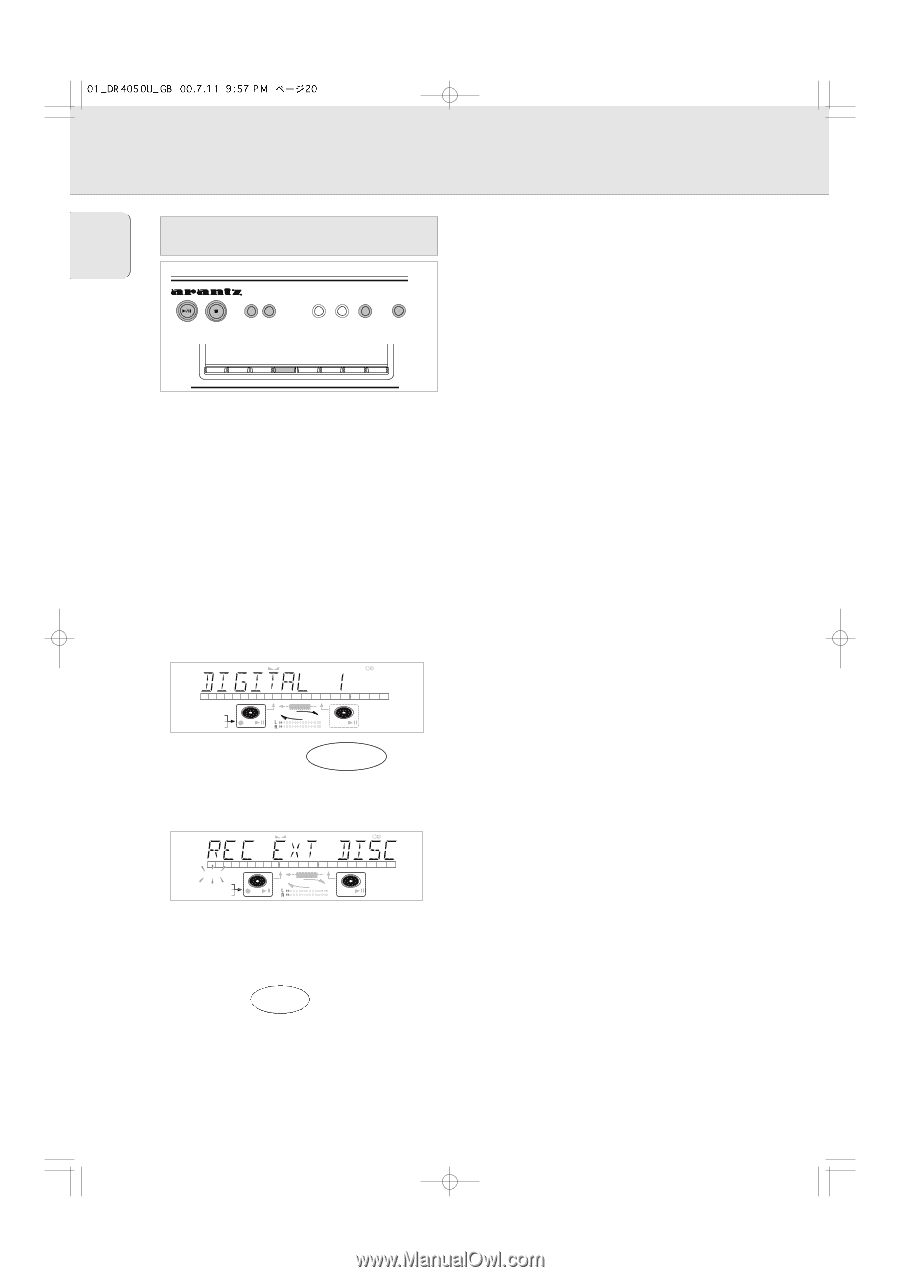
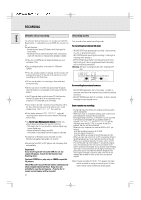
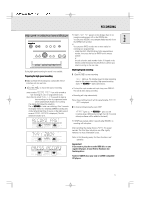
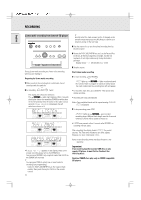
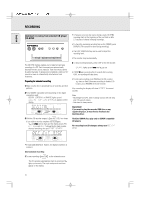
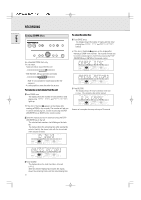
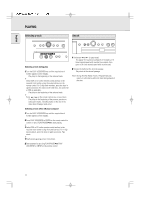
English RECORDING DAIuStCo.start recording from external CD player CD-SYNC PLAY/PAUSE STOP CD RECORDER DR4050 REC TYPE REC FINALIZE ERASE SOURCE CD-R PROG SHUFFLE DISPLAY SCROLL REPEAT DJ MODE The CD-SYNC feature enables you to make fast and easy recordings of a CD. Track increments are automatically detected from the source material. Track increments cannot be added manually. In analog source material a silence of 2.7 seconds or more is automatically detected as a track increment. Preparing for autostart recording 1 Make sure the disc is absolutely free of scratches and dust particles. 2 Press SOURCE repeatedly until (depending on the digital connection used): § DIGITAL I, OPTICAL I or ANALOG lights up and DIGITAL 1, OPTICAL or ANALOG appears on the display. REM REC TIME TRACK TOTAL REM TRACK TIME STEP SYNC MANUAL DIGITAL I CD OPTICAL I ANALOG RW RECORD CHANGER PROG CD SHUFFLE ALL RW REPEAT SCAN TRACK 3 With the CD recorder stopped, press REC TYPE four times: if you wish to record a complete disc or program. § d and SYNC start to flash and the display shows REC EXT DISCand WAIT followed by the track number, the total remaining time and START SOURCE. REM REC TIME TRACK TOTAL REM TRACK TIME STEP • If, however, you start the source during a track, CD-SYNC recording starts at the beginning of the next track or after 2.7 seconds of silence in analog recordings. • To check the remaining recording time on the CDR(W), press DISPLAY. (This can also be done during recording.) • The EASY JOG/ENTER key can be used to adjust the recording level. • The recorder stops automatically. 2 To stop recording manually, press STOP on the CD recorder. § UPDATE lights up and SYNC and d go out. • If STOP 9 was pressed within 3 seconds after pressing PLAY, no recording will take place. • To interrupt recording, press PAUSE on the CD recorder. § d starts to flash. (Autostart recording is disabled.) To resume, press RECORD on the CD recorder. After recording the display will show UPDATE for several seconds. Note: - Recordings from DAT, DCC or analog sources will only stop after 20 seconds silence. - Auto track is always active. Important: If you want to play the recorded CDR disc on any regular CD player, it must first be finalized. See finalizing discs. Finalized CDRW discs play only on CDRW compatible CD players. For recording from CD changers always use REC EXT DISC. SYNC MANUAL DIGITAL I CD OPTICAL I RW ANALOG RECORD CHANGER PROG CD SHUFFLE ALL RW REPEAT SCAN TRACK • If input label (DIGITAL I) flashes, the digital connection is incorrect. Start autostart recording 1 To start recording, press PLAY on the selected source. § The CD recorder automatically starts to record and d lights continuously. The track number and track time appear on the display. 20
-
 1
1 -
2
-
3
-
4
-
5
-
6
-
7
-
8
-
9
-
10
-
11
-
12
-
13
-
14
-
 15
15 -
 16
16 -
 17
17 -
 18
18 -
 19
19 -
 20
20 -
 21
21 -
 22
22 -
 23
23 -
 24
24 -
 25
25 -
26
-
27
-
28
-
29
-
30
-
31
-
32
-
33
-
34
-
35
-
36
-
37
-
38
-
39
-
40
-
41
-
42
-
43
-
44
-
45
-
46
-
47
-
48
-
49
-
50
-
51
-
52
-
53
-
54
-
55
-
56
-
57
-
58
-
59
-
60
-
61
-
62
-
63
-
64
 |
 |