Panasonic AGHMC150PJ User Manual - Page 22
The remote control, Insert the battery, Remote control usable range, Turn on/off the camera
 |
View all Panasonic AGHMC150PJ manuals
Add to My Manuals
Save this manual to your list of manuals |
Page 22 highlights
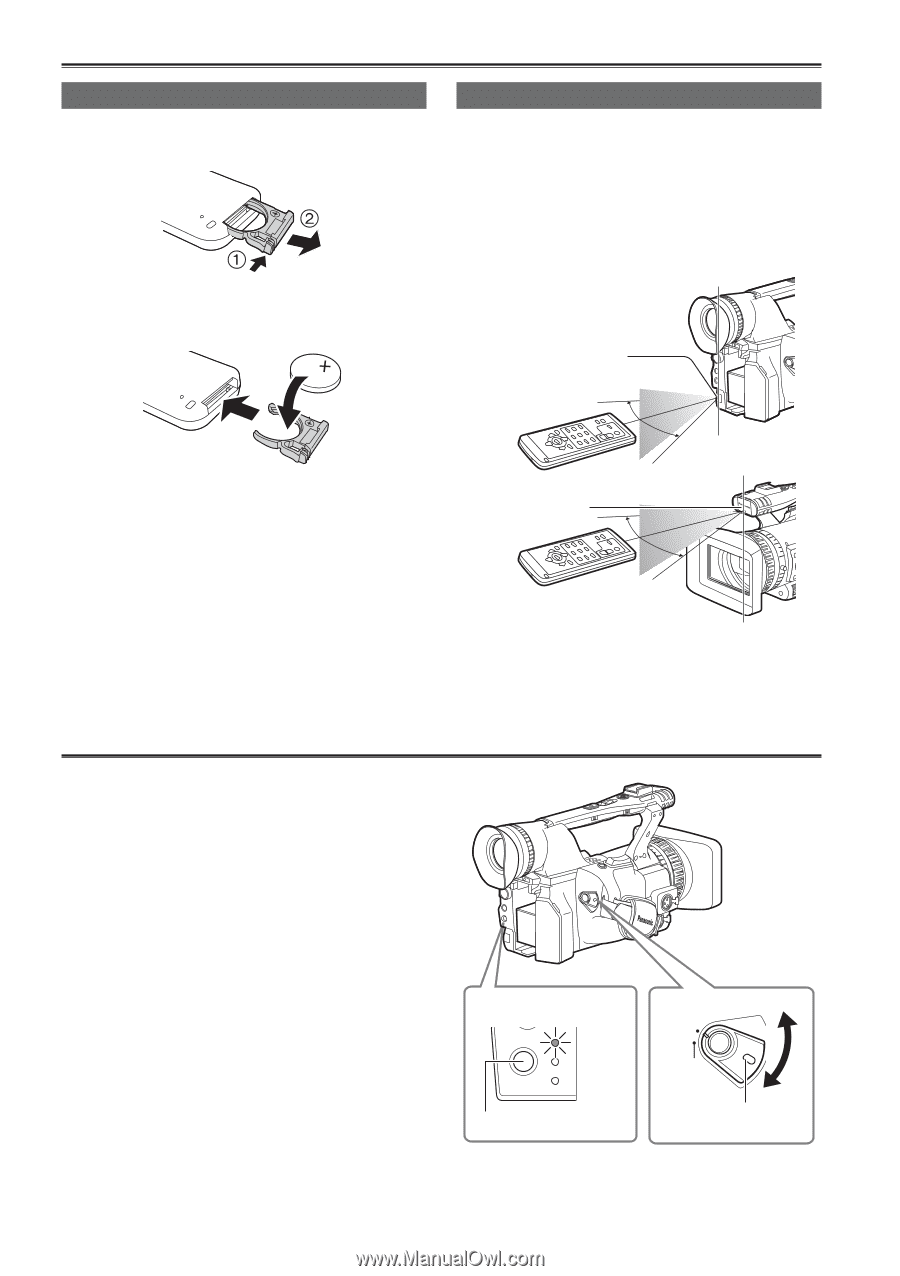
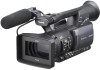
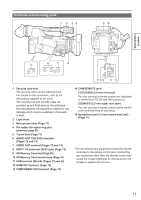
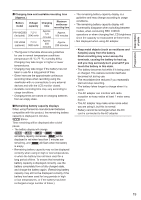
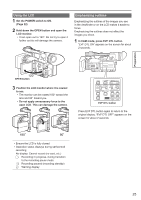
The remote control Insert the battery 1 Push the catch in the direction shown by arrow ᶃ to remove the holder. 2 Insert the battery with the "+" marked side facing up. Remote control usable range The distance between the remote control and the unit's remote control sensor: Within approx. 5 m Angle: Approximately 10° upward, approximately 15° downward, approximately 15° leftward, or approximately 15° rightward (when the accessory battery is used) Remote control sensor (Rear) 3 Return the holder to its original position. • When the battery (CR2025) has run out, replace it with a new one. (The battery lasts about one year, depending on the frequency of use.) If the remote control unit fails to work even when it is operated near the camera-recorder's remote control sensor, the battery has run out. • Keep the battery out of the reach of children. Remote control sensor (Front) • The remote control is intended for indoor operation. Outdoors or under strong light, the unit may not operate properly even within the usable ranges. Turn on/off the camera While pressing the lock release button, move the POWER switch to ON or OFF. Turn on the camera: The mode lamp (CAM) lights red (CAMERA mode) and the camera is now in the recording pause mode. Turn off the camera: The mode lamp (CAM) goes out. • Energy-saving mode According to the settings made in the POWER SAVE item of the OTHER FUNCTIONS screen in the settings menu, the following will apply if no designated operations∗ are performed for approximately five minutes while recording is paused (when an SD Memory Card has been inserted). ON: The camera recorder turns off automatically. OFF: Does not switch OFF the camera. ∗ See the setup menus, POWER SAVE (Page 99) for details. 22 Mode lamp CAM STAND BY PB PC MODE Mode button POWER ON OFF Lock release button
-
 1
1 -
2
-
3
-
4
-
5
-
6
-
7
-
8
-
9
-
10
-
11
-
12
-
13
-
14
-
15
-
16
-
 17
17 -
 18
18 -
 19
19 -
 20
20 -
 21
21 -
 22
22 -
 23
23 -
 24
24 -
 25
25 -
 26
26 -
 27
27 -
28
-
29
-
30
-
31
-
32
-
33
-
34
-
35
-
36
-
37
-
38
-
39
-
40
-
41
-
42
-
43
-
44
-
45
-
46
-
47
-
48
-
49
-
50
-
51
-
52
-
53
-
54
-
55
-
56
-
57
-
58
-
59
-
60
-
61
-
62
-
63
-
64
-
65
-
66
-
67
-
68
-
69
-
70
-
71
-
72
-
73
-
74
-
75
-
76
-
77
-
78
-
79
-
80
-
81
-
82
-
83
-
84
-
85
-
86
-
87
-
88
-
89
-
90
-
91
-
92
-
93
-
94
-
95
-
96
-
97
-
98
-
99
-
100
-
101
-
102
-
103
-
104
-
105
-
106
-
107
-
108
-
109
-
110
-
111
-
112
 |
 |