Panasonic VDRD310 Dvd Camcorder - English/spanish - Page 113
To disconnect USB cable, safely, Prepare a DVD-RW/DVD-R
 |
View all Panasonic VDRD310 manuals
Add to My Manuals
Save this manual to your list of manuals |
Page 113 highlights
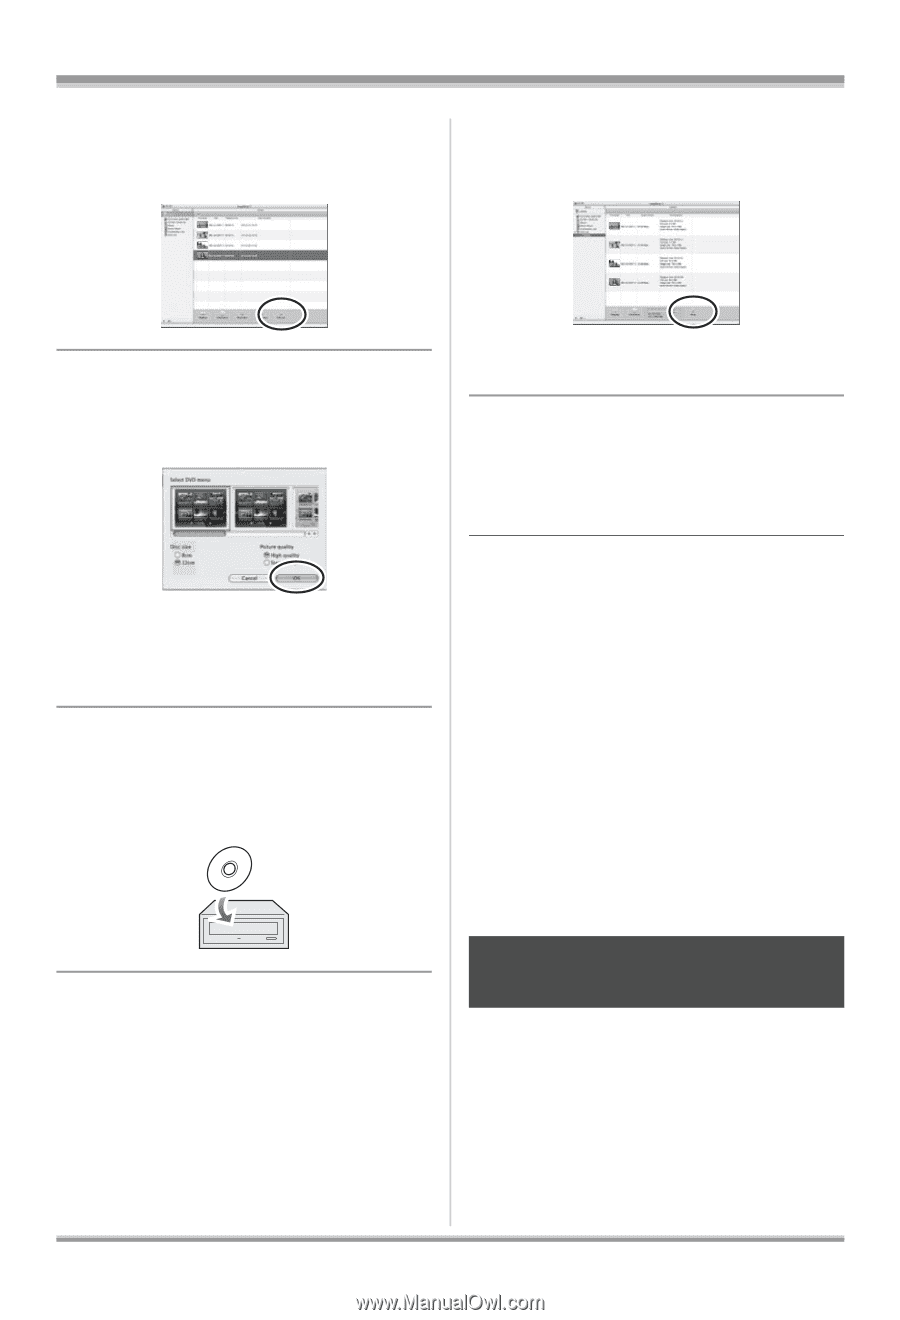
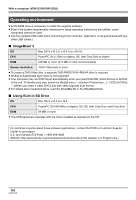
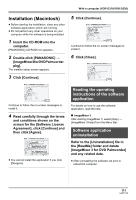
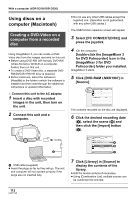
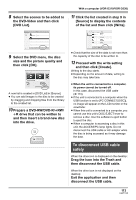
8 Select the scenes to be added to the DVD-Video and then click [DVD List]. With a computer (VDR-D310/VDR-D230) 11 Click the list created in step 9 in [Source] to display the contents of the list and then click [Write]. 9 Select the DVD menu, the disc size and the picture quality and then click [OK]. A new list is created in [DVD List] in [Source]. ≥ You can add images to the disc to be created by dragging and dropping files from the library to the created list. 10 Prepare a DVD-RW/DVD-R/rRW/ rR drive that can be written to and then insert a brand-new disc into the drive. ≥ Check that the size of the data is not more than the capacity of the disc to be written to. 12 Proceed with the write setting and then click [Create]. Writing to the disc starts. ≥ Depending on the amount of data, writing to the disc may take time. ≥ When the unit is connected to a computer, its power cannot be turned off. In this case, disconnect the USB cable (l 113). ≥ If the unit is connected to a computer when the USB function is set to [PC CONNECT(DISC)], no image will appear on the LCD monitor or the viewfinder. ≥ When this unit is connected to a computer, you cannot use this unit's DISC EJECT lever to remove a disc. Use the software's eject button to eject the disc. ≥ When a computer is accessing a disc in this unit, the ACCESS/PC lamp lights. Do not disconnect the USB cable or AC adaptor while the disc is being accessed as it may damage the data. To disconnect USB cable safely When the drive icon is displayed on the desktop: Drag the icon into the Trash and then disconnect the USB cable. When the drive icon is not displayed on the desktop: Exit the application and then disconnect the USB cable. 113 LSQT1145
-
 1
1 -
2
-
3
-
4
-
5
-
6
-
7
-
8
-
9
-
10
-
11
-
12
-
13
-
14
-
15
-
16
-
17
-
18
-
19
-
20
-
21
-
22
-
23
-
24
-
25
-
26
-
27
-
28
-
29
-
30
-
31
-
32
-
33
-
34
-
35
-
36
-
37
-
38
-
39
-
40
-
41
-
42
-
43
-
44
-
45
-
46
-
47
-
48
-
49
-
50
-
51
-
52
-
53
-
54
-
55
-
56
-
57
-
58
-
59
-
60
-
61
-
62
-
63
-
64
-
65
-
66
-
67
-
68
-
69
-
70
-
71
-
72
-
73
-
74
-
75
-
76
-
77
-
78
-
79
-
80
-
81
-
82
-
83
-
84
-
85
-
86
-
87
-
88
-
89
-
90
-
91
-
92
-
93
-
94
-
95
-
96
-
97
-
98
-
99
-
100
-
101
-
102
-
103
-
104
-
105
-
106
-
107
-
 108
108 -
 109
109 -
 110
110 -
 111
111 -
 112
112 -
 113
113 -
 114
114 -
 115
115 -
 116
116 -
 117
117 -
 118
118 -
119
-
120
-
121
-
122
-
123
-
124
-
125
-
126
-
127
-
128
-
129
-
130
-
131
-
132
-
133
-
134
-
135
-
136
-
137
-
138
-
139
-
140
-
141
-
142
-
143
-
144
-
145
-
146
-
147
-
148
-
149
-
150
-
151
-
152
-
153
-
154
-
155
-
156
 |
 |