Panasonic VDRD310 Dvd Camcorder - English/spanish - Page 61
Manual focus adjustment, White balance, Set the AUTO/MANUAL/FOCUS
 |
View all Panasonic VDRD310 manuals
Add to My Manuals
Save this manual to your list of manuals |
Page 61 highlights
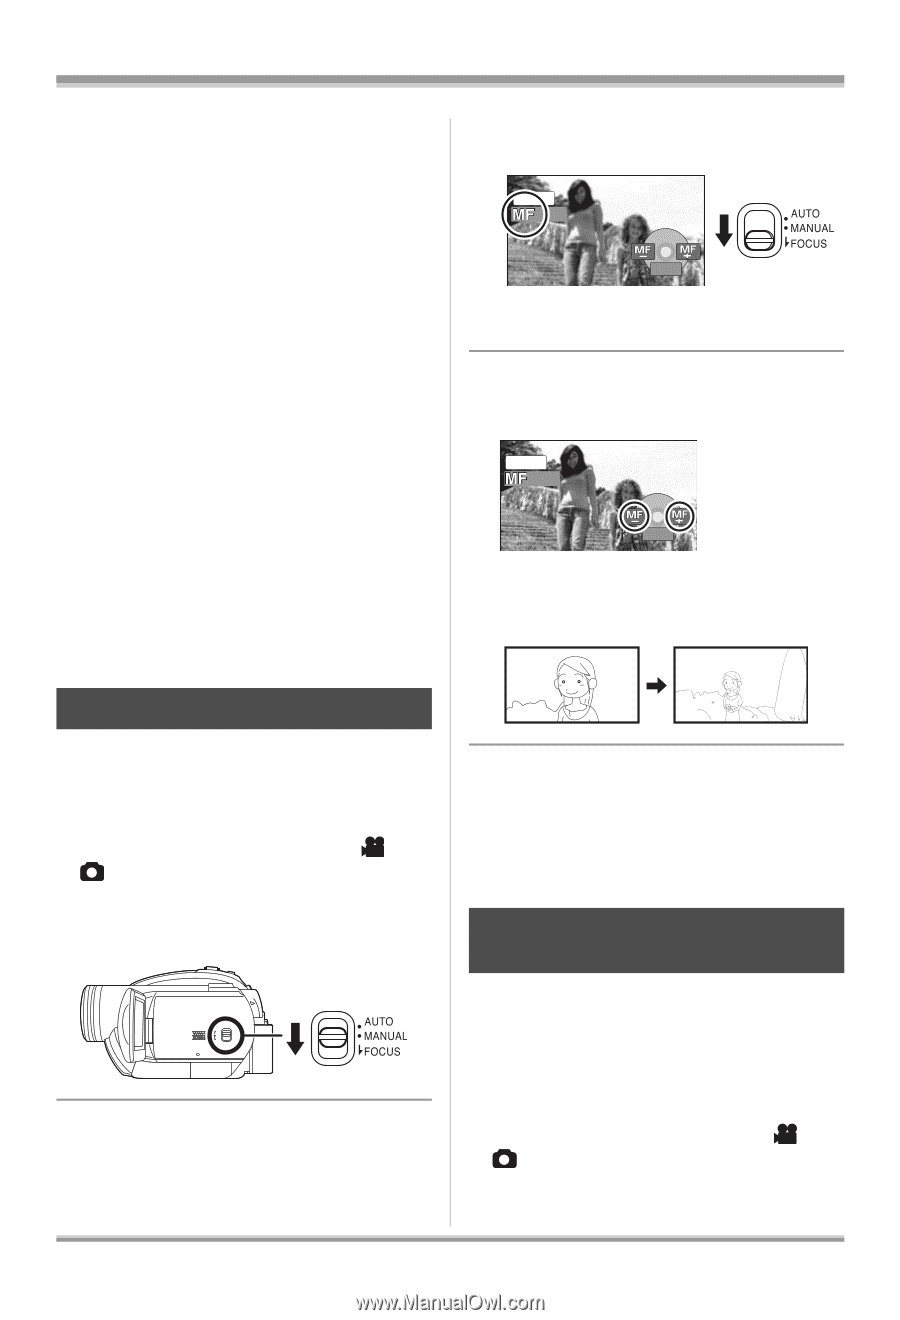
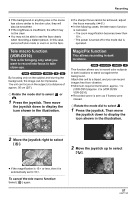
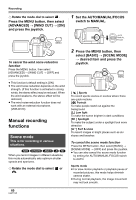
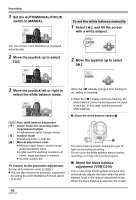
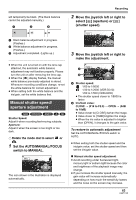
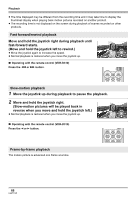
Recording ≥ Avoid recording under fluorescent light, mercury light or sodium light because the color and brightness of the playback image may change. ≥ If you record a subject illuminated with strong light or a highly reflective subject, vertical lines of light may appear. ≥ If the brightness is insufficient, the sports mode does not function. The [5] display flashes. ≥ If this mode is used indoors, the screen may flicker. Portrait mode ≥ If this mode is used indoors, the screen may flicker. If so, change the scene mode setting to [OFF]. Low light mode ≥ Extremely dark scenes may not be able to be recorded finely. Spotlight mode ≥ If the recording subject is extremely bright, the recorded image may become whitish and the periphery of the recorded image extremely dark. Surf & snow mode ≥ If the subject is extremely bright, the recorded image may become whitish. 2 Move the switch down and set it to FOCUS position. MNL 4/4 NEXT The manual focus indication [MF] and the icon shown in the illustration appear. 3 Move the joystick left or right to bring the subject into focus. MNL 4/4 NEXT ≥ The subject may not be in focus when zoomed in if focusing with a wide angle. First, zoom in on the subject, and then focus on it. Manual focus adjustment (RAM) (-RW‹VR›) (-RW‹V›) (-R) (SD) If auto focusing is difficult due to the conditions, then manual focusing is available. ¬ Rotate the mode dial to select or . 1 Set the AUTO/MANUAL/FOCUS switch to MANUAL. To restore to the automatic adjustment Press the AUTO/MANUAL/FOCUS switch down again to the FOCUS position. ≥ You can also restore the auto focusing by setting the AUTO/MANUAL/FOCUS switch to AUTO. White balance This is for recording in natural colors. (RAM) (-RW‹VR›) (-RW‹V›) (-R) (SD) The automatic white balance function may not reproduce natural colors depending on the scenes or lighting conditions. If so, you can adjust the white balance manually. ¬ Rotate the mode dial to select or . 61 LSQT1145
-
 1
1 -
2
-
3
-
4
-
5
-
6
-
7
-
8
-
9
-
10
-
11
-
12
-
13
-
14
-
15
-
16
-
17
-
18
-
19
-
20
-
21
-
22
-
23
-
24
-
25
-
26
-
27
-
28
-
29
-
30
-
31
-
32
-
33
-
34
-
35
-
36
-
37
-
38
-
39
-
40
-
41
-
42
-
43
-
44
-
45
-
46
-
47
-
48
-
49
-
50
-
51
-
52
-
53
-
54
-
55
-
 56
56 -
 57
57 -
 58
58 -
 59
59 -
 60
60 -
 61
61 -
 62
62 -
 63
63 -
 64
64 -
 65
65 -
 66
66 -
67
-
68
-
69
-
70
-
71
-
72
-
73
-
74
-
75
-
76
-
77
-
78
-
79
-
80
-
81
-
82
-
83
-
84
-
85
-
86
-
87
-
88
-
89
-
90
-
91
-
92
-
93
-
94
-
95
-
96
-
97
-
98
-
99
-
100
-
101
-
102
-
103
-
104
-
105
-
106
-
107
-
108
-
109
-
110
-
111
-
112
-
113
-
114
-
115
-
116
-
117
-
118
-
119
-
120
-
121
-
122
-
123
-
124
-
125
-
126
-
127
-
128
-
129
-
130
-
131
-
132
-
133
-
134
-
135
-
136
-
137
-
138
-
139
-
140
-
141
-
142
-
143
-
144
-
145
-
146
-
147
-
148
-
149
-
150
-
151
-
152
-
153
-
154
-
155
-
156
 |
 |