Panasonic VDRD310 Dvd Camcorder - English/spanish - Page 20
Using the viewfinder, Using the remote control, VDR-D310, of the arrow.
 |
View all Panasonic VDRD310 manuals
Add to My Manuals
Save this manual to your list of manuals |
Page 20 highlights
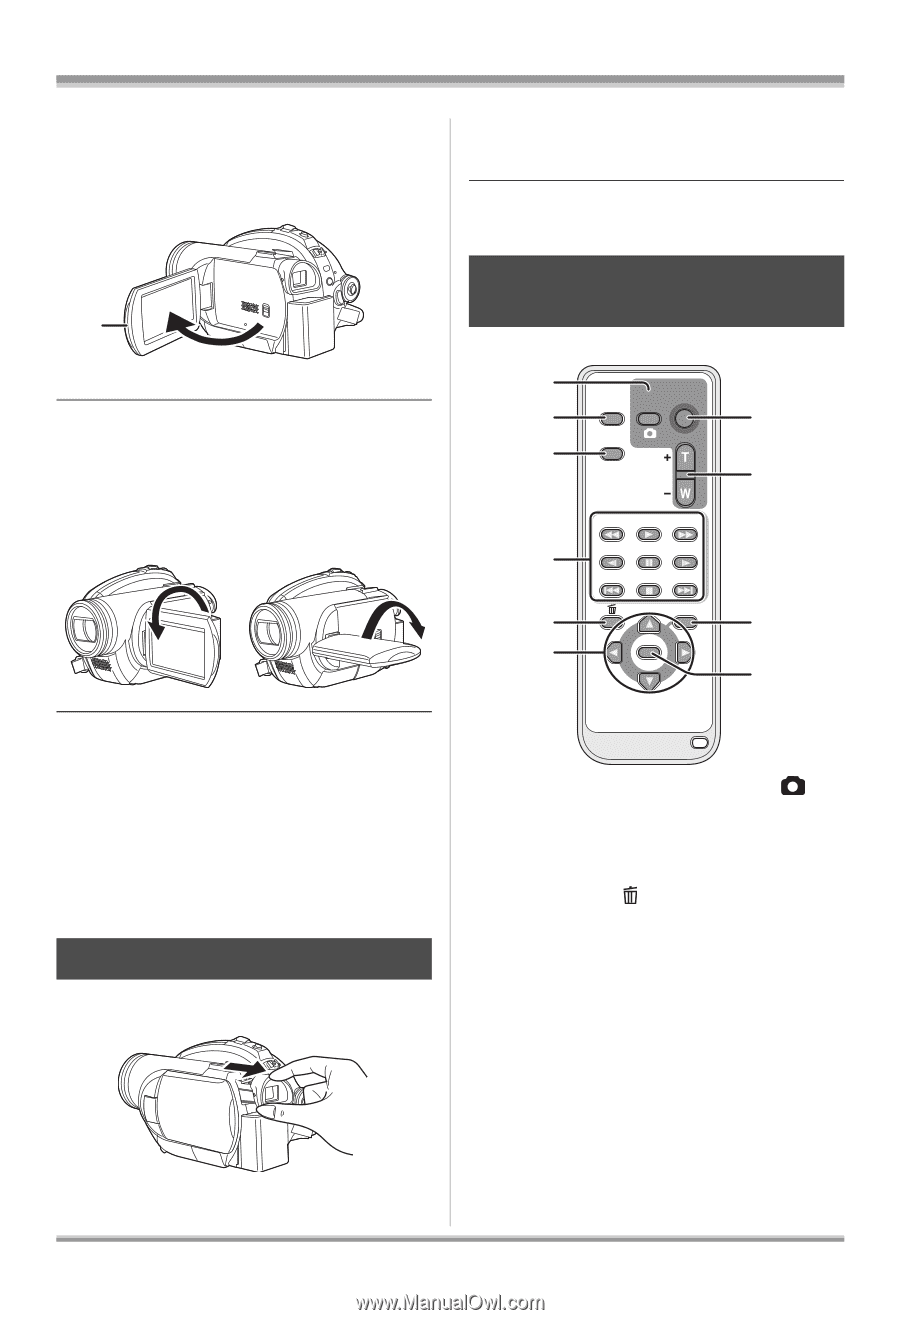
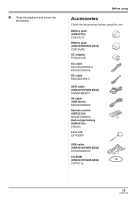
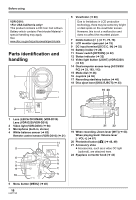
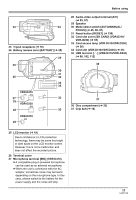
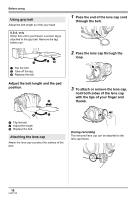
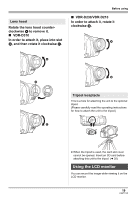
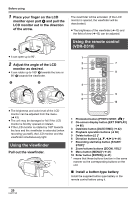
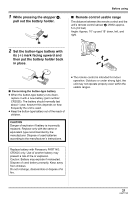
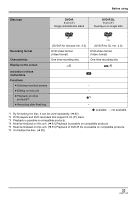
Before using 1 Place your finger on the LCD monitor open part A and pull the LCD monitor out in the direction of the arrow. A ≥ It can open up to 90o. 2 Adjust the angle of the LCD monitor as desired. ≥ It can rotate up to 180o A towards the lens or 90o B towards the viewfinder. A B The viewfinder will be activated. (If the LCD monitor is opened, the viewfinder will be deactivated.) ≥ The brightness of the viewfinder (l 43) and the field of view (l 43) can be adjusted. Using the remote control (VDR-D310) 1 START/ EXT PHOTO STOP DISPLAY SHOT 2 7 3 DATE/ TIME ZOOM VOL 8 SEARCH PLAY SEARCH 4 STILL ADV PAUSE STILL ADV SKIP STOP SKIP MENU 5 9 ENTER 6 10 ≥ The brightness and color level of the LCD monitor can be adjusted from the menu. (l 43) ≥ The unit may be damaged or fail if the LCD monitor is forcibly opened or rotated. ≥ If the LCD monitor is rotated by 180x towards the lens and the viewfinder is extended (when recording yourself), the LCD monitor and the viewfinder simultaneously light. Using the viewfinder Pull out the viewfinder. 1 Photoshot button [PHOTO SHOT, ]* 2 On-screen display button [EXT DISPLAY] (l 86) 3 Date/time button [DATE/TIME] (l 42) 4 Playback operation buttons (l 66) 5 Delete button [ ]* 6 Direction buttons [3,4,2,1] (l 41) 7 Recording start/stop button [START/ STOP]* 8 Zoom/volume buttons [ZOOM, VOL]* 9 Menu button [MENU]* (l 41) 10 Enter button [ENTER] (l 41) * means that these buttons function in the same manner as the corresponding buttons on the unit. ∫ Install a button-type battery Install the supplied button-type battery in the remote control before using it. 20 LSQT1145
-
 1
1 -
2
-
3
-
4
-
5
-
6
-
7
-
8
-
9
-
10
-
11
-
12
-
13
-
14
-
 15
15 -
 16
16 -
 17
17 -
 18
18 -
 19
19 -
 20
20 -
 21
21 -
 22
22 -
 23
23 -
 24
24 -
 25
25 -
26
-
27
-
28
-
29
-
30
-
31
-
32
-
33
-
34
-
35
-
36
-
37
-
38
-
39
-
40
-
41
-
42
-
43
-
44
-
45
-
46
-
47
-
48
-
49
-
50
-
51
-
52
-
53
-
54
-
55
-
56
-
57
-
58
-
59
-
60
-
61
-
62
-
63
-
64
-
65
-
66
-
67
-
68
-
69
-
70
-
71
-
72
-
73
-
74
-
75
-
76
-
77
-
78
-
79
-
80
-
81
-
82
-
83
-
84
-
85
-
86
-
87
-
88
-
89
-
90
-
91
-
92
-
93
-
94
-
95
-
96
-
97
-
98
-
99
-
100
-
101
-
102
-
103
-
104
-
105
-
106
-
107
-
108
-
109
-
110
-
111
-
112
-
113
-
114
-
115
-
116
-
117
-
118
-
119
-
120
-
121
-
122
-
123
-
124
-
125
-
126
-
127
-
128
-
129
-
130
-
131
-
132
-
133
-
134
-
135
-
136
-
137
-
138
-
139
-
140
-
141
-
142
-
143
-
144
-
145
-
146
-
147
-
148
-
149
-
150
-
151
-
152
-
153
-
154
-
155
-
156
 |
 |