Panasonic WVCU650 WJSX150 User Guide
Panasonic WVCU650 - SYSTEM CONTROLLER ADDENDUM Manual
 |
UPC - 791871504277
View all Panasonic WVCU650 manuals
Add to My Manuals
Save this manual to your list of manuals |
Panasonic WVCU650 manual content summary:
- Panasonic WVCU650 | WJSX150 User Guide - Page 1
Addendum for WV-CU950/650 and WJ-SX150 Series The descriptions in this document are applicable when WJ-SX150A Administrator Console and the firmware of this unit (matrix switcher) are Ver. 2.04 or later. Note: Refer to the operating instructions of matrix switcher for how to check the version. (1) - Panasonic WVCU650 | WJSX150 User Guide - Page 2
setting is 150. 4. To select your registered password (up to 5 digits), press the numeric buttons, then press the CAM (SET) button. The logout (configurable by minute) through WJ-SX150A Administrator Console. (Refer to the operating instructions of matrix switcher.) ■ Operation Start (Auto Login - Panasonic WVCU650 | WJSX150 User Guide - Page 3
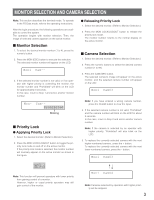
operate in the PS·Data mode, refer to the operating instructions. After the login procedure, the following operations are available to control the system. The operation begins with monitor selection. Then, the image of selected camera appears on the active monitor. ■ Monitor Selection 1. To select - Panasonic WVCU650 | WJSX150 User Guide - Page 4
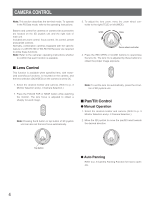
the PS·Data mode, refer to the operating instructions. Buttons and control for cameras or camera site accessories are located on the 3D joystick ■ Pan/Tilt Control ● Manual Operation 1. Select the desired monitor and camera. (Refer to p. 3 Monitor Selection and p. 3 Camera Selection.) 2. Move the 3D - Panasonic WVCU650 | WJSX150 User Guide - Page 5
, it will be overwritten by the new one. • SETUP MENU and WJ-SX150A Administrator Console can configure each operator's pan/tilt control. (Refer to the operating instructions of matrix switcher.) ■ Call Preset Position 1. Select the desired monitor and camera. (Refer to p. 3 Monitor Selection and - Panasonic WVCU650 | WJSX150 User Guide - Page 6
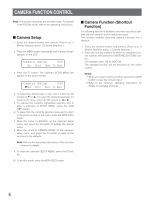
PS·Data mode, refer to the operating instructions. ■ Camera Setup 1. Select the desired monitor and camera. (Refer to p. 3 Monitor Selection and p. 3 Camera Selection.) 2. Press the MENU button repeatedly until "Camera Setup" appears on the LCD. Camera Setup 006 On Off Rst A.Rst 3. Press the - Panasonic WVCU650 | WJSX150 User Guide - Page 7
Learn 007 Start Stop w Press the F1 button. e Operate the camera manually. r Press the F2 button. The operation data will be saved. camera. (Refer to p. 3 Monitor Selection and p. 3 Camera Selection.) 2. Press the MENU button repeatedly until "Auto Pan Setup" appears on the LCD. Auto Pan Setup - Panasonic WVCU650 | WJSX150 User Guide - Page 8
operating instructions of matrix switcher.) 1. Select the desired monitor and camera. (Refer to p. 3 Monitor Selection and p. 3 Camera Selection AUTO PAN.) Note: The AUTO MODE parameter, previously set in the camera's SETUP MENU, will be automatically replaced to the activated function parameter. 4. - Panasonic WVCU650 | WJSX150 User Guide - Page 9
. To operate in the PS·Data mode, refer to the operating instructions. ■ Receiver Control The following functions are available only when the receivers are included in the system and the specified camera housing is installed. ● Camera Housing Control Wiper Control 1. Select the desired monitor and - Panasonic WVCU650 | WJSX150 User Guide - Page 10
instructions. ■ Tour Sequence The following functions are available if a tour sequence has been previously configured through SETUP MENU or WJSX150A Administrator Console. Any tour sequence can be assigned to any monitors. 1. Select the desired monitor and camera the matrix switcher recovers from - Panasonic WVCU650 | WJSX150 User Guide - Page 11
monitor. * Monitor number, system controller name, tour number and recorder number Clock 08/21/2002 12:50:59 PM M1 K1 T01 C01 camera title Camera title Monitor status ALARM10* Event ● Moving Each Item 1. Press the MENU button repeatedly until "OSD Position" appears on the LCD. OSD Position 003 - Panasonic WVCU650 | WJSX150 User Guide - Page 12
Lists the display mode on the monitors. SPOT: Spot mode Tnn: Tour Sequence mode (nn is the tour sequence number.) CAM: Camera Setup mode SET: WJ-SX150A Setup mode ALARM: Alarm Active mode ACK: Alarm ACK mode VLD H: Video Loss History Table ALM H: Alarm History Table SYS S: System - Panasonic WVCU650 | WJSX150 User Guide - Page 13
The columns in the table indicate the status as follows: DATE: Lists the date and time when the video loss status changes. CH: Lists logical camera number, slave unit number or recorder number that is connected to the system. EVENT: Lists the event when the video loss status changes. 4. To exit - Panasonic WVCU650 | WJSX150 User Guide - Page 14
another alarm input is accepted. Notes: • The association of the alarm inputs with cameras and monitors are changeable in SETUP MENU or WJSX150A Administrator Console. (Refer to the operating instructions of matrix switcher.) • Alarm input will be automatically reset in 30 seconds. The auto-recovery - Panasonic WVCU650 | WJSX150 User Guide - Page 15
go out. ■ Suspending the Alarm Inputs Use this function when you do not want to be disturbed by an alarm input, for example, during the setup procedures. ALM SUSPENDED 1. Press the ALARM/ALM SUSPEND button while holding down the SHIFT button. "ALM SUSPENDED" will appear on the monitor, and the ALM - Panasonic WVCU650 | WJSX150 User Guide - Page 16
necessary to install the Multiplexer board in the matrix switcher and configure the system through SETUP MENU and WJ-SX150A Administrator Console. (Refer to the operating instructions of matrix switcher.) ■ Monitoring the Camera Picture ● Multiscreen Segment Switching 1. Select the desired monitor - Panasonic WVCU650 | WJSX150 User Guide - Page 17
Mux Still 052 "Input Still CH" 5. Press the F1 button. The selected camera image will change into the still picture. 6. To cancel the still picture, activated. Note: When a WJ-HD100 Series recorder or a Panasonic time-lapse VCR is connected to the matrix switcher, recording status will appear on - Panasonic WVCU650 | WJSX150 User Guide - Page 18
-HD500 SERIES CONTROL (TERMINAL MODE) Matrix switcher can control the following functions of Digital Disk Recorder WJ-HD500 Series. The following is the procedure of WJ-HD500 Series SETUP MENU. Notes: • The following operating procedures are for the terminal mode. If you are using a PS·Data system - Panasonic WVCU650 | WJSX150 User Guide - Page 19
through WJHD500 SETUP. (Refer to the recorder's operating instructions.) 1. Enter Camera 13, 14, 15 and 16) → 7 (segments) → 9 →10 → 13 → 16 → 4A 3. To return to the spot display, exit the recorder mode. Note: Multiscreen segment patterns are not configurable through WJ-SX150A Administrator Console - Panasonic WVCU650 | WJSX150 User Guide - Page 20
stop alarm recording activated by "REC ONLY" setting of 430 CAMERA/440 ALARM PORT/450 SERIAL PORT/460 MUX MOTION DET in SETUP MENU or the Alarm Mode window in WJ-SX150A Administrator Console. (Refer to the operating instructions of matrix switcher.) To stop the alarm recording, press the ALL RESET - Panasonic WVCU650 | WJSX150 User Guide - Page 21
referring to the recorder's operating instructions. In addition, the following ) Playback images can be electrically zoomed besides a camera's optical zooming. 1. Enter the recorder mode. . ● Multiscreen Sequence Digital disk recorder starts a sequence according to the setting of WJ-HD500 Series. 1. - Panasonic WVCU650 | WJSX150 User Guide - Page 22
-HD300 SERIES CONTROL (TERMINAL MODE) Matrix switcher can control the following functions of Digital Disk Recorder WJ-HD300 Series. The following is the procedure of WJ-HD300 Series SETUP MENU. Notes: • The following operating procedures are for the terminal mode. If you are using a PS·Data system - Panasonic WVCU650 | WJSX150 User Guide - Page 23
● Normal Playback The operations are the same as WJ-HD500 Series. (Refer to p. 19.) Note: Refer to the recorder's operating instructions for details and other playback modes. ● Manual Recording The operations are the same as WJ-HD500 Series. (Refer to p. 20.) ● Stopping REC ONLY Alarm Recording - Panasonic WVCU650 | WJSX150 User Guide - Page 24
01ch 01ch REC EVT MANUAL MANUAL MANUAL MANUAL MANUAL MANUAL MANUAL MANUAL TEXT ABCDEFGHIJKLMNOP ABCDEFGHIJKLMNOP ABCDEFGHIJKLMNOP EVENT SEARCH VMD SEARCH MARK Note: The illustration is an example in which "CAMERA" has been selected for the searching filter. 4. To determine the filter setting, - Panasonic WVCU650 | WJSX150 User Guide - Page 25
rightward (B): Moves the cursor to the right. Available controls and functions (CAMERA FILTERING window) CAMERA FILTERING CAMERA 1 2345678 9 10 11 12 13 14 15 16 SET : FILTERING EMERGENCY OFF VMD ON TERMINAL ON COMMAND ON VIDEO LOSS ON MANUAL ON SCHEDULE ON SET : [ SET ] CANCEL : [ ESC - Panasonic WVCU650 | WJSX150 User Guide - Page 26
and date displayed on the result list or thumbnail. Filtering is available by camera channel, date-and-time, detection area or search mode. 1. Enter the range set in step 4, the motion detection area setup window will not be displayed. 6. Select "SETUP AREA" on the status bar by performing either of - Panasonic WVCU650 | WJSX150 User Guide - Page 27
be applied. OFF: The motion detector is not activated on the camera channel. LOW: The sensitivity level is low. MID: The sensitivity is detection area setup, press the MON (ESC) button. The monitor display will return to the upper menu. • Refer to the unit's operating instructions for details - Panasonic WVCU650 | WJSX150 User Guide - Page 28
3. Select the desired marked time by performing one of the following. • Move the 3D joystick controller up or down. • Rotate the JogDial clockwise or counterclockwise. • Press the + or - button. Note: To move to the next or previous page, perform either of the following. • Move the zoom wheel - Panasonic WVCU650 | WJSX150 User Guide - Page 29
appears on the LCD. Note: If the recorder is WJ-HD300 Series, "B" mark will light up beside "Off Notes: • Refer to the operating instructions of recorder for details on available functions 27 Marking search for how to play back. ■ Displaying Camera Titles 1. Enter the recorder mode. (Refer to p. 19 - Panasonic WVCU650 | WJSX150 User Guide - Page 30
in the matrix switcher, you can neither connect nor control a WJ-HD200 Series recorder. You need to remove the board from the matrix switcher. ■ Displaying WJ-HD200 Series SETUP MENU The operations are the same as WJ-HD500 Series. (Refer to p. 18.) ■ Controlling Digital Disk Recorder WJ-HD200 Series - Panasonic WVCU650 | WJSX150 User Guide - Page 31
. The cursor can be adjusted by moving the 3D joystick rightward or leftward. ● Electronic Zooming (EL-ZOOM) The operations are the same as WJ-HD500 Series. (Refer to p. 21.) Note: 2 x and 4 x are available zooming range. 8 x is unavailable. 4. Press the PLAY/PAUSE button. After the search through - Panasonic WVCU650 | WJSX150 User Guide - Page 32
in the matrix switcher, connect the matrix switcher to the digital disk recorder, and configure the system through WJ-SX150A Administrator Console, OSD SETUP MENU, and WJ-HD100 Series SETUP MENU. (Refer to the operating instructions of matrix switcher.) ■ Displaying WJ-HD100 Series SETUP MENU The - Panasonic WVCU650 | WJSX150 User Guide - Page 33
3. Press the numeric buttons or +/- button to enter the desired date and time. The cursor can be adjusted by moving the 3D joystick rightward or leftward. 4. Press the PLAY/PAUSE button. After the search through the date and time, the recorded image will be played. 5. To return to the multiscreen - Panasonic WVCU650 | WJSX150 User Guide - Page 34
in the matrix switcher, connect the matrix switcher to the time-lapse VCR, and configure the system through WJ-SX150A Administrator Console, OSD SETUP MENU, and time-lapse VCR's SETUP MENU. (Refer to the operating instructions of matrix switcher.) The following is the procedure of a Panasonic model - Panasonic WVCU650 | WJSX150 User Guide - Page 35
matrix switcher, connect the matrix switcher to the digital disk recorder, and configure the system through WJ-SX150A Administrator Console, OSD SETUP MENU, and time-lapse VCR's SETUP MENU. (Refer to the operating instructions of matrix switcher.) • You cannot control non-Panasonic camera number - Panasonic WVCU650 | WJSX150 User Guide - Page 36
in WVCU950/WV-CU650 Operating Instructions. However, when the system controller (WV-CU950 or WV-CU650) is connected to recorders via the matrix switcher (WJ-SX150 Series), the following differences will occur. ■ Unavailable Functions through WJ-SX150A Connection The following functions are - Panasonic WVCU650 | WJSX150 User Guide - Page 37
• Make sure the recorder's unit address is set to 1 through SETUP MENU or WJ-SX150A administrator Console. (Refer to this unit's operating instructions.) If another number is selected, you cannot control the recorder. • To control cameras at the front panel of recorder, connect the DATA 4 connector - Panasonic WVCU650 | WJSX150 User Guide - Page 38
in 600 RECORDER of SETUP MENU or the Recorder window of WJ-SX150A Administrator Console. (Refer to this unit's operating instructions.) System controller (Terminal Mode) Monitor EXT IN MONITOR OUT ALARM DATA HDR DATA 4 TERM OFF ON SERIAL DATA 3 DATA 2 DATA 1 RS485(CAMERA) LINE 2 SELECT 4 EXT - Panasonic WVCU650 | WJSX150 User Guide - Page 39
1, in 600 RECORDER of SETUP MENU or the Recorder window of WJ-SX150A Administrator Console. (Refer to this unit's operating instructions.) System controller (Terminal Mode)* Monitor MONITOR OUT ALARM DATA HDR DATA 4 TERM OFF ON SERIAL DATA 3 DATA 2 DATA 1 RS485(CAMERA) LINE 2 SELECT 4 EXT IN - Panasonic WVCU650 | WJSX150 User Guide - Page 40
with Digital Disk Recorder WJ-HD220 Series ● To Confirm the Images from a Recorder Connected to the Unit • Connection procedures are the same as WJ-HD200 Series. (Refer to the operating instructions of matrix switcher.) • Set the DATA setting to "PSD" for CAMERA 1 to 4 in the CAMERA SYSTEM SETUP - Panasonic WVCU650 | WJSX150 User Guide - Page 41
WJ-HD300 SERIES CONTROL (WV-CU950/650 TERMINAL MODE) Refer to p. 22 WJ-HD300 SERIES CONTROL (TERMINAL MODE). WJ-HD300 SERIES CONTROL (WV-CU950/650 PS·DATA) Refer to p. 36 and the operating instructions of system controller. 41 - Panasonic WVCU650 | WJSX150 User Guide - Page 42
• System functions ■ Controlling Digital Disk Recorder WJ-HD300 Series ● Search Playback mode. (Refer to the unit's operating instructions.) 2. Press the INDEX button. The date MANUAL MANUAL MANUAL MANUAL MANUAL MANUAL MANUAL MANUAL rightward or leftward. TIME&DATE CAMERA REC EVENT TEXT UNLOCK FILTER - Panasonic WVCU650 | WJSX150 User Guide - Page 43
REC EVENT FILTERING EMERGENCY OFF VMD ON TERMINAL ON COMMAND ON VIDEO LOSS ON MANUAL ON SCHEDULE ON SET : [ SET ] CANCEL : [ ESC ] Joystick by camera channel, date-and-time, detection area or search mode. 1. Enter the recorder mode. (Refer to the unit's operating instructions.) 2. - Panasonic WVCU650 | WJSX150 User Guide - Page 44
(SET) button. The VMD search window will be displayed on the monitor. ■ SELECT CAMERA & DATE CAMERA CAM1 START JAN . 1 . 03 12 : 00 AM END JAN . 1 . 03 menu. 5. Press the CAM (SET) button. The motion detection area setup window will be displayed. Note: To set all displayed areas as motion - Panasonic WVCU650 | WJSX150 User Guide - Page 45
will be applied. OFF: The motion detector is not activated on the camera channel. LOW: The sensitivity level is low. MID: The sensitivity is area setup, press the MON (ESC) button. The VMD search list window will be displayed again on the monitor. • Refer to the unit's operating instructions for - Panasonic WVCU650 | WJSX150 User Guide - Page 46
HD500 Series. (Refer to the unit's operating instructions.) COMMUNICATION PROTOCOL (FOR USERS OF WJ-HD300 SERIES) The following commands have been described in the operating instructions of this unit (matrix switcher). However, while Digital Disk Recorder WJ-HD300 Series are being connected to the - Panasonic WVCU650 | WJSX150 User Guide - Page 47
to WJ-SX150A Operating Instructions for WJSX150A OSD ON/OFF.) DATA COPY window ON CMD:RmmPD Text display ON CMD:RmmDT List/Thumbnail CMD:RmmTN ANS:RmmLT ANS:RmmMP ANS:RmmPM ANS:RmmDI ANS:RmmPD ANS:RmmDT ANS:RmmTN mm=Monitor No. n=0 OFF n=1 ON mm=Monitor No. mm=Monitor No. mm=Monitor No. Setup - Panasonic WVCU650 | WJSX150 User Guide - Page 48
Solutions Company, Unit Company of Panasonic Corporation of North America Security Systems www.panasonic.com/security For customer support, call 1.877.733.3689 Executive Office: Three Panasonic Way 2H-2, Secaucus, New Jersey 07094 Zone Office Eastern: Three Panasonic Way, Secaucus, New Jersey 07094
-
 1
1 -
 2
2 -
 3
3 -
 4
4 -
 5
5 -
 6
6 -
 7
7 -
8
-
9
-
10
-
11
-
12
-
13
-
14
-
15
-
16
-
17
-
18
-
19
-
20
-
21
-
22
-
23
-
24
-
25
-
26
-
27
-
28
-
29
-
30
-
31
-
32
-
33
-
34
-
35
-
36
-
37
-
38
-
39
-
40
-
41
-
42
-
43
-
44
-
45
-
46
-
47
-
48
 |
 |

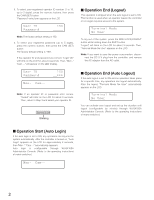
This operation is skipped when the auto login is set to ON.
(Refer to the operating instructions of matrix switcher.)
1.
Turn on the power switches of all system components.
The OPERATE indicator will light up.
2. To turn on the power of the system controller, connect
the AC adapter to the AC outlet.
The OPERATE indicator lights up and "Terminal Mode
No User" appears on the LCD.
BEFORE OPERATION
INSTALLATIONS AND CONNECTIONS
SETUP PROCEDURES (HARDWARE)
Note:
This section describes the terminal mode. To operate
in the PS·Data mode, refer to the operating instructions.
Before starting the following procedures, all system compo-
nents must be turned on.
The following procedures are applicable when the system
controller is connected to the matrix switcher.
■
Operation Start (Login)
Note:
When auto login is set to ON, operators can log into
the system without entering their passwords. (Refer to
p. 2 Operation Start (Auto Login).)
Terminal Mode
No User
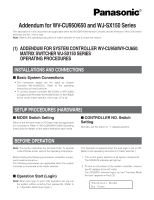
Addendum for WV-CU950/650 and WJ-SX150 Series
(1)
ADDENDUM FOR SYSTEM CONTROLLER WV-CU950/WV-CU650:
MATRIX SWITCHER WJ-SX150 SERIES
OPERATING PROCEDURES
The descriptions in this document are applicable when WJ-SX150A Administrator Console and the firmware of this unit (matrix
switcher) are Ver. 2.04 or later.
Note:
Refer to the operating instructions of matrix switcher for how to check the version.
■
Basic System Connections
• The connection details are the same as System
Controller WV-CU360C/CJ. Refer to the operating
instructions of matrix switcher .
•
To connect System Controller WV-CU950 or WV-CU650
to Digital Disk Recorder WJ-HD300 Series or WJ-HD220
Series via the matrix switcher, refer to pp. 37 to 40.
■
MODE Switch Setting
Either of the terminal mode or PS·Data mode are applicable
for connections. Refer to WV-CU950/WV-CU650 Operating
Instructions for details on the switch setting for each mode.
■
CONTROLLER NO. Switch
Setting
Normally, set this switch to “1” (default position).