Pentax 19301 M40 Operating Manual - Page 85
Selecting the Recorded Pixels, Press the, button in, mode., Use the four-way controller
 |
UPC - 027075130302
View all Pentax 19301 manuals
Add to My Manuals
Save this manual to your list of manuals |
Page 85 highlights
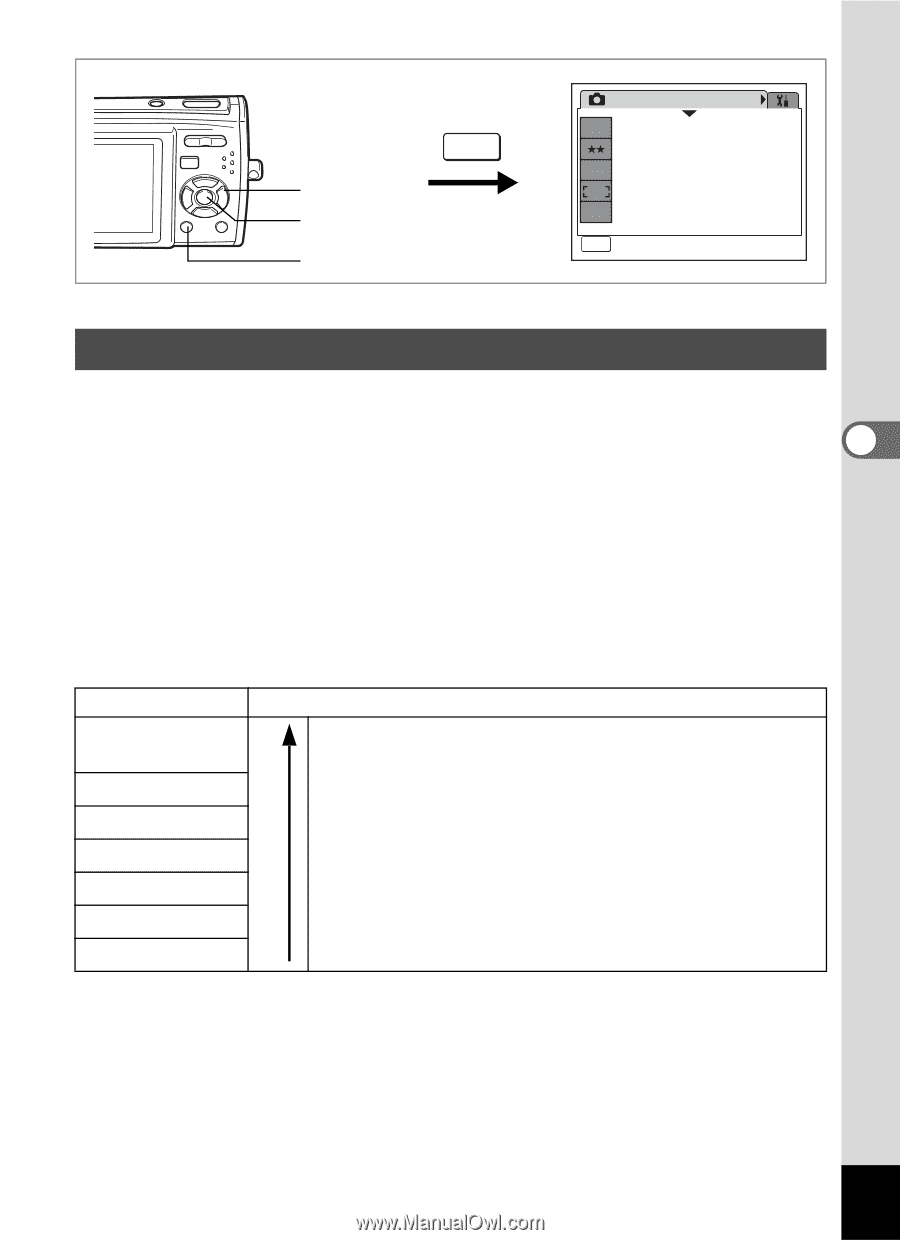
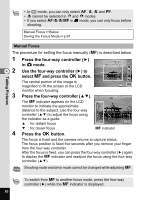
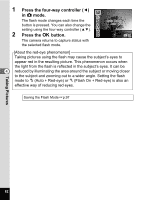
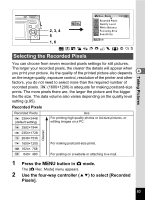
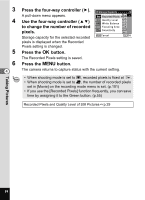
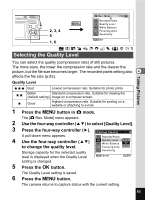
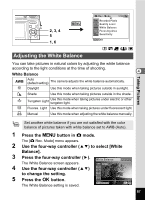
Taking Pictures Rec. Mode 1/3 2, 3, 4 5 1, 6 MENU 8M Recorded Pixels Quality Level AWB White Balance Focusing Area ISO AUTO Sensitivity MENU Exit b R A q < z e i \ c Q E D Selecting the Recorded Pixels You can choose from seven recorded pixels settings for still pictures. The larger your recorded pixels, the clearer the details will appear when you print your picture. As the quality of the printed picture also depends 4 on the image quality, exposure control, resolution of the printer and other factors, you do not need to select more than the required number of recorded pixels. i (1600×1200) is adequate for making postcard-size prints. The more pixels there are, the larger the picture and the bigger the file size. The data volume also varies depending on the quality level setting (p.85). Recorded Pixels Recorded Pixels a 3264×2448 (default setting) f 2592×1944 g 2304×1728 h 2048×1536 i 1600×1200 l 1024× 768 m 640× 480 Clearer Use For printing high quality photos or A4-size pictures, or editing images on a PC. For making postcard-size prints. For posting on a website or attaching to e-mail. 1 Press the 3 button in A mode. The [A Rec. Mode] menu appears. 2 Use the four-way controller (23) to select [Recorded Pixels]. 83
-
 1
1 -
2
-
3
-
4
-
5
-
6
-
7
-
8
-
9
-
10
-
11
-
12
-
13
-
14
-
15
-
16
-
17
-
18
-
19
-
20
-
21
-
22
-
23
-
24
-
25
-
26
-
27
-
28
-
29
-
30
-
31
-
32
-
33
-
34
-
35
-
36
-
37
-
38
-
39
-
40
-
41
-
42
-
43
-
44
-
45
-
46
-
47
-
48
-
49
-
50
-
51
-
52
-
53
-
54
-
55
-
56
-
57
-
58
-
59
-
60
-
61
-
62
-
63
-
64
-
65
-
66
-
67
-
68
-
69
-
70
-
71
-
72
-
73
-
74
-
75
-
76
-
77
-
78
-
79
-
 80
80 -
 81
81 -
 82
82 -
 83
83 -
 84
84 -
 85
85 -
 86
86 -
 87
87 -
 88
88 -
 89
89 -
 90
90 -
91
-
92
-
93
-
94
-
95
-
96
-
97
-
98
-
99
-
100
-
101
-
102
-
103
-
104
-
105
-
106
-
107
-
108
-
109
-
110
-
111
-
112
-
113
-
114
-
115
-
116
-
117
-
118
-
119
-
120
-
121
-
122
-
123
-
124
-
125
-
126
-
127
-
128
-
129
-
130
-
131
-
132
-
133
-
134
-
135
-
136
-
137
-
138
-
139
-
140
-
141
-
142
-
143
-
144
-
145
-
146
-
147
-
148
-
149
-
150
-
151
-
152
-
153
-
154
-
155
-
156
-
157
-
158
-
159
-
160
-
161
-
162
-
163
-
164
-
165
-
166
-
167
-
168
-
169
-
170
-
171
-
172
-
173
-
174
-
175
-
176
-
177
-
178
-
179
-
180
-
181
-
182
-
183
-
184
-
185
-
186
-
187
-
188
-
189
-
190
-
191
-
192
 |
 |