Pfaff Tiptronic 2020 Owner's Manual - Page 10
PFAFF, ronic
 |
View all Pfaff Tiptronic 2020 manuals
Add to My Manuals
Save this manual to your list of manuals |
Page 10 highlights
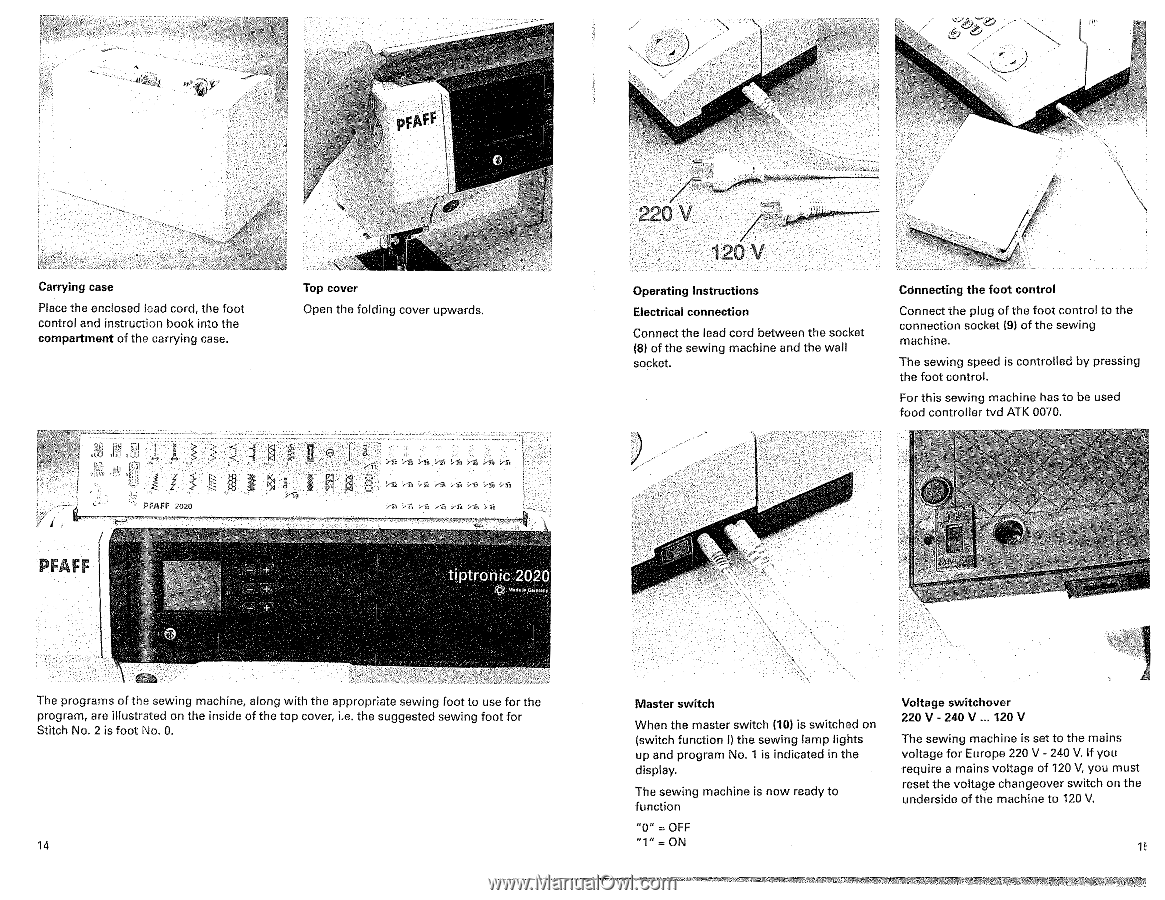
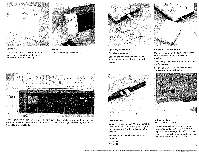
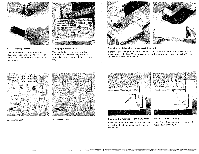
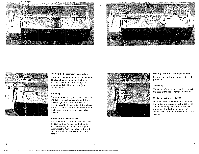
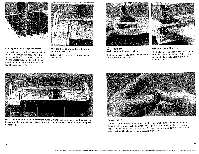
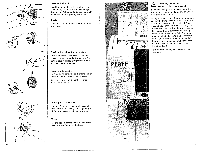
• a Carrying case Place the enclosed lead cord, the foot control and instruction book into the compartment of the carrying case. Top cover Open the folding cover upwards. .ItiA I At ,11 PFAFF 7020 PFAFF 1 ,k1 - 0 $ kit 'ea rA •71 •,-4 'ea 'ea Av. v1/1 i s fW (es t pt ronic 200 The programs of the sewing machine, along with the appropriate sewing foot to use for the program, are illustrated on the inside of the top cover, i.e. the suggested sewing foot for Stitch No. 2 is foot No. 0. 14 • 220 V 120 V Operating Instructions Electrical connection Connect the lead cord between the socket (8) of the sewing machine and the wall socket. Connecting the foot control Connect the plug of the foot control to the connection socket (9) of the sewing machine. The sewing speed is controlled by pressing the foot control. For this sewing machine has to be used food controller tvd ATK 0070. ( Master switch When the master switch (10) is switched on (switch function the sewing lamp lights up and program No. 1 is indicated in the display. The sewing machine is now ready to function "0" r, OFF "1" • ON Voltage switchover 220 V -240V... 120V The sewing machine is set to the mains voltage for Europe 220 V - 240 V. If you require a mains voltage of 120 V, you must reset the voltage changeover switch on the underside of the machine to 120 V.
-
 1
1 -
2
-
3
-
4
-
 5
5 -
 6
6 -
 7
7 -
 8
8 -
 9
9 -
 10
10 -
 11
11 -
 12
12 -
 13
13 -
 14
14 -
 15
15 -
16
-
17
-
18
-
19
-
20
-
21
-
22
-
23
-
24
-
25
-
26
-
27
-
28
-
29
-
30
-
31
-
32
-
33
-
34
-
35
-
36
-
37
-
38
-
39
-
40
-
41
-
42
-
43
-
44
-
45
-
46
-
47
-
48
-
49
-
50
-
51
-
52
-
53
-
54
 |
 |