Pfaff Tiptronic 2020 Owner's Manual - Page 24
prog., Progr.
 |
View all Pfaff Tiptronic 2020 manuals
Add to My Manuals
Save this manual to your list of manuals |
Page 24 highlights
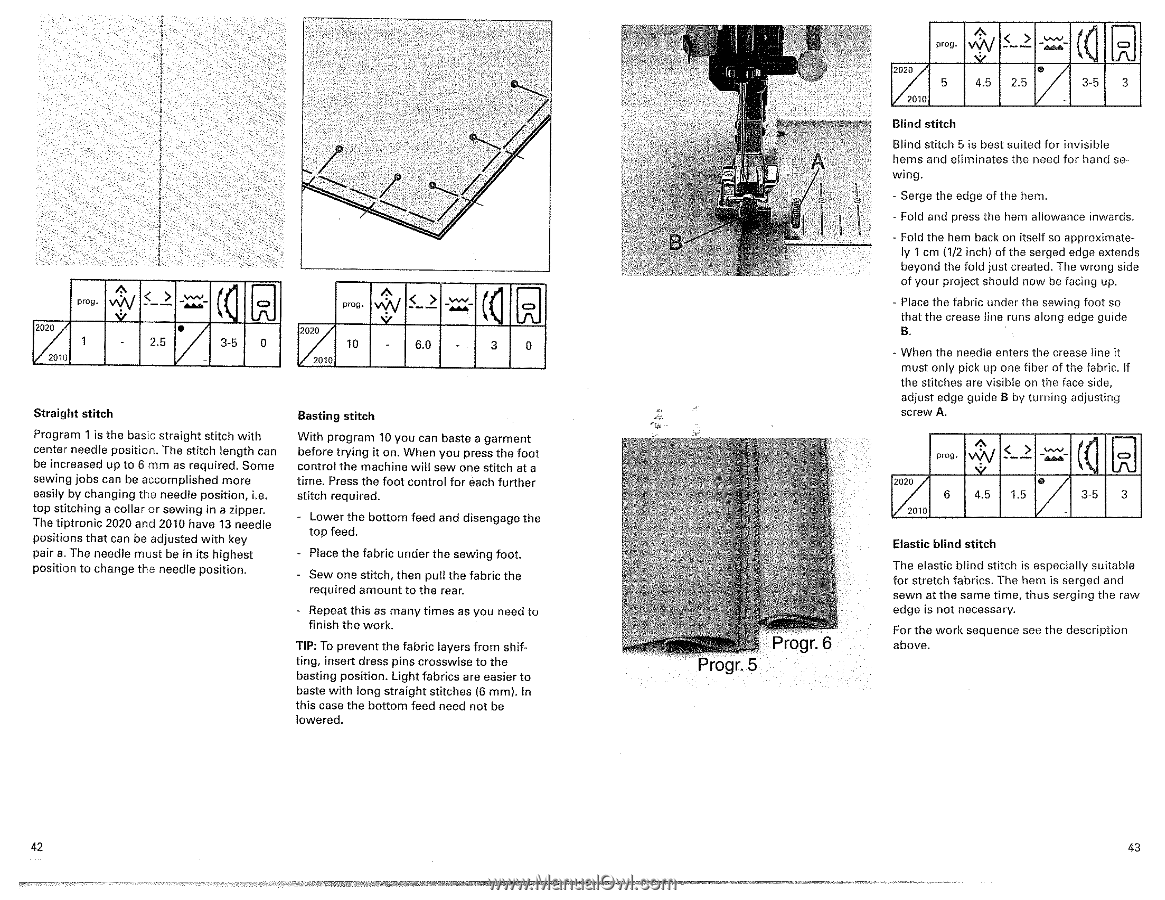
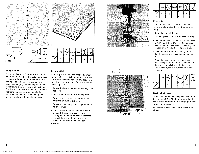
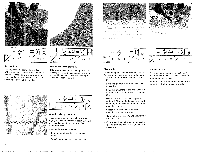
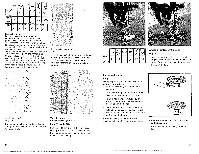
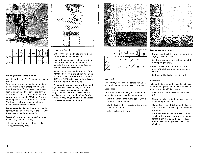
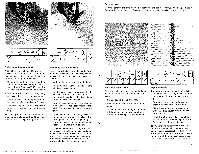
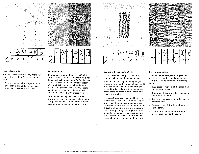
a Gi prog. .:. v%'N V,I 5-1- -17.- ((I 2 2020 • 1 - 2.5 / 3-5 0 zoto WOO. V' 2020 10 zoto (1H 6.0 - 3 0 Straight stitch Program 1 is the basic straight stitch with center needle position. The stitch length can be increased up to 6 mm as required. Some sewing jobs can be accomplished more easily by changing the needle position, i.e. top stitching a collar or sewing in a zipper. The tiptronic 2020 and 2010 have 13 needle positions that can be adjusted with key pair a. The needle must be in its highest position to change the needle position. Basting stitch With program 10 you can baste a garment before trying it on. When you press the foot control the machine will sew one stitch at a time. Press the foot control for each further stitch required. - Lower the bottom feed and disengage the top feed. - Place the fabric under the sewing foot. - Sew one stitch, then pull the fabric the required amount to the rear. Repeat this as many times as you need to finish the work. TIP: To prevent the fabric layers from shifting, insert dress pins crosswise to the basting position. Light fabrics are easier to baste with long straight stitches (6 mm). In this case the bottom feed need not be lowered. 1 • Progr. 6 Progr. 5 2020 5 2010 / 4.5 2.5 • 3-5 3 Blind stitch Blind stitch 5 is best suited for invisible hems and eliminates the need for hand sewing. - Serge the edge of the hem. • Fold and press the hem allowance inwards. - Fold the hem back on itself so approximately 1 cm (1/2 inch) of the serged edge extends beyond the fold just created. The wrong side of your project should now be facing up. - Place the fabric under the sewing foot so that the crease line runs along edge guide B. - When the needle enters the crease line it must only pick up one fiber of the fabric. If the stitches are visible on the face side, adjust edge guide B by turning adjusting screw A. Ixcg• NnN AA 2020 6 2010 • 4.5 1.5 ........... 0 _A. 3-5 3 Elastic blind stitch The elastic blind stitch is especially suitable for stretch fabrics. The hem is serged and sewn at the same time, thus serging the raw edge is not necessary. For the work sequence see the description above. 42 43
-
 1
1 -
2
-
3
-
4
-
5
-
6
-
7
-
8
-
9
-
10
-
11
-
12
-
13
-
14
-
15
-
16
-
17
-
18
-
 19
19 -
 20
20 -
 21
21 -
 22
22 -
 23
23 -
 24
24 -
 25
25 -
 26
26 -
 27
27 -
 28
28 -
 29
29 -
30
-
31
-
32
-
33
-
34
-
35
-
36
-
37
-
38
-
39
-
40
-
41
-
42
-
43
-
44
-
45
-
46
-
47
-
48
-
49
-
50
-
51
-
52
-
53
-
54
 |
 |