Pfaff Tiptronic 2020 Owner's Manual - Page 37
Regular, pattern
 |
View all Pfaff Tiptronic 2020 manuals
Add to My Manuals
Save this manual to your list of manuals |
Page 37 highlights
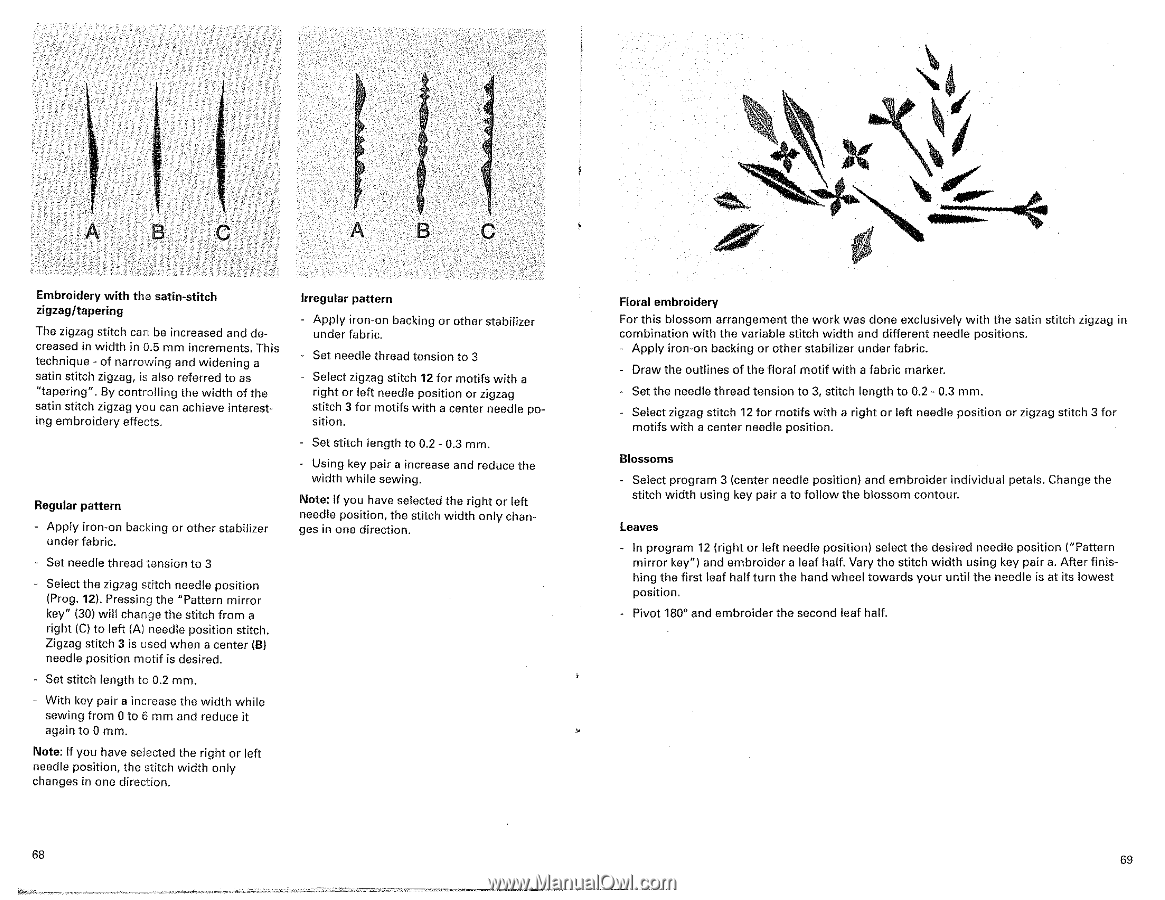
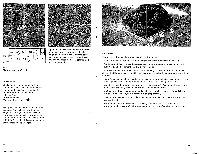
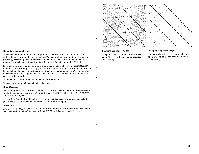
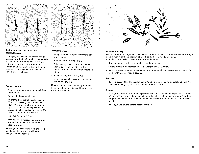
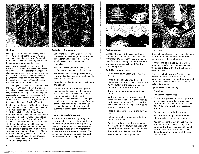
A B C A B C Embroidery with the satin-stitch zigzag/tapering The zigzag stitch can be increased and decreased in width in 0.5 mm increments. This technique - of narrowing and widening a satin stitch zigzag, is also referred to as "tapering". By controlling the width of the satin stitch zigzag you can achieve interesting embroidery effects. Regular pattern - Apply iron-on backing or other stabilizer under fabric. - Set needle thread tension to 3 - Select the zigzag stitch needle position (Prog. 12). Pressing the "Pattern mirror key" (30) will change the stitch from a right (C) to left (A) needle position stitch. Zigzag stitch 3 is used when a center (B) needle position motif is desired. - Set stitch length to 0.2 mm. - With key pair a increase the width while sewing from 0 to 6 mm and reduce it again to 0 mm. Note: If you have selected the right or left needle position, the stitch width only changes in ono direction. Irregular pattern Apply iron-on backing or other stabilizer under fabric. Set needle thread tension to 3 Select zigzag stitch 12 for motifs with a right or left needle position or zigzag stitch 3 for motifs with a center needle position. - Set stitch length to 0.2 - 0.3 mm. - Using key pair a increase and reduce the width while sewing. Note: If you have selected the right or left needle position, the stitch width only chap• ges in ono direction. 68 Floral embroidery For this blossom arrangement the work was done exclusively with the satin stitch zigzag in combination with the variable stitch width and different needle positions. Apply iron•on backing or other stabilizer under fabric. Draw the outlines of the floral motif with a fabric marker. Set the needle thread tension to 3, stitcn length to 0.2 - 0.3 mm. Select zigzag stitch 12 for motifs with a right or left needle position or zigzag stitch 3 for motifs with a center needle position. Blossoms - Select program 3 (center needle position) and embroider individual petals. Change the stitch width using key pair a to follow the blossom contour. Leaves - In program 12 (right or left needle position) select the desired needle position ("Pattern mirror key") and embroider a eaf half. Vary the stitch width using key pair a. After finishing the first leaf half turn the hand wheel towards your until the needle is at its lowest position. - Pivot 1600 and embroider the second leaf half. 69
-
 1
1 -
2
-
3
-
4
-
5
-
6
-
7
-
8
-
9
-
10
-
11
-
12
-
13
-
14
-
15
-
16
-
17
-
18
-
19
-
20
-
21
-
22
-
23
-
24
-
25
-
26
-
27
-
28
-
29
-
30
-
31
-
 32
32 -
 33
33 -
 34
34 -
 35
35 -
 36
36 -
 37
37 -
 38
38 -
 39
39 -
 40
40 -
 41
41 -
 42
42 -
43
-
44
-
45
-
46
-
47
-
48
-
49
-
50
-
51
-
52
-
53
-
54
 |
 |