Pfaff Tiptronic 2020 Owner's Manual - Page 45
Pfaff Tiptronic 2020 Manual
 |
View all Pfaff Tiptronic 2020 manuals
Add to My Manuals
Save this manual to your list of manuals |
Page 45 highlights
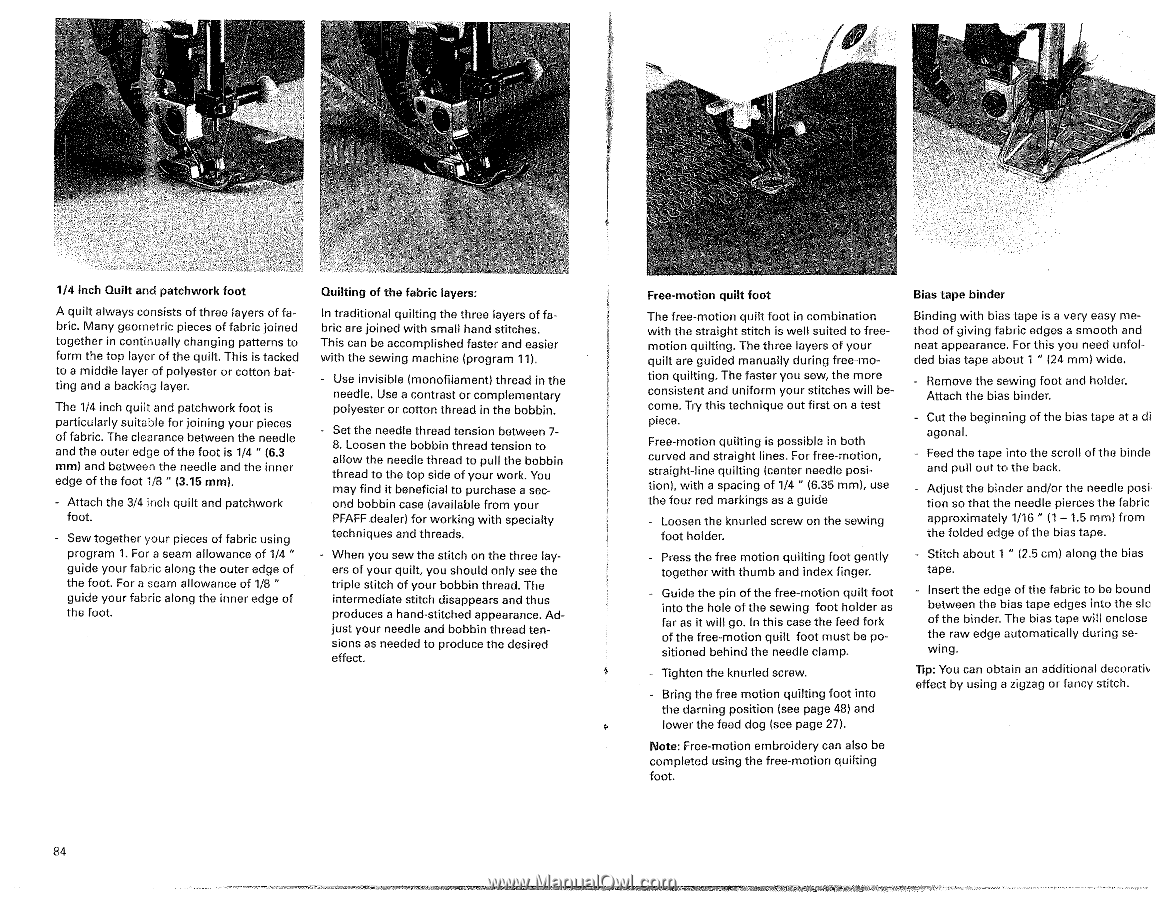
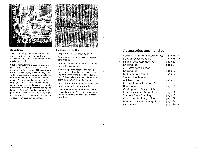
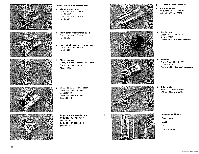
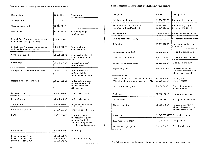
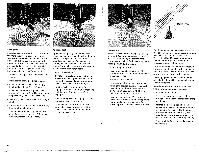
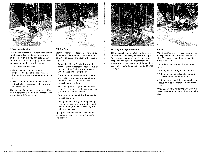
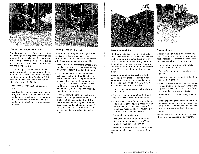
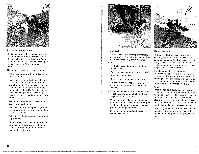
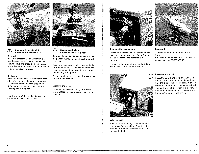
2) 4 iv • i. . ' • 1/4 Inch Quilt and patchwork foot A quilt always consists of three layers of fabric. Many geometric pieces of fabric joined together in continually changing patterns to form the lop layer of the quilt. This is tacked to a middle layer of polyester or cotton batting and a backing layer. The 1/4 inch quilt and patchwork foot is particularly suitable for joining your pieces of fabric. The clearance between the needle and the outer edge of the foot is 1/4 " (6.3 mm) and between the needle and the inner edge of the foot 118 " (3.15 mm). Attach the 3/4 inch quilt and patchwork foot. Sew together your pieces of fabric using program 1. For a seam allowance of 1/4 " guide your fabric along the outer edge of the foot. For a seam allowance of 1/8 " guide your fabric along the inner edge of the foot. Quilting of the fabric layers: In traditional quilting the three layers of fabric are joined with small hand stitches. This can be accomplished faster and easier with the sewing machine (program 11). - Use invisible (monofilament) thread in the needle. Use a contrast or complementary polyester or cotton thread in the bobbin. - Set the needle thread tension between 78. Loosen the bobbin thread tension to allow the needle thread to pull the bobbin thread to the top side of your work. You may find it beneficial to purchase a second bobbin case (available from your PFAFF dealer) for working with specialty techniques and threads. When you sew the stitch on the three layers of your quilt, you should only see the triple stitch of your bobbin thread. The intermediate stitch disappears and thus produces a hand-stitched appearance. Adjust your needle and bobbin thread tensions as needed to produce the desired effect. 84 Free-motion quilt foot The free-motion quilt foot in combination with the straight stitch is well suited to freemotion quilting. The throe layers of your quilt are guided manually during free-motion quilting. The faster you sew, the more consistent and uniform your stitches will become. Try this technique out first on a test piece. Free-motion quilting is possible in both curved and straight lines. For free-motion, straight-line quilting (center needle position), with a spacing of 1/4 " (6.35 mm), use the four red markings as a guide Loosen the knurled screw on the sewing foot holder. Press the free motion quilting foot gently together with thumb and index finger. Guide the pin of the free-motion quilt foot into the hole of the sewing foot holder as far as it will go. In this case the feed fork of the free-motion quilt foot must be positioned behind the needle clamp. Tighten the knurled screw. Bring the free motion quilting foot into the darning position (see page 48) and lower the feed dog (see page 27). Note: Free-motion embroidery can also be completed using the free-motion quilting foot. Bias tape binder Binding with bias tape is a very easy method of giving fabric edges a smooth and neat appearance. For this you need unfolded bias tape about 1 " (24 mm) wide. Remove the sewing foot and holder. Attach the bias binder. Cut the beginning of the bias tape at a di agonal. - Feed the tape into the scroll of the binde and pull out to the back. - Adjust the binder and/or the needle posi tion so that the needle pierces the fabric approximately 1/16 " (1 - 1.5 mm) from the folded edge of the bias tape. Stitch about 1 " (2.5 cm) along the bias tape. Insert the edge of the fabric to be bound between the bias tape edges into the slo of the binder. The bias tape will enclose the raw edge automatically during sewing. Tip: You can obtain an additional decorativ effect by using a zigzag or fancy stitch.
-
 1
1 -
2
-
3
-
4
-
5
-
6
-
7
-
8
-
9
-
10
-
11
-
12
-
13
-
14
-
15
-
16
-
17
-
18
-
19
-
20
-
21
-
22
-
23
-
24
-
25
-
26
-
27
-
28
-
29
-
30
-
31
-
32
-
33
-
34
-
35
-
36
-
37
-
38
-
39
-
 40
40 -
 41
41 -
 42
42 -
 43
43 -
 44
44 -
 45
45 -
 46
46 -
 47
47 -
 48
48 -
 49
49 -
 50
50 -
51
-
52
-
53
-
54
 |
 |