Pfaff Tiptronic 2020 Owner's Manual - Page 47
folded/pressed
 |
View all Pfaff Tiptronic 2020 manuals
Add to My Manuals
Save this manual to your list of manuals |
Page 47 highlights
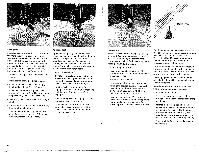
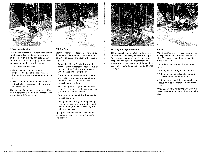
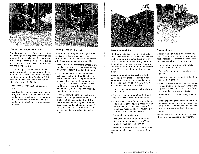
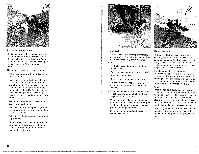
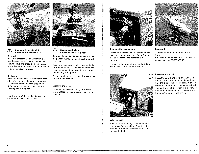
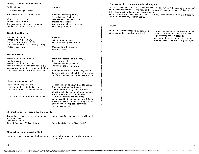
Circular embroidery guide The circular embroidery guide allows you to create perfect embroidered circles. The creative possibilities are endless! Your fabric Is automatically fed in a circle, allowing you to embellish your clothing and household items. The guide is marked in 1 cm increments. - Mark a center point with a fabric marker on your fabric. - Insert the circular embroidery guide from the left into the hole at the back of the sewing foot holder. The radius of the circle is determined by the placement of the guide in the holder. The full width of the circle will be equal to twice the distance between the needle and the rubber guide point. - The guide is secured with the screw on the sewing foot holder. - Place the center marked point of your fabric directly below the rubber point of the embroidery guide. - Select the desired embroidery pattern and begin sewing. - Change the radius with every new circle by loosening the screw and sliding the circular embroidery guide to another mark on the guide arm. 88 ( . rot Il Fringe foot With this sdecial foot for loop embroidery you can produce fantastic effects in no time. This foot is particularly effective on terry cloth. Mark your desired pattern with a fabricmarking pen. Place a piece of stabilizer under the fabric. Attach the fringe foot. Set the upper thread tension to 2 - 3. Embroider the motif row by row. For circles you must work from the outside inwards. When using heavier threads, you should select a slightly longer stitch length. Al ways sew a test seam first. When you have finished, pull the work carefully from the machine by holding the last loops. If you pull too quickly, you will pull the end loops flat/tight. Knot the beginning and and threads on the reverse side. Narrow edge foot This sewing foot makes narrow-edge topstitching easier. It is excellently suited to edge-joining separate fabric pieces. i.e. attaching lace to a finished fabric edge. The metal guide in the center of the foci acts to keep the two fabrics separated. Topstitching with a narrow edge: For narrow-edge topstitching place the center guide of the sewing foot against the fabric edge. Move the needle into the desired left-hand position and topstitch. The center guide allows for perfect topstitch spacing. Sewing on lace: Place the folded/pressed edge of your fabric to the left of the center guide and the finished edge of your lace to the right of the center guide. Both fabric and lace should be placed under the foot right side up. The center guide will keep the fabrics properly separated allowing for more precise stitching. Choose zigzag stitch No. 3 and sew catching the edge of the fabric and the lace. Adjust the width and length of your zigzag as desired. 89
-
 1
1 -
2
-
3
-
4
-
5
-
6
-
7
-
8
-
9
-
10
-
11
-
12
-
13
-
14
-
15
-
16
-
17
-
18
-
19
-
20
-
21
-
22
-
23
-
24
-
25
-
26
-
27
-
28
-
29
-
30
-
31
-
32
-
33
-
34
-
35
-
36
-
37
-
38
-
39
-
40
-
41
-
 42
42 -
 43
43 -
 44
44 -
 45
45 -
 46
46 -
 47
47 -
 48
48 -
 49
49 -
 50
50 -
 51
51 -
 52
52 -
53
-
54
 |
 |
