Pfaff Tiptronic 2020 Owner's Manual - Page 16
Ai Oiiji
 |
View all Pfaff Tiptronic 2020 manuals
Add to My Manuals
Save this manual to your list of manuals |
Page 16 highlights
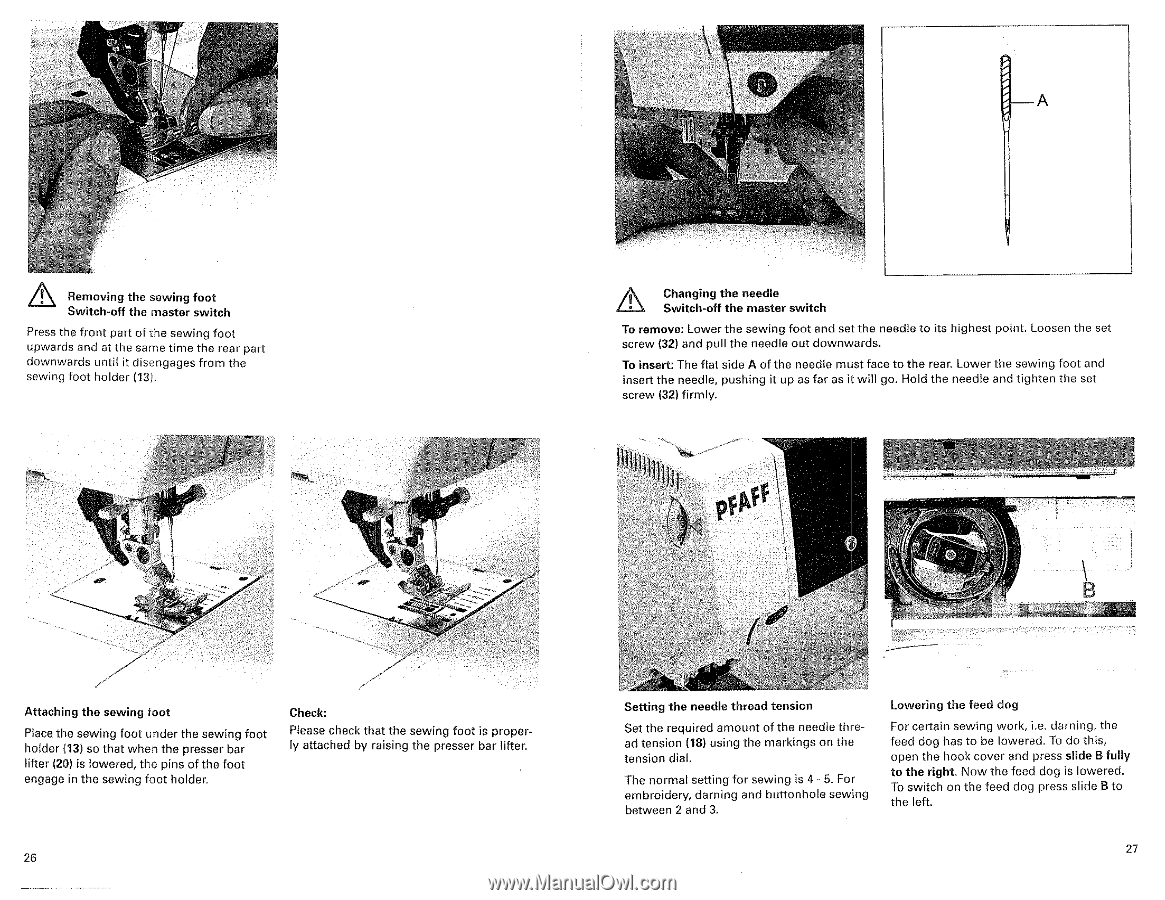
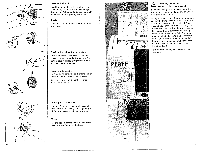
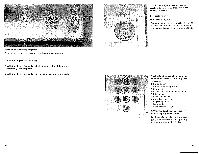
r.. • A Removing the sewing foot Switch-off the master switch Press the front part of the sewing foot upwards and at the same time the rear part downwards until it disengages from the sewing foot holder (13). Changing the needle Switch-off the master switch To remove: Lower tho sowing foot and set the needle to its highest point. Loosen the set screw (32) and pull the needle out downwards. To insert: The flat side A of the needle must face to the rear. Lower the sewing foot and insert the needle, pushing it up as far as it will go. Hold the needle and tighten the se: screw (32) firmly. I IIJI O AD Attaching the sewing toot Place the sewing foot under the sewing foot holder (13) so that when the presser bar lifter (20) is lowered, the pins of the foot engage in the sewing foot holder. Check: Please check that the sewing foot is properly attached by raising the presser bar lifter. 26 Setting the needle thread tension Set the required amount of the needle thread tension 118) using the markings on the tension dial. The normal setting for sewing is 4 - 5. For embroidery, darning and buttonhole sewing between 2 and 3. Lowering the feed dog For certain sewing work, i.e. darning, the feed dog has to be lowered. To do this, open the hook cover and press slide B fully to the right. Now the feed dog is lowered. To switch on the feed dog press slide B to the left. 27
-
 1
1 -
2
-
3
-
4
-
5
-
6
-
7
-
8
-
9
-
10
-
 11
11 -
 12
12 -
 13
13 -
 14
14 -
 15
15 -
 16
16 -
 17
17 -
 18
18 -
 19
19 -
 20
20 -
 21
21 -
22
-
23
-
24
-
25
-
26
-
27
-
28
-
29
-
30
-
31
-
32
-
33
-
34
-
35
-
36
-
37
-
38
-
39
-
40
-
41
-
42
-
43
-
44
-
45
-
46
-
47
-
48
-
49
-
50
-
51
-
52
-
53
-
54
 |
 |