Pfaff Tiptronic 2020 Owner's Manual - Page 50
detachable
 |
View all Pfaff Tiptronic 2020 manuals
Add to My Manuals
Save this manual to your list of manuals |
Page 50 highlights
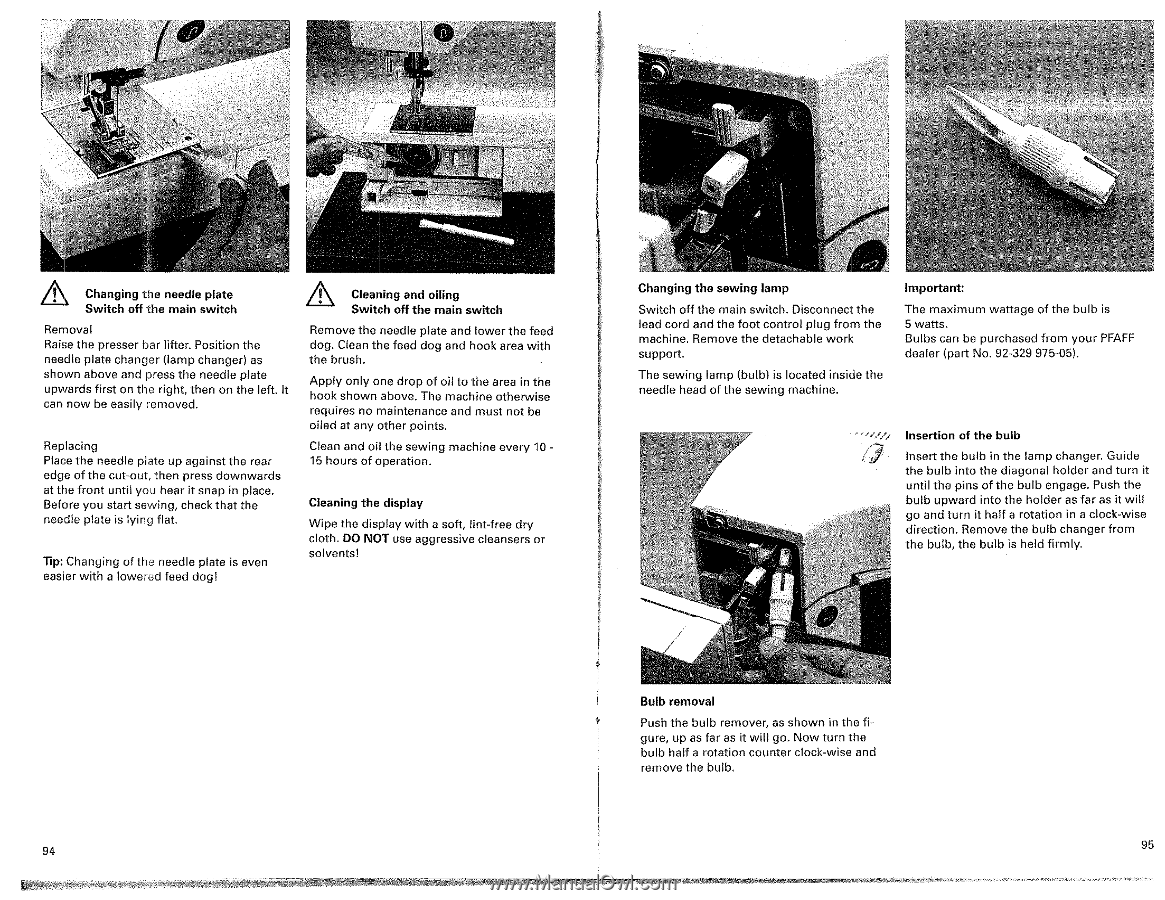
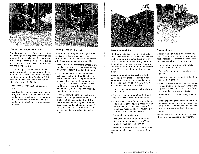
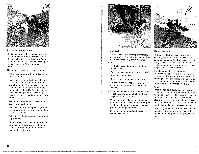
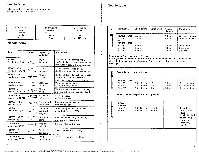
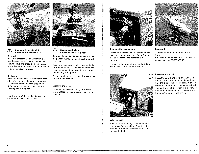
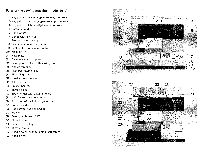
1s) 7, 1 Changing the needle plate Switch off the main switch Removal Raise the presser bar lifter. Position the needle plate changer (lamp changer) as shown above and press the needle plate upwards first on the right, then on the left. It can now be easily removed. Replacing Place the needle plate up against the rear edge of the cut-out, then press downwards at the front until you hear it snap in place. Before you start sewing, check that the needle plate is lying flat. Tip: Changing of the needle plate is even easier with a lowered feed dog! Cleaning and oiling Switch off the main switch Remove the needle plate and lower the feed dog. Clean the feed dog and hook area with the brush. Apply only one drop of oil to the area in the hook shown above. The machine otherwise requires no maintenance and must not be oiled at any other points. Clean and oil the sewing machine every 10 15 hours of operation. Cleaning the display Wipe the display with a soft, lint-free dry cloth. DO NOT use aggressive cleansers or solvents! Changing the sewing lamp Switch off the main switch. Disconnect the lead cord and the foot control plug from the machine. Remove the detachable work support. The sewing lamp (bulb) is located inside the needle head of the sewing machine. Important: The maximum wattage of the bulb is 5 watts. Bulbs can be purchased from your PFAFF dealer (part No. 92-329 975-05). Insertion of the bulb / Insert the bulb in tie lamp changer. Guide the bulb into the diagonal holder and turn it until the pins of the bulb engage. Push the bulb upward into the holder as far as it will go and turn it half a rotation in a clock-wise direction. Remove the bulb changer from ca the bulb, the bulb is held firmly. Bulb removal Push the bulb remover, as shown in the figure, up as far as it will go. Now turn the bulb half a rotation counter clock-wise and remove the bulb. 94 95
-
 1
1 -
2
-
3
-
4
-
5
-
6
-
7
-
8
-
9
-
10
-
11
-
12
-
13
-
14
-
15
-
16
-
17
-
18
-
19
-
20
-
21
-
22
-
23
-
24
-
25
-
26
-
27
-
28
-
29
-
30
-
31
-
32
-
33
-
34
-
35
-
36
-
37
-
38
-
39
-
40
-
41
-
42
-
43
-
44
-
 45
45 -
 46
46 -
 47
47 -
 48
48 -
 49
49 -
 50
50 -
 51
51 -
 52
52 -
 53
53 -
 54
54
 |
 |