RCA HD50LPW165 User Guide & Warranty - Page 19
How to Connect: TV + DTVLink Components - manual
 |
View all RCA HD50LPW165 manuals
Add to My Manuals
Save this manual to your list of manuals |
Page 19 highlights
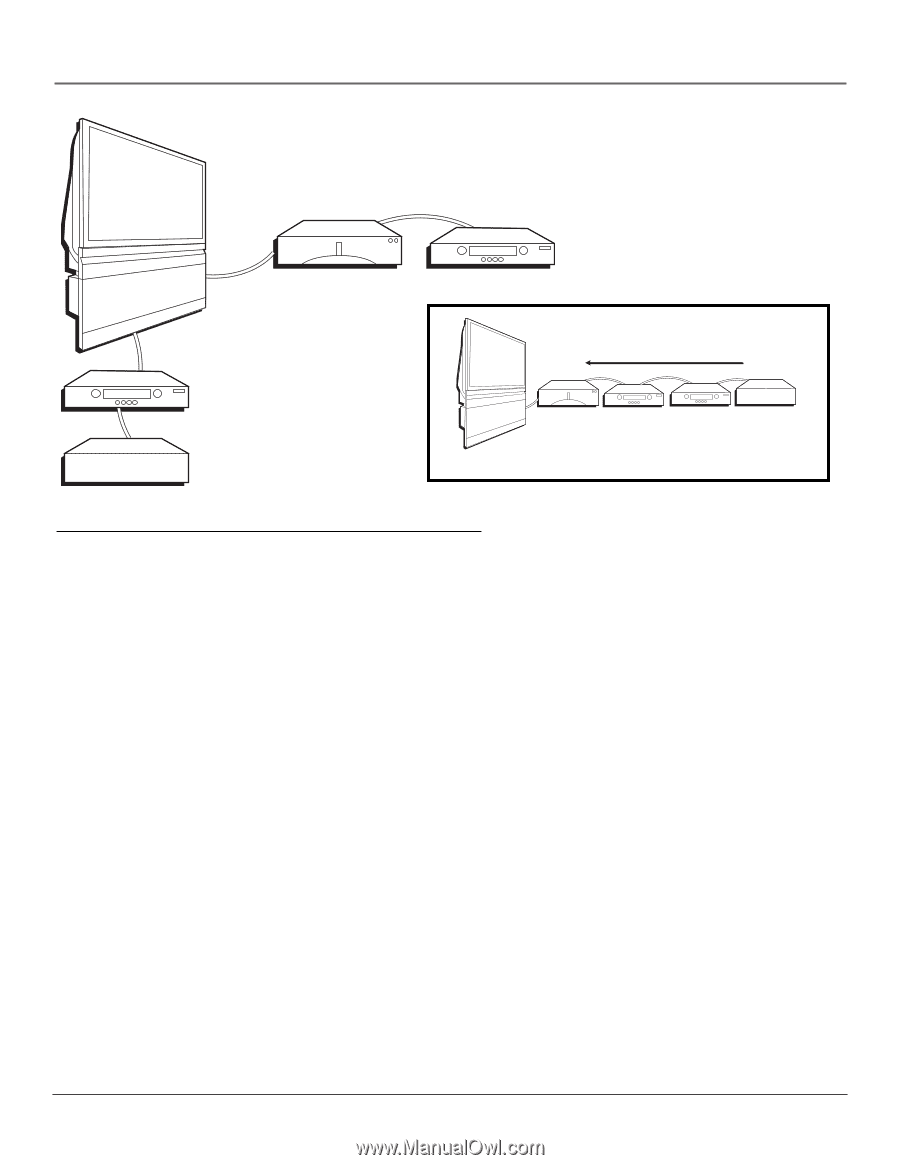
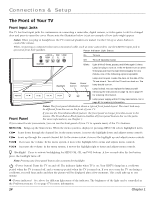
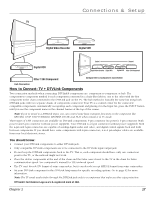
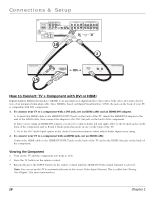
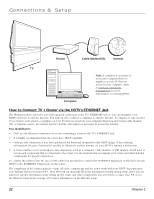
Connections & Setup TV Digital Video Recorder Digital VCR Digital VCR TV Fastest Slowest Digital Video Recorder Digital VCR Digital VCR Other 1394 Component Other 1394 Component Component-to-Component Connection Hub Connection How to Connect: TV + DTVLink Components Two connection methods when connecting DTVLink® components are: component-to-component or hub. The component-to-component method is each component connected in a chain-like fashion, one to the other with the first component in the chain connected to the DTVLink jack on the TV. The hub method is basically the same but using both DTVLink jacks with two separate chains of components connected. Your TV is a control center for the connected compatible components, automatically recognizing each component and placing it in the Input list: press the INPUT button until you see the component name in the channel banner at the top of the screen. Note: If you've tuned to a DTVLink input, you can control some basic transport functions on the component like RECORD, STOP, FAST FORWARD, REVERSE, PAUSE, and PLAY when remote is in TV mode. Three types of 1394 connectors are available on DTVLink components; 4-pin connector (no power); 6-pin connector (with power) and 6-pin connector (without power supplied). Your DTVLink is a 6-pin connector (without power supplied). Both the 4-pin and 6-pin connectors are capable of sending digital audio and video, and digital control signals back and forth between components. If you should have some components with 4-pin connectors, 4-to-6 pin adapter cables are available from your local electronic stores. You should know: • Connect your DTVLink components to either DTVLink jack. • Only compatible DTVLink components are to be connected to the DTVLink input/output jack. • Do not loop the DTVLink components back to the TV. That is, each component should have only one connection point to the TV, or the network might not work. • Place the slower components at the end of the chain and the faster ones closest to the TV in the chain for faster communication speed. See component's manual for 1394 network speed. • The TV can't decode DV format of some camcorders, but it can decode/accept MPEG2 format from some camcorders. • Set your DTVLink component in the DTVLink Setup menu for specific recording options. Go to page 62 for more information. Note: The TV sends audio/video through the DTVLink jack only to a component that enforces video copy protection. DTVLink® Certification Logo is a U.S. registered mark of CEA. Chapter 1 17
-
 1
1 -
2
-
3
-
4
-
5
-
6
-
7
-
8
-
9
-
10
-
11
-
12
-
13
-
 14
14 -
 15
15 -
 16
16 -
 17
17 -
 18
18 -
 19
19 -
 20
20 -
 21
21 -
 22
22 -
 23
23 -
 24
24 -
25
-
26
-
27
-
28
-
29
-
30
-
31
-
32
-
33
-
34
-
35
-
36
-
37
-
38
-
39
-
40
-
41
-
42
-
43
-
44
-
45
-
46
-
47
-
48
-
49
-
50
-
51
-
52
-
53
-
54
-
55
-
56
-
57
-
58
-
59
-
60
-
61
-
62
-
63
-
64
-
65
-
66
-
67
-
68
-
69
-
70
-
71
-
72
-
73
-
74
-
75
-
76
-
77
-
78
-
79
-
80
-
81
-
82
-
83
-
84
-
85
-
86
-
87
-
88
-
89
-
90
-
91
-
92
-
93
-
94
-
95
-
96
 |
 |