Ricoh Priport HQ9000 Operating Instructions
Ricoh Priport HQ9000 Manual
 |
View all Ricoh Priport HQ9000 manuals
Add to My Manuals
Save this manual to your list of manuals |
Ricoh Priport HQ9000 manual content summary:
- Ricoh Priport HQ9000 | Operating Instructions - Page 1
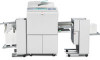
Operating Instructions 1 Before Using the Machine 2 Basics 3 Printing Functions 4 Troubleshooting 5 User Tools 6 Remarks 7 Entering Text 8 Specifications Read this manual carefully before you use this machine and keep it handy for future reference. For safe and correct use, be sure to read the - Ricoh Priport HQ9000 | Operating Instructions - Page 2
Introduction This manual contains detailed instructions and notes on the operation and use of this machine. For your safety and benefit, read this manual carefully before using the machine. Keep this manual in a handy place for quick reference. Important Contents of this manual are subject to change - Ricoh Priport HQ9000 | Operating Instructions - Page 3
❖ Operating Instructions (this manual) Describes operations, functions, User Tools (initial setting, mode setting, etc.) and troubleshooting. ❖ Network Guide (PDF file - CD-ROM *1 ) Describes procedures for configuring the machine and computers in a network environment. ❖ Printer Reference (PDF file - Ricoh Priport HQ9000 | Operating Instructions - Page 4
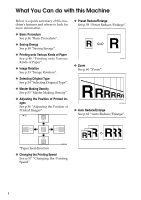
What You Can do with this Machine Below is a quick summary of this machine's features and where to look for more information. ❖ Basic Procedure See p.46 "Basic Procedure". ❖ Saving Energy See p.48 "Saving Energy". ❖ Printing onto Various Kinds of Paper See p.49 "Printing onto Various Kinds of Paper - Ricoh Priport HQ9000 | Operating Instructions - Page 5
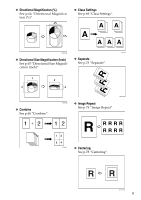
❖ Directional Magnification (%) See p.64 "Directional Magnification (%)". ❖ Class Settings See p.69 "Class Settings". CP2P01EE AJK210S ❖ Directional Size Magnification (Inch) See p.65 "Directional Size Magnification (inch)". ❖ Separate See p.73 "Separate". ❖ Combine See p.66 "Combine". - Ricoh Priport HQ9000 | Operating Instructions - Page 6
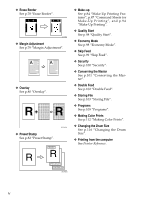
Feed See p.102 "Double Feed". ❖ Storing File See p.103 "Storing File". ❖ Programs See p.109 "Programs". ❖ Making Color Prints See p.112 "Making Color Prints". ❖ Changing the Drum Size See p.116 "Changing the Drum Size". ❖ Printing from the computer See Printer Reference. GRSTAM0E iv - Ricoh Priport HQ9000 | Operating Instructions - Page 7
Manual 8 Safety Information 9 Safety During Operation 9 Positions of RWARNING and RCAUTION Labels 11 Guide To Components 12 Options ...15 Option List ...15 Guide ...32 2. Basics Printing Preparations 33 Using the Paper Feed Tray and Delivery Tray 33 Using the LCIT and LCOT 36 After Printing - Ricoh Priport HQ9000 | Operating Instructions - Page 8
...98 Skip Feed ...99 Security ...100 Conserving the Master 101 Double Feed...102 Storing File ...103 Storing Data ...103 Changing a Stored File's User Name, File Name, or Password 105 Searching for Stored Files 106 Printing Stored Files 107 Deleting Stored Files 108 Printing or Deleting Stored - Ricoh Priport HQ9000 | Operating Instructions - Page 9
Drum Size 116 Printing Area (At 23°C/73°F, 65% RH 116 Master Cut Length 116 Combination Chart 117 4. Troubleshooting Tray 126 Loading Paper into LCIT 127 jAdding Ink ...128 CReplacing the Master Roll 130 x /Unit Indicator Lights 145 kRemoving the Used Master 146 When Multiple Sheets Are - Ricoh Priport HQ9000 | Operating Instructions - Page 10
Counter for All User Codes 166 Clearing the Counter 166 6. Remarks Do's and Don'ts 167 Where to Put Your Machine 169 Machine Environment 169 Moving...170 Power Connection 170 Access to the Machine 171 Maintaining Your Machine 172 Cleaning the Exposure Glass 172 Cleaning the exposure glass - Ricoh Priport HQ9000 | Operating Instructions - Page 11
8. Specifications Main Unit...179 Options ...183 Auto Document Feeder (ADF: DF Type 85 183 Twin Color Press Roller Printing System TC-IIR 183 Large Capacity System (LCS: LS3000R 184 Other Options...185 Consumables ...186 INDEX...187 ix - Ricoh Priport HQ9000 | Operating Instructions - Page 12
x - Ricoh Priport HQ9000 | Operating Instructions - Page 13
, bank drafts, checks, passports, driver's licenses. The preceding list is meant as a guide only and is not inclusive. We Users Notes to users in the United States of America Notice: This equipment has been tested and found to comply with the limits for a Class B digital device, pursuant to Part - Ricoh Priport HQ9000 | Operating Instructions - Page 14
Note to users in Canada Note: This Class B digital apparatus complies with Canadian ICES-003. Operation is subject to the met. To prevent radio interference to the licensed service, this device is intended to be operated indoors and away from windows to provide maximum shielding. Equipment (or its - Ricoh Priport HQ9000 | Operating Instructions - Page 15
FROM, OUT OF OR IN CONNECTION WITH THE SOFTWARE OR THE USE OR OTHER DEALINGS IN THE SOFTWARE. NetBSD 1. Copyright Notice of NetBSD For all users to use this product: This product contains NetBSD operating system: For the most part, the software constituting the NetBSD operating system is not in the - Ricoh Priport HQ9000 | Operating Instructions - Page 16
ANY DIRECT, INDIRECT, INCIDENTAL, SPECIAL, EXEMPLARY, OR CONSEQUENTIAL DAMAGES (INCLUDING, BUT NOT LIMITED TO, PROCUREMENT OF SUBSTITUTE GOODS OR SERVICES; LOSS OF USE, DATA, OR PROFITS; OR BUSINESS INTERRUPTION) HOWEVER CAUSED AND ON ANY THEORY OF LIABILITY, WHETHER IN CONTRACT, STRICT LIABILITY - Ricoh Priport HQ9000 | Operating Instructions - Page 17
original code provided by Ginger Alliance Ltd. b) The product manufacturer provides warranty and support to the application software of this product including the Sablotron 0.82 as modified, of the Sablotron 0.82 is available at: http://support-download.com/services/device/sablot/notice082.html. 5 - Ricoh Priport HQ9000 | Operating Instructions - Page 18
LIBRARY • The software installed on this product is based in part on the work of the Independent JPEG Group. SASL CMU includes software developed by Computing Services at Carnegie Mellon University ( DAMAGES OR ANY DAMAGES WHATSOEVER RESULTING FROM LOSS OF USE, DATA OR PROFITS, WHETHER IN AN ACTION OF - Ricoh Priport HQ9000 | Operating Instructions - Page 19
this software or this function. License is also granted to make and use derivative works provided that such works are identified as "derived from of any kind. These notices must be retained in any copies of any part of this documentation and/or software. MD5 Copyright (C) 1991-2, RSA Data Security, - Ricoh Priport HQ9000 | Operating Instructions - Page 20
How to Read This Manual Symbols This manual uses the following symbols: R WARNING: Indicates important safety these explanations. Note Indicates supplementary explanations of the machine's functions, and instructions on resolving user errors. Reference This symbol is located at the end of sections. - Ricoh Priport HQ9000 | Operating Instructions - Page 21
this manual, the following important symbols are used: R WARNING: Indicates a potentially hazardous situation which, if instructions are : • You spill something into the machine. • You suspect that your machine needs service or repair. • The external housing of your machine has been damaged. • Keep - Ricoh Priport HQ9000 | Operating Instructions - Page 22
or expended supply waste at household waste collection points. Disposal can take place at an authorized dealer. • When disposing of a used ink container, reattach the cap to prevent ink from splattering. • Be careful not to get ink on your clothes when replacing an ink container. Ink stains on - Ricoh Priport HQ9000 | Operating Instructions - Page 23
Positions of RWARNING and RCAUTION Labels This machine has labels for RWARNING and RCAUTION at the positions shown below. For safety, please follow the instructions and handle the machine as indicated. AJK100S 11 - Ricoh Priport HQ9000 | Operating Instructions - Page 24
Guide To Components 1. Front door Open to access the inside of the machine. 2. Control panel See Prevent paper skewing. 6. Paper feed tray Load paper here. 7. Paper feed side plates knob Use to move the side plates. 8. Paper feed side plates knob lock lever Locks the paper feed side plates. 12 - Ricoh Priport HQ9000 | Operating Instructions - Page 25
edge of prints. 5. Paper delivery tray Completed prints are delivered here. 6. Chocks Use to adjust the buffer fins. 7. Master eject unit handle E1 Use to pull out the master eject unit. 8. Ink holder Set the ink cartridge in this holder. 9. Drum unit lock lever B1 Lower to unlock and pull out the - Ricoh Priport HQ9000 | Operating Instructions - Page 26
will be fed automatically, one by one. (The illustration shows the ADF.) 13. Trailing edge guides Swing out these guides when you use A4, 81/2" × 11"KL paper. 14. Buffer fins Use to stack prints neatly. 15. Paper delivery end plate knob Use to move the end plate. 16. Paper delivery side plate knobs - Ricoh Priport HQ9000 | Operating Instructions - Page 27
802.11b interface board Memory unit HDD board Key Counter Model Name DF Type 85 Platen Cover Type 1018 LS3000R Metric version: Drum Type 90 / Inch version:Drum Type 90 (81/2" × 11") / TC-IIR PostScript3 Board Type 2 IEEE 1284 Parallel Board Type 1 IEEE 802.11b I/F Unit - Ricoh Priport HQ9000 | Operating Instructions - Page 28
Feeder ❖ Large Capacity System (LCS): Large capacity input tray (LCIT) 1. Indicators 2. Side guide adjustment knob 3. Down button 4. Up button 5. Side guide screw 6. Feeding pressure lever 7. Side guides AJK143S 8. Input tray 9. Power switch 10. Cover release lever 11. Cover 12. Intermediate - Ricoh Priport HQ9000 | Operating Instructions - Page 29
❖ Large Capacity System (LCS): Large capacity output tray (LCOT) AJK146S 1. Side guide adjustment knob 2. End plate screw 3. End plate 4. Output tray 5. Side guides 6. Up button 7. Down button 17 - Ricoh Priport HQ9000 | Operating Instructions - Page 30
of printed images. 3. {User Tools} key Press to change of printed images. 5. {Printer Settings} key Press to change Ink". C: Master End indicator. See p.130 "CReplacing the Master Roll". B: Load Paper indicator. See p.126 "BLoading Paper". k: Master Eject indicator. See p.146 "kRemoving the Used - Ricoh Priport HQ9000 | Operating Instructions - Page 31
17. Error indicator (Red) • On: An error has occurred. You can not make a master. • Off: Normal status 18. Speed setting keys Press to adjust the printing speed. See p.57 "Changing the Printing Speed". 19. {Initial position} key Press to reset to the standard image position. 20. Number keys Press to - Ricoh Priport HQ9000 | Operating Instructions - Page 32
item on the display panel, it is highlighted like . Keys appearing as cannot be used. Important ❒ A force or impact of more than 30 N (about 3 kgf) status and messages. 3. You can register up to three fre- quently used reduce/enlarge ratios other than the fixed reduce/enlarge ratios. 4. Numbers of - Ricoh Priport HQ9000 | Operating Instructions - Page 33
Common Key Operations The following keys are common to all screens. ❖ Key list [OK] [Cancel] [UPrev.], [TNext] [OK] [Yes] [Clear] [Exit] Acknowledges a selected function or entered values, and then returns to the previous display Deletes a selected function or entered values, and then returns to - Ricoh Priport HQ9000 | Operating Instructions - Page 34
finished warming up, you can make master and prints. Note ❒ This machine automatically enters Energy Saver Mode or turns itself off if you do not use it for a certain period. See p.48 "Saving Energy" and p.48 "Auto Off Timer". Turning On the Main Power A Make sure that the power cord is - Ricoh Priport HQ9000 | Operating Instructions - Page 35
Turning On the Power A Press the operation switch. Turning Off the Main Power Important ❒ Be sure to turn off the main switch before pulling out the power plug. Not doing this may result in damage to the hard disk or memory. A Open the switch cover, and turn off the main switch. AJK806S Note ❒ If - Ricoh Priport HQ9000 | Operating Instructions - Page 36
24 - Ricoh Priport HQ9000 | Operating Instructions - Page 37
1. Before Using the Machine Originals Size and Weights of Recommended Originals ❖ Metric version Where original is placed Exposure glass ADF Original size A3 L, B4 L, A4 KL, B5 - Ricoh Priport HQ9000 | Operating Instructions - Page 38
Before Using the Machine Non compatible originals for the Auto Document Feeder(ADF) , aluminum foil, carbon paper, or conductive paper. • Originals with indexes, tags, other projecting parts • Stapled or clipped original • Sticky originals such as translucent paper • Thin originals that have low - Ricoh Priport HQ9000 | Operating Instructions - Page 39
is difficult for the machine to automatically detect the sizes of the following types of originals, so select the paper size manually. 1 • Originals with indexes, tags, or other protrusions • Transparent originals such as OHP transparencies or translucent paper • Text or picture dense original - Ricoh Priport HQ9000 | Operating Instructions - Page 40
Before Using the Machine Print Paper 1 Recommended Paper Size and Type The following limitations apply: Metric Paper (12.5") *1 When the image position is set to 0 mm (0") Note ❒ Tray capacity is based on using high quality 80 g/m2 (20 lb.) paper. The num- ber of sheets shown is approximate. 28 - Ricoh Priport HQ9000 | Operating Instructions - Page 41
mm) stalled: 5.1" × 7.1") Paper stack height: Less than 345 mm (13.5") *1 When the image position is set to 0 mm (0") Note ❒ Tray capacity is based on using high quality 80 g/m2 (20 lb.) paper. The num- ber of sheets shown is approximate. Non-recommended Paper The following types of paper are - Ricoh Priport HQ9000 | Operating Instructions - Page 42
Do not use inkjet paper. It does not absorb ink well, print will smudge if rubbed, and the back of paper may be dirtied. ❒ If you print on rough grained paper, the print image might be blurred. ❒ You can use A3 (297 paper is curled, it might wrap around the drum or stains might appear. 30 TPEY990E - Ricoh Priport HQ9000 | Operating Instructions - Page 43
Print Paper Storing Paper Note ❒ When storing paper, the following precautions should always be taken: 1 • Do not store paper where it will be exposed to direct sunlight. • Avoid storing paper in humid (greater than 70%) areas. • Store on a flat surface. ❒ Keep open reams of paper in the - Ricoh Priport HQ9000 | Operating Instructions - Page 44
Before Using the Machine Printing Size 1 Maximum print size • Metric version: 290 × 412 mm, 11.4" × 16.2" (ap- prox. A3 size) • Inch version: 290 × 422 mm, 11.4" × 16.6" - Ricoh Priport HQ9000 | Operating Instructions - Page 45
2. Basics Printing Preparations Using the Paper Feed Tray and Delivery Tray Loading Paper A Carefully open the paper feed tray. C Make sure that the paper feed side plates knob lock - Ricoh Priport HQ9000 | Operating Instructions - Page 46
Basics E Make sure that the paper feed side plates are touching both sides of the paper, and then push the lock lever for the side plates down to lock the side plates into position. B Lift the paper delivery side plates and adjust them to match the pa- per size. 2 ZDCY041E Important ❒ Always - Ricoh Priport HQ9000 | Operating Instructions - Page 47
❖ Paper alignment wings Adjust the paper alignment wings. Use the paper alignment wings and chocks to stack printed paper thinner, slide the chocks up together. 2 ACY053S ❒ Depending on the type of paper you are using, you may not be able to load to capacity (1000 sheets) when the wings are raised - Ricoh Priport HQ9000 | Operating Instructions - Page 48
then grasp the paper feed side plates knob and move the side guides of the paper feed tray of the machine to the widest position. -Using the trailing edge guides When printing on A4KL, 81/2"KL, B5 JISKLsize paper, swing out the guides as shown below: AJK305S C Lower the paper feed side plates. 36 - Ricoh Priport HQ9000 | Operating Instructions - Page 49
of the machine. 2 ABQ004S Note ❒ Do not release the handle. E Lift the end of the intermediate feeding section and put it down placing the wheeled support bar onto the paper feed tray. ACY066S Turning On the Power Important ❒ Make sure to turn on the power switch of the LCS first, and - Ricoh Priport HQ9000 | Operating Instructions - Page 50
the machine. The LCIT must be detached. 2 A Detach the LCIT. B Load paper onto the paper feed tray. ABQ041S B Tighten the screw to lock the side guides. Setting up the LCOT A Press the up button to lift the out- put tray. The output tray goes up. C Load paper. AJK166S AJK160S B Turn the - Ricoh Priport HQ9000 | Operating Instructions - Page 51
paper size mark. Printing on Paper Smaller than B6 JIS A Move the side guides outward. AJK163S Printing on 81.4 g/m2 (21.6 lb.) or Heavier Paper A Note AJK162S ❒ Depending on the type of paper that you are using, you might not be able to use the full capac- ity (3000 sheets) of the LCOT when - Ricoh Priport HQ9000 | Operating Instructions - Page 52
Smaller than A4 or 81/2" × 11"KL Paper A Swing out the guides as shown in the illustration. B Remove prints. 2 AJK311S Removing Prints A Move the side guides outward, and then lift the end plate arm. ABQ027S C Move the side guides and end plate arm back to their original positions. Note ❒ Lower - Ricoh Priport HQ9000 | Operating Instructions - Page 53
After Printing After Printing This section shows you how to return the paper feed tray and paper delivery tray to their original positions. B After the paper feed tray has stopped moving, raise the paper feed side plates knob lock lever to release the side plates. Folding the Paper Feed Tray 2 - Ricoh Priport HQ9000 | Operating Instructions - Page 54
Basics Folding the Paper Delivery Tray A Slightly lower one of the side plates. D Slide the chocks down. 2 ACY050S B Remove the prints from the tray. ACY060S E Move the paper delivery end plate until its handle is flush with the end of the tray. ACY051S C Lower the paper alignment wings. - Ricoh Priport HQ9000 | Operating Instructions - Page 55
After Printing G Move the side plates to the widest position, and then lower them. D While pulling the LCIT release le- ver, detach the LCIT. 2 ACY055S H Close the paper delivery tray. ABQ009S Note ❒ Be sure to hold the handle of the intermediate feeding section when you detach the LCIT. E Fold - Ricoh Priport HQ9000 | Operating Instructions - Page 56
the exposure glass, place the originals face down. Placing Originals in the Auto When using the ADF, place the origi- Document Feeder nals face up. 2 A Adjust the guide to the original size. Placing Originals on the Exposure Glass B Insert the aligned originals face up into the ADF. A Lift - Ricoh Priport HQ9000 | Operating Instructions - Page 57
" × 17"K size originals, select as the Original Orientation. The machine will then rotate the print image by 90°. This is useful for printing large originals using the Combine, or 2 Stamp functions. For example, to print A3Kor 11" × 17"K originals with the Stamp func- tion selected: AJK300S - Ricoh Priport HQ9000 | Operating Instructions - Page 58
se- lect key is lit. the display. ❖ Initial print display Note ❒ If the machine has user codes set, enter your user code using the number keys, and then press [#]. Reference p.164 "User Code" AJK405S C Place the originals. Reference p.44 "Placing Originals" D Make the necessary settings. E Enter - Ricoh Priport HQ9000 | Operating Instructions - Page 59
Auto Reset If not used for a certain period run Press the {Clear/Stop} key. • there is no ink • originals or paper are jammed • it is making master or it is loading original images into memory • you are making changes with User Tools • there is no paper ❖ To check the settings Press the - Ricoh Priport HQ9000 | Operating Instructions - Page 60
Off mode The machine turns off automatically. To use it, turn the main switch on. Note ❒ if: • a warning message appears • there is no ink • originals or paper are jammed • it is making cover is open • you are making changes with User Tools • the user code entry screen is dis- played • the Data - Ricoh Priport HQ9000 | Operating Instructions - Page 61
the following steps. A Press [Feed Tray Paper Type]. B Make sure that [Normal] is select- ed. C Press [OK]. GRENVE0E * Paper feed direction Note ❒ When you use envelopes, the paper feed tray capacity is about 150 sheets (85 g/m2, 22 lb) or enough to load a stack up to 105 mm, 4.1" high. F If - Ricoh Priport HQ9000 | Operating Instructions - Page 62
Printing onto Special Paper Preparation To use this function, you have to register the special paper type in [User 1], or [User 2] with User Tools. 2 See p.157 "Paper Type: User1-2". A Press [Feed Tray Paper Type]. B Select [User 1] or [User 2]. C Press [Change Settings] D Press [OK]. 50 - Ricoh Priport HQ9000 | Operating Instructions - Page 63
Making a Master and Prints Making a Master and Prints Using the default settings, you can process masters and make prints in a C Press the {Start} key. single operation. This is called "Auto Cycle". You can also - Ricoh Priport HQ9000 | Operating Instructions - Page 64
Enter the required number of prints using the number keys. Selecting Cycle Setting When printing from a computer, one of the four master making and print- ing cycles listed below can be select- ed. For details about Cycle Settings, 2 see Printer Reference. • Auto Cycle • Original Page Cycle - Ricoh Priport HQ9000 | Operating Instructions - Page 65
orientation. Note ❒ The following tables list the combinations that can be used in Image Rotation 2 mode. ❖ Metric version Original A3L Paper A4L orientation. ✩: Place these originals in the optional ADF. Note ❒ If you use Zoom mode, custom size originals or paper, the image will not be - Ricoh Priport HQ9000 | Operating Instructions - Page 66
Photo If the original document contains a combination of text and photographs, it is printed using the optimum image balance. ❒ Black ink printed using [Pale] can produce a grayish color. ❒ Colored ink printed using [Pale] can produce pale colors for background images. Note A Press [Original Type - Ricoh Priport HQ9000 | Operating Instructions - Page 67
Making a Master and Prints B Select the type of original. Master Making Density You can adjust the print image density before making a master in the following cases. • When printing from faint origi- Adjust the contrast in the [Text / nals, set the image density darker. 2 Photo]and [Photo] - Ricoh Priport HQ9000 | Operating Instructions - Page 68
ing, it is only possible to adjust the print position and speed A Press the {Proof} key. Note ❒ You can also use the {Proof} key arranged in the right part of the control panel. GRPOSI0E * Paper feed direction A Press {Image position}. AJK438S A single printed page is ejected. Note ❒ Press - Ricoh Priport HQ9000 | Operating Instructions - Page 69
. gin at the leading edge. If there is no margin, paper might wrap around the drum and cause a misfeed. ❒ One push of either scroll key 2 shifts the image position printing speed and print quality depends on the type of paper you use. Limitation ❒ When printing on paper longer than 364 mm or - Ricoh Priport HQ9000 | Operating Instructions - Page 70
Basics 2 58 - Ricoh Priport HQ9000 | Operating Instructions - Page 71
a ratio regardless of the size of an original or printing paper. With some ratios, parts of the image might not be printed or margins will appear on prints. ❒ You can change the preset reproduction ratios with User Tools. See p.160 "Reproduction Ratio". ❒ Prints can be reduced or enlarged as follows - Ricoh Priport HQ9000 | Operating Instructions - Page 72
the {Start} key. Note ❒ You can select a preset ratio close to the ratio using [Reduce] or [Enlarge], and then adjust it further, using [n] or [o]. A Place the originals. B Press [Reduce / Enlarge]. -Create margin mode Use Create Margin to reduce the image to 93% of its original size with the - Ricoh Priport HQ9000 | Operating Instructions - Page 73
or [o] changes it in increments of 10%. ❒ If you have incorrectly entered the ratio, readjust it using [n] or [o]. To enter the ratio using the number keys A Press [Mag. Ratio]. B Enter the ratio using the num- ber keys. C Press [#]. D Press [OK]. D Press the {Start} key. Printing Functions 3 61 - Ricoh Priport HQ9000 | Operating Instructions - Page 74
Printing Functions Auto Reduce/Enlarge The machine can choose an appropriate reproduction ratio based on the paper and original sizes you select. 3 Note ❒ The range of ratios you can select are 50 - 200%. ❒ The table below shows the reproduction ratios that can be selected for various combinations - Ricoh Priport HQ9000 | Operating Instructions - Page 75
Printing Functions ❖ Inch version Original 11" × Paper 17"L 81/2" × 14"L 81/2" × 11"L 81/2" × 11"K 81/2" × 51/2"L *2 81/2 × 51/2" K *2 11" × 17"L 100% 121% 129% -- 200% -- 81/2" × 77% 100% -- -- 155% -- 14"L 81/2" × 65% 77% 11"L 100% 100% *1 129% 129% *1 81/2" × 11"K - Ricoh Priport HQ9000 | Operating Instructions - Page 76
[#]. E Press [OK]. CP2P01EE a: Horizontal ratio b: Vertical ratio Note ❒ You can also select a preset ratio close to the ratio using [Reduce] or [Enlarge], and then adjust it further, using [n] or [o]. A Place the originals. B Press [Reduce / Enlarge]. C Press [Specified Ratio]. To specify a ratio - Ricoh Priport HQ9000 | Operating Instructions - Page 77
originals. B Press [Reduce / Enlarge]. 3 C Press [Specified Ratio]. D Press [Direct. Mag. in]. E Enter the horizontal size of the original using the number keys, CP2M01EE and then press [#]. 1. Horizontal original size 2. Vertical original size 3. Horizontal print size 4. Vertical print size - Ricoh Priport HQ9000 | Operating Instructions - Page 78
B5 JISKL A3L *2 *1 *1 - B4 JISL A4KL *2 *2 *2 *2 *1 *2 *1 *1 B5 JISKL A5KL*3 *2 *2 *2 *2 *2 *2 *2 *2 *1: You can use these original and paper sizes to combine 4 one-sided originals. *2: You can use these original and paper sizes to combine 2 or 4 one-sided originals. *3: Only - Ricoh Priport HQ9000 | Operating Instructions - Page 79
If the reproduction ratio is under 49%, it is automatically adjusted to 50%. Parts of the image might not be printed. Note ❒ You can print a can set the machine to automatically cancel Combine mode once you have finished using it. See p.162 "Cancel Combine/Repeat Setting". ❒ If the orientation - Ricoh Priport HQ9000 | Operating Instructions - Page 80
shown below. 3 ZDCH110E Placing the originals (K) in the optional ADF A Place the originals face up with the first page on the top. B Adjust the document guides to the original size. AJK153S Note ❒ To avoid originals misfeeding, fan the originals before placing them in the ADF. B Press [Combine]. 68 - Ricoh Priport HQ9000 | Operating Instructions - Page 81
pattern of the number of prints and classes. You can also register frequently used pattern settings in the ma- ❒ When placing an original on the chine to enter the numbers of prints for each original manually. You can also register frequently used settings of the numbers of originals and prints in - Ricoh Priport HQ9000 | Operating Instructions - Page 82
class manually. You can also register frequently used settings of the numbers of prints in the machine's memory and recall these for future use. mode with User Tools. See p.163 "Auto 70 Separate (Class)". C Press [Class]. D Enter the number of prints and classes per pattern using the number - Ricoh Priport HQ9000 | Operating Instructions - Page 83
the number keys, and then press the {q} key. Note ❒ Up to 30 originals can be set. ❒ If you use this setting frequently you can register and recall a program. For details, see p.70 "Registering a program" and p.71 "Recalling a Program". E Press [OK] twice. F Press the {Start} - Ricoh Priport HQ9000 | Operating Instructions - Page 84
press the {q} key. F Press the{Start} key. Registering Classes Note ❒ Up to 30 classes can be set. A Press [Class Settings]. ❒ If you use this setting frequently you can register and recall a 3 program. See procedure of "Registering a Program" and "Recalling a Program" on p.70 "Class mode - Ricoh Priport HQ9000 | Operating Instructions - Page 85
mode. ❒ When you do not use Separate mode, you can select the machine condition after each print set is fed out to the paper delivery tray with User Tools. See p.157 "Auto Class". ❒ If there are less than 10 sheets of paper in the paper delivery tray, the machine may not be - Ricoh Priport HQ9000 | Operating Instructions - Page 86
Separate mode. The next sep- aration begins. ACY039S Image Repeat Use this function to repeat the image on the same sheet of paper. You can select to print 2, 4, 8 or 16 repeated images. Limitation ❒ Part of the repeated image might not be printed depending on the paper sizes, - Ricoh Priport HQ9000 | Operating Instructions - Page 87
these original and paper sizes to repeat 2 images. *2: You can use these original and paper sizes to repeat 2 or 4 images. *3: You can use these original and paper sizes to repeat 2, 4 or 8 images. *4: You can use these original and paper sizes to repeat 2, 4, 8 or 16 images. ❖ Placing originals - Ricoh Priport HQ9000 | Operating Instructions - Page 88
51/2" × 81/2" L -- 81/2" × 14"L *2 *2 *1 -- 81/2" × 11"KL *3 *2 *2 *1 3 *1: You can use these original and paper sizes to repeat 2 images. *2: You can use these original and paper sizes to repeat 2 or 4 images. *3: You can use these original and paper sizes to repeat 2, 4 or 8 images. A Place - Ricoh Priport HQ9000 | Operating Instructions - Page 89
repeated as often as the paper size allows. The sizes of originals you can use are as follows: Metric version Vertical: 50 - 300 mm Horizontal: 50 - 11.7 inch Horizontal: 2.0 - 18 inch 3 Limitation ❒ You cannot use Image Rotation, Size Magnification, or Erase Border with this function. A Place - Ricoh Priport HQ9000 | Operating Instructions - Page 90
size beforehand. If the original size is not detected automatically, enter the size using the number keys. ❒ The position of centring might shift when original size is can adjust the size of the mar- gins with User Tools. The default is 2 mm, 0.1". See p.162 "Erase Original Border Width"p.162 "Erase - Ricoh Priport HQ9000 | Operating Instructions - Page 91
Erase Original Border A Place the originals. B Press [Edit Image]. Printing Functions E Press [Erase Paper Border]. F Select the size and direction of the paper. G Press [OK] four times. H Press the {Start} key. Margin Adjustment You can make a binding margin. 3 C Press [Edit Image]. D Press [ - Ricoh Priport HQ9000 | Operating Instructions - Page 92
stored files first becomes the background image for all subsequent prints. The following originals selected from stored files are printed with this background. Note ❒ When using stored files to make overlay images, check if the orientation of stored files is appropriate. 80 - Ricoh Priport HQ9000 | Operating Instructions - Page 93
Printing Functions Image Overlay Select stored file A Place the original. B Press [Edit Image]. Note ❒ This function can be used only when the optional HDD board is installed. A Press [Stored File]. B Press the stored file name you want to select, and then press [OK]. 3 C Press [ - Ricoh Priport HQ9000 | Operating Instructions - Page 94
+ Store) Preset Stamp Note ❒ This function can be used only when the optional HDD board is installed. One of Limitation ❒ Only one message can be stamped at a time. Note ❒ This function can be used only when the optional HDD board is installed. ❒ The message "CONFIDENTIAL" is selected as a default. - Ricoh Priport HQ9000 | Operating Instructions - Page 95
Printing Functions Stamp position and original orientation E Press [All Pages] or [1st Page Only] to select the print page. Note ❒ You can change the stamp position, size, and density of the stamp. See p.83 "To change the stamp position, size, and density". F After you have specified all nec- - Ricoh Priport HQ9000 | Operating Instructions - Page 96
Command sheet allows you to create special effects without cutting and pasting. 3 By combining Make-Up modes and printing with different color drums, you can create a variety of printing effects. Make-Up Modes for Inside Areas Mode 1. Text mode Sample Command sheet/Original (Closed area - Ricoh Priport HQ9000 | Operating Instructions - Page 97
Printing Functions Make-Up Modes for Outside Areas Mode 1. Text mode: The area outside designated areas is printed in Letter mode. Sample Command sheet/Original HAWAII Print HAWAII Please enjoy your Summer vacation. Please enjoy your Summer vacation. 2. Photo mode: The area out- 3 side - Ricoh Priport HQ9000 | Operating Instructions - Page 98
Printing Functions Background Patterns A total of 160 background patterns is available in Make-Up mode: • 40 basic patterns • 40 patterns similar to the basic patterns but with patterns elements at 4 times the size. • 80 variants based on 90° rotations of all the basic and enlarged patterns. 3 * - Ricoh Priport HQ9000 | Operating Instructions - Page 99
for command sheets because any dark spots or streaks will be read as designated areas. ❒ Do not use blotting paper or other absorbent paper for command sheets because ink might leak through the paper and get the exposure glass dirty. Making a Command Sheet There are two ways of designating areas - Ricoh Priport HQ9000 | Operating Instructions - Page 100
method on the same com- mand sheet. 3 • There is no limit to the number of areas you can designate on a single command sheet. • If you use Outline mode for letter images with a thickness of less than 3mm, 0.12", the print image might come out as expected. 88 - Ricoh Priport HQ9000 | Operating Instructions - Page 101
depending on how the designated area is drawn, so remember the following when making the command sheet. Designated area Area recognized Preferred designated area Part of the designated area is surrounded by 3 sides of the entire area. Make a space of at least 2mm, 0.08", in front of the area - Ricoh Priport HQ9000 | Operating Instructions - Page 102
line must be drawn through the area that you wish to edit. A Put the command sheet on top of the original. 3 ZM-20 B Draw a line using a felt tip pen (black, red or blue) with a thickness of at least 1mm. ZM-21 Note ❒ Make sure there is no break in the line - Ricoh Priport HQ9000 | Operating Instructions - Page 103
, 0.08" Closed area method Note ❒ The line designating the area must be a closed loop. A Put the command sheet on top of the original. ZM-20 B Using a black, red, or blue felt tip pen, draw a line around the area to des- ignate. The line should have a thickness of at least 1mm. ZM - Ricoh Priport HQ9000 | Operating Instructions - Page 104
Printing Functions 3 a = Line marking the designated area b = 2mm, 0.08" c = Image within the designated area ❒ The line marking the designated area should be more than 2mm, 0.08", from any neighboring image. a b d c GRCOMM4E a = 2mm, 0.08" b = Neighboring image c = Line marking the - Ricoh Priport HQ9000 | Operating Instructions - Page 105
for designating rectangular areas. It is also more precise, but it is difficult to use for designating complex areas. ❖ Drawing a command sheet using a closed line fruit The closed line method is easier to use for complex areas, but it is less precise. It also takes longer to draw a command sheet - Ricoh Priport HQ9000 | Operating Instructions - Page 106
Printing Functions Make-Up Printing G Select the mode of outside area. A Place the command sheet face down on the exposure glass. When you select the Photo mode A Select the contrast and screen type, and then press [OK]. H Press the [OK] key. 3 B Press [Edit Image]. Note ❒ When you select - Ricoh Priport HQ9000 | Operating Instructions - Page 107
❖ ADF AJK153S Note ❒ If a command sheet or original misfeeds from the ADF, remove the misfed sheet or original and reset it in the ADF. ❒ It is not necessary to reset the previous command sheets or original. Printing Functions 3 95 - Ricoh Priport HQ9000 | Operating Instructions - Page 108
Printing Functions Printing Samples -Sample 1 A Command Sheet, Frame shape, Inside area: Erase Area mode B Outside area: Text mode C Print 3 1 2 3 ZM-50 1. Command sheet 2. Original 3. Print 96 - Ricoh Priport HQ9000 | Operating Instructions - Page 109
Printing Functions -Sample 2 A Print the original as it is B Change the drum unit for color printing C Command Sheet, Frame shape, Inside area: All Area pattern No. 39 D Outside area: Text mode E Print 3 1 2 3 1. Command sheet 2. Original 3. Print ZM-52 97 - Ricoh Priport HQ9000 | Operating Instructions - Page 110
. This is called Auto Quality Start. To solve this problem, you can have Note the machine carry out a few idle spins ❒ To use this function, you need to of the drum before a print run. set Auto Quality Start to [On] using 3 Note User Tools. See p.156 "Auto Quality Start Setting". ❒ You can - Ricoh Priport HQ9000 | Operating Instructions - Page 111
As the paper feeding time is longer than usual, you can use paper longer than the length limitation. The maximum length of paper in Skip Feed mode also have this step omitted by adjusting the User Tools settings. See p.156 "Skip Feed". A Select the number of drum ro- tations per sheet of paper fed - Ricoh Priport HQ9000 | Operating Instructions - Page 112
"Higher" Security This function has two security op- tions. Select which option to use in User Tools before using this function. See p.159 "Security Option". • Normal: No additional prints can be made and the drum unit cannot be pulled out. A Select "Higher Security" in "Se- curity Option" with - Ricoh Priport HQ9000 | Operating Instructions - Page 113
drum unit. The machine automatically changes the master length depending on the Note ❒ Under this option, security can paper size you use. This saves both master and ink User Tools. See p.158 "Master Cut Length". You can also save master using the optional A4 drum. See p.116 "Changing the Drum - Ricoh Priport HQ9000 | Operating Instructions - Page 114
the output and press [Exit]. Preparation Note To use the Double Feed function, select [On] in " drum". B Remove the misfed paper. Note ❒ If a double feed is wrongly detected while printing on the reverse side of paper or the face of printed paper, select [Off] for "Double Feed Warning" with User - Ricoh Priport HQ9000 | Operating Instructions - Page 115
{Clear Modes} key to cancel the file selection. ❖ File Name ❒ The user name used when adding a file to the machine is to identify 3 Stored files will this are easy to guess, so using them will not provide a worthwhile level of security. Note ❒ Enter a four-digit password. ❒ You can access to - Ricoh Priport HQ9000 | Operating Instructions - Page 116
"Placing Originals". B Press [Store File]. 3 Note ❒ When using the exposure glass, after the first original is scanned, place the subsequent password" D Press [OK]. E Make settings as desired. The User Name display appears. C Enter a user name, and then press [OK]. Reference p.177 "Entering Text" - Ricoh Priport HQ9000 | Operating Instructions - Page 117
B Press [File Name]. Storing File C Enter the password (four-digits) using the number keys, and then press [#]. The File Name display appears. password A Press [Store File]. B Press [Password]. B Select the file with the user name, file name, or password you want to change. Note ❒ If a password - Ricoh Priport HQ9000 | Operating Instructions - Page 118
Select the file. Note ❒ If a password has been set for E Enter the new user name, file name, or password, and then press [OK]. the file, enter the and then press [OK]. 3 Reference C Press [Details]. p.104 "To register a user name" p.105 "To change a file name" p.105 "To set or change - Ricoh Priport HQ9000 | Operating Instructions - Page 119
using the number keys. Note ❒ You can also print stored files via a Web browser from a computer in the network. For details on how to start the Web browser, see Network Guide file using [Search File]. ❒ You can sort file names in the list by user name, file name or date. To sort files, press [User - Ricoh Priport HQ9000 | Operating Instructions - Page 120
details, Guide. see the web browser's help. A Press [Select Stored File]. B Select the file to be deleted. Note ❒ If a password has been set for the file, enter the password and then press [OK]. ❒ You can search for a file using [Search File]. ❒ You can sort file names in the list by user name - Ricoh Priport HQ9000 | Operating Instructions - Page 121
. They are canceled only when you delete or overwrite them with another program. D Press the program number you want to store. E Enter the program name using the letter keys on the display panel. Storing a Program A Edit the print settings so all func- tions you want to store in this program are - Ricoh Priport HQ9000 | Operating Instructions - Page 122
]. Repeat steps E and F of "Storing a program". If you want to prevent someone from writing over your program, do the following. Note ❒ If all the user programs have been protected, you cannot store any setting in program menu. A Press the {Program} key. B Press [Protect]. C Press the number of the - Ricoh Priport HQ9000 | Operating Instructions - Page 123
Deleting a Program A Press the {Program} key. B Press [Erase]. C Press the number of the program you want to delete. A confirmation dialog box will appear. D Press [Delete]. The program is deleted, and the screen returns to the initial display. Programs 3 111 - Ricoh Priport HQ9000 | Operating Instructions - Page 124
lock lever (B1). AJK302S D Lift the upper drum stay (B3) a lit- tle to unlock the drum unit, and then pull out the drum unit while holding the drum unit handle (B2) and the upper drum stay (B3). AJK151S Note ❒ Make sure the green light be- side the drum unit lock lever is on before sliding out - Ricoh Priport HQ9000 | Operating Instructions - Page 125
Making Color Prints F Insert the color drum unit along the guide rail. I Lift drum unit lock lever (B1). TPEH290E G Lower the drum unit lock lever J Close the front door. AJK148S 3 (B1) of the inserted drum. Note ❒ Make sure that the Open Cov- er/Unit indicator turns off, and the color - Ricoh Priport HQ9000 | Operating Instructions - Page 126
of the print. A Prepare the two originals. Place the first original on the exposure glass or in the ADF. ❖ Exposure glass 3 GRCOLO0E Note ❒ Let the ink on the prints dry for a while before printing on them again. ❒ If the prints are not dry, the paper feed roller might become dirty. In - Ricoh Priport HQ9000 | Operating Instructions - Page 127
D Remove the prints from the paper delivery tray and place them on the paper feed tray again as shown in the illustration. ZDZY010E E Change the drum unit. See p.112 "Changing the Color Drum Unit". TPEH101E F Place the second original, and then press the {Start} key. Making Color Prints 3 115 - Ricoh Priport HQ9000 | Operating Instructions - Page 128
Printing Functions Changing the Drum Size To save costs on master rolls and ink, you can shorten the length of each master by changing to an optional smaller drum. Printing Area 3 (At 23°C/73°F, 65% RH) ❖ Metric version A3 drum A4 drum More than 290 × 410 mm, 11.4" × 16.2" More than 290 × 200 mm - Ricoh Priport HQ9000 | Operating Instructions - Page 129
Combination Chart This combination chart shows which functions can be used together. Can be used together. × Cannot be used together. 1 Cannot be used together. The first function selected takes priority. 2 Cannot be used together. The second function selected takes priority. 3 AJK320S 117 - Ricoh Priport HQ9000 | Operating Instructions - Page 130
Printing Functions 3 118 - Ricoh Priport HQ9000 | Operating Instructions - Page 131
of common problems and messages. If other messages appear, follow the instructions displayed. If a malfunction or a misfeed occurs, the following messages will appear on the display. Note ❒ For "Troubleshooting" about printing from a computer, refer to the other manuals for this machine - Ricoh Priport HQ9000 | Operating Instructions - Page 132
Troubleshooting Message Causes Solutions Communication error has occurred. Turn the operation switch off then on. Turn the operation switch off and on. - If the message appears again, contact your service representa- tive. Print image is The master image previously Make prints after - Ricoh Priport HQ9000 | Operating Instructions - Page 133
If you Cannot Make Clear Prints Faint Prints If the machine is not used for a long period of time or you change the color drum unit, the ink on the drum might dry causing print quality to deteriorate. To solve this problem, use Quality Start mode. See p.98 "Quality Start". If the print density is - Ricoh Priport HQ9000 | Operating Instructions - Page 134
print paper. ❒ When printing onto paper that does not absorb ink well, like postcards, the background of prints might be dirty. In this case, lower the printing speed or use Skip Feed mode to dry the ink on the prints. ❒ The drum unit is locked if the security mode is active. See p.100 "Security - Ricoh Priport HQ9000 | Operating Instructions - Page 135
cloth, remove any ink that has accumulated on the trailing edge of the drum unit. ZBHH210E Important 4 ❒ Do not use benzine, thinner, or other organic liquids-doing so can dam- age the machine. E Turn the drum unit and lock it after cleaning. ZBHH100E F Insert the drum unit until it locks - Ricoh Priport HQ9000 | Operating Instructions - Page 136
Troubleshooting If You Cannot Make Prints as You Want Problem functions. Some functions cannot be used together. See p.117 "Combination Chart". Parts of the image are not Erase . Warning" with User Tools. played frequently. Combine Problem Causes Prints are blank or parts of the Original - Ricoh Priport HQ9000 | Operating Instructions - Page 137
If You Cannot Make Prints as You Want Storing Files Problem Solution "Exceeded max. number of pages The number of -protected files tem- porarily. Press [Unlock] in Temporarily Unlock Stored File in User Tools. See p.159 "Tempo- rarily Unlock Stored Files". . You can delete all stored files at - Ricoh Priport HQ9000 | Operating Instructions - Page 138
Troubleshooting BLoading Paper Loading Paper into the Paper Feed Tray B Load the paper in the paper feed tray. Important ❒ Load paper when the paper feed tray - Ricoh Priport HQ9000 | Operating Instructions - Page 139
D Push the lock lever for the paper feed side plates down to lock the side plates into position. B Tighten the screw to lock the side guides. ZDCY041E Note ❒ Make sure that the paper size and orientation shown on the display panel match the size and orientation of paper loaded in the - Ricoh Priport HQ9000 | Operating Instructions - Page 140
of quality and function- ality, and we recommend that you use only the expendable supplies available at an authorized dealer. Note ❒ Be sure to supply ink of the same color as the current drum. ❒ Store ink in a cool, dry place. Do not store ink where it will be exposed to heat or direct sunlight - Ricoh Priport HQ9000 | Operating Instructions - Page 141
Open the front door. 2: Pull out the ink holder. • 3: Remove the used ink cartridge. • 4: Remove the cap of the new ink cartridge. 4 • 5: Insert the new cartridge into the ink holder. Note ❒ Always supply ink of the same color. • 6: Return the ink holder to its original position until it clicks - Ricoh Priport HQ9000 | Operating Instructions - Page 142
Troubleshooting CReplacing the Master Roll When C lights, it is time to replace the master roll. It also lights when the master roll is not set properly. Important ❒ Faults may occur if you use Open the master guide. AJK304S • 4: Open the master tray cover. • 5: Remove the used master roll. ACY042S - Ricoh Priport HQ9000 | Operating Instructions - Page 143
CReplacing the Master Roll • 8: Insert the master roll. ACY044S Note ❒ Make sure the leading edge reaches the interior of the master holder. 4 ACY045S • 9: Close the master guide. ACY046S • 10: Push in the master tray until it stops. ACY047S 131 - Ricoh Priport HQ9000 | Operating Instructions - Page 144
Troubleshooting print settings will be cleared. ❒ The master eject unit or the drum unit may be locked if the security mode is active. Enter the security in the correct positions? ❒ If misfeeds occur repeatedly, contact your service representative. "x + A" Paper Misfeeds in the Paper Feed Section A - Ricoh Priport HQ9000 | Operating Instructions - Page 145
B" Paper Misfeeds in the Paper Feed Section A Open the front door. B Lower drum unit lock lever (B1). TPEY080J • When printing onto postcards or thick paper, lower use paper where the leading edge has two right angle corners. Note ❒ For taking out the drum unit, see p.112 "Changing the Color Drum - Ricoh Priport HQ9000 | Operating Instructions - Page 146
Troubleshooting E If you cannot remove the misfed paper, remove it from the paper feed tray. C Take out the drum. F Set the drum unit and close the front door. 4 Note ❒ For setting the drum unit, see p.112 "Changing the Color Note Drum Unit". ❒ For taking out the drum unit, see p.112 " - Ricoh Priport HQ9000 | Operating Instructions - Page 147
Misfeeds When paper is wrapped around the drum A Open the front cover. B Lower drum unit lock lever (B1). F Set the drum unit and close the front door. Note ❒ For setting the drum unit, see p.112 "Changing the Color Drum Unit". C Take out the drum. When paper is misfed inside the machine - Ricoh Priport HQ9000 | Operating Instructions - Page 148
Troubleshooting D Remove the misfed paper from the inside as shown in the illustration. E If you cannot remove the misfed paper, remove paper from the pressure cylinder. 4 F Set the drum unit and close the front door. *: Less than 6 mm, 0.24" Note ❒ For setting the drum unit, see p.112 " - Ricoh Priport HQ9000 | Operating Instructions - Page 149
master roll (1), and then close the master tray cover (2). A Pull out the master tray until it stops. B Push the button and open the master guide. ACY043S F Position the master roll so that the edge reaches the interior of the master holder. 4 AJK304S C Rotate the spool backward to re- move - Ricoh Priport HQ9000 | Operating Instructions - Page 150
Troubleshooting "x + B + D" Master Misfeeds in the Master Feed Section A Open the front door. B Lower drum unit lock lever (B1). E Set the drum unit and close the front door. Note ❒ For setting the drum unit, see p.112 "Changing the Color Drum Unit". 4 C Take out the drum. "x + B + E" Master - Ricoh Priport HQ9000 | Operating Instructions - Page 151
misfed master. F Return lever (E3) and the master eject unit to their original positions. G Set the drum unit and close the front door. Note ❒ For setting the drum unit, see p.112 "Changing the Color Drum Unit". D Return the master eject unit to its original position and close the front door. -If - Ricoh Priport HQ9000 | Operating Instructions - Page 152
Troubleshooting A Slide out the master tray. "x + P" Original Misfeeds Occur in the Auto Document Feeder A Open the ADF cover. ACY048S B Open the cover at the bottom of 4 - Ricoh Priport HQ9000 | Operating Instructions - Page 153
x Clearing Misfeeds F Close the ADF cover until it clicks in position and if necessary, close the ADF. When Paper Misfeeds in the LCIT A Turn the cover release lever to un- lock the cover of the intermediate feeding section of the LCIT. ZDCY100E 4 -To prevent originals misfeeding: Placing some - Ricoh Priport HQ9000 | Operating Instructions - Page 154
Troubleshooting C Close the cover, and then move the cover release lever back to the original position. 4 Note ABQ030S ❒ If a paper misfeed message ap- pears on the machine, remove the paper misfed in the machine also. 142 - Ricoh Priport HQ9000 | Operating Instructions - Page 155
Changing the Paper Size Changing the Paper Size Changing the Paper Size of the Paper Feed Tray A Remove the paper from paper feed tray. C Place the paper on the paper feed tray. ACY008S 4 ACY009S The paper feed tray will lower. B Make sure that the paper feed side plates knob lock lever is - Ricoh Priport HQ9000 | Operating Instructions - Page 156
Troubleshooting Changing the Paper Size of LCIT A Take the paper stack out of the in- put tray. D Turn the side guide adjustment knob to adjust the side guides to the new paper size. ABQ041S 4 E Tighten the screw to lock the side ABQ033S guides. B F Remove the paper remaining in Load paper. - Ricoh Priport HQ9000 | Operating Instructions - Page 157
MWhen the Open Cover/Unit Indicator Lights MWhen the Open Cover/Unit Indicator Lights A message is displayed explaining the place where the doors/covers are not properly closed. ❖ Front door Close the front door completely. ❖ Optional LCIT Unit A Close the LCIT Unit cover. AJK112S ❖ Optional ADF - Ricoh Priport HQ9000 | Operating Instructions - Page 158
Troubleshooting kRemoving the Used Master When k lights, it is time to empty the master eject unit. It also lights when the master eject unit is not set properly. F Remove the used master by push- ing down the handle (1) towards the waste container (2). Note ❒ Ink is easily removed from skin by - Ricoh Priport HQ9000 | Operating Instructions - Page 159
Sheets Are Fed at the Same Time When Multiple Sheets Are Fed at the Same Time Follow the procedure below to correct a multiple sheet feed problem of the LCIT. A Adjust the feeding pressure lever of the LCIT according to the thickness of the paper loaded. ABQ025S Note ❒ The appropriate feeding - Ricoh Priport HQ9000 | Operating Instructions - Page 160
Troubleshooting When Prints Are Not Delivered in a Neat Stack When Printing on Small Size Paper A Slightly lower the end plate to raise the screw. -When paper - Ricoh Priport HQ9000 | Operating Instructions - Page 161
5. User Tools User Tools Menu System Settings ❖ General Features (See p.155 "General Features".) Panel Beeper mm/inch Default Warning Only • Metric version: mm • Inch version: inch ❖ Timer Settings ( - Ricoh Priport HQ9000 | Operating Instructions - Page 162
dpi) model as this model does not support the Double Feed function. ❖ Interface Settings • For details about network settings, see "User Tools Menu (System Settings)", Network Guide. ❖ Administrator Tools (See p.158 "Administrator Tools".) User Code Management Key Operator Code Restricted Access - Ricoh Priport HQ9000 | Operating Instructions - Page 163
User Tools Menu Master Making/Print Settings ❖ Reproduction Ratio (See p.160 "Reproduction Ratio".) Shortcut Reduce/Enlarge 1-3 Enlarge 1-4 Priority Setting:Enlarge Reduce 1-5 Priority Setting:Reduce Ratio for - Ricoh Priport HQ9000 | Operating Instructions - Page 164
User Tools ❖ Original Setting (See p.161 "Original Setting".) Master Making Density Original Type Text/Photo Contrast Photo Contrast Photo (Screen) Background Correction Default Normal Text Normal - Ricoh Priport HQ9000 | Operating Instructions - Page 165
User Tools Menu ❖ Prog.Key Settings (See p.163 "Prog.Key Settings".) Function Key:F1-F5 Default • F1: 1 Sided → 1 Sided Combine: 2 originals • F2: 1 Sided → 1 Sided Combine: 4 originals • F3: Create Margin • F4: Off • F5: Off 5 153 - Ricoh Priport HQ9000 | Operating Instructions - Page 166
display appears. Enter the key operator code, and then press [OK]. See p.158 "Key Operator Code". A Press the {User Tools} key. AJK435S Note ❒ You can also exit from User Tools by pressing [Exit]. AJK435S B Press [System Settings] or [Master Making / Print Settings]. C Select the desired menu, and - Ricoh Priport HQ9000 | Operating Instructions - Page 167
Settings You Can Change with User Tools Settings You Can Change with User Tools System Settings ❖ Set Time You can set the time for the ma- chine's internal clock using the General Features number keys. Note ❖ Panel Beeper Turns the beeper on or off. • All On (The beeper sounds ❒ To change - Ricoh Priport HQ9000 | Operating Instructions - Page 168
User you can restore the density by making a few extra prints or by using the Manual Quality Start mode. ❖ Auto Cycle Note Specifies whether Auto Cycle mode is making prints on custom size paper and the original image drum unit idles after the displayed time periods have passed in Auto Quality - Ricoh Priport HQ9000 | Operating Instructions - Page 169
You Can Change with User Tools ❖ No.of ldling Rotations: Quality Start ❖ Master/Ink Remaining Volume When you use the Quality Start mode, you can select how many times the drum unit idles. Note ❒ Default: 7 times ❖ Deflector Angle You can change the angle of the wing guide depending on the paper - Ricoh Priport HQ9000 | Operating Instructions - Page 170
code (max.4 digits) using the number keys, user code. User code must registered for User Code Management. See p.164 "User Code". Note ❒ Default: Off ❖ Restricted Access In Key Counter mode, you have to set the key counter before making prints. (To turn on Key Counter mode, contact your service - Ricoh Priport HQ9000 | Operating Instructions - Page 171
Counter Sets the counter value of all users to 0. • Clear Per User Sets the counter value of a selected user to 0. ❖ Program/Change/Delete User Code and Name You can register, change, or delete user codes and names. Note ❒ Up to 200 user codes (up to 4 digits) can be registered. Reference p.164 - Ricoh Priport HQ9000 | Operating Instructions - Page 172
to 99%). ❖ Priority Setting:Reduce You can set the ratio with priority when [Reduce / Enlarge] is pressed, followed by [Reduce]. ❒ When selecting [User Enlrg. Ratio], enter a ratio using the number keys (in the range of 101 to 200%). Note ❒ Default: • Metric version: 71% • Inch version: 74% 160 - Ricoh Priport HQ9000 | Operating Instructions - Page 173
Settings You Can Change with User Tools ❖ Ratio for Create Margin You can set a Reduce/Enlarge ratio on. ❖ Combine/Image Repeat Separation Line Note ❒ Default: Normal You can select a separation line using the Combine function from: None, Solid, Broken A, Broken B, ❖ Original Type or Crop Marks - Ricoh Priport HQ9000 | Operating Instructions - Page 174
User Tools ❖ Erase Original Border Width You can specify the width of erased border margins for originals using this function. Note ❒ Default: • Metric version: 2 mm • Inch version: 0.1" ❖ Erase Paper Border Width You can specify the width of erased border margins for prints using this function. ❖ - Ricoh Priport HQ9000 | Operating Instructions - Page 175
User Tools ❖ Auto Separate (Class) Specifies whether Separate mode Prog.Key Settings is automatically selected when you make prints in Class Setting mode. Note ❒ Default: On ❖ Function Key:F1-5 You can assign frequently used Mode Specify the economy mode level of ink. Note ❒ Default: Off 163 - Ricoh Priport HQ9000 | Operating Instructions - Page 176
of masters and prints made under each user code. F Enter the user code (up to four digits) using the number keys, and then press [#]. Note ❒ If you want to use this feature, se- lect [On] in "User Code Manage- ment"with User Tools menu. See p.158 "User Code Management". Note ❒ If you make - Ricoh Priport HQ9000 | Operating Instructions - Page 177
[Yes]. H Press [Exit]. F Enter the new user code and user name, and then press[OK]. G Press [Exit]. H Press the {User Tools} key. I Press the {User Tools} key. Displaying the Counter for Each User Code A Press the {User Tools} key. Deleting a User Code B Press [System Settings]. Note ❒ After - Ricoh Priport HQ9000 | Operating Instructions - Page 178
dialog box will appear. F Press [Yes]. Note ❒ Press [Select All on the Page] to select all user codes on the page. B Press [Clear Per User]. Clearing the Counter A Press the {User Tools} key. B Press [System Settings]. C Press [Administrator Tools]. D Press [Display / Clear / Print Counter per - Ricoh Priport HQ9000 | Operating Instructions - Page 179
that paper is wrapped around the drum and stop printing. • When you use envelopes or pasted print paper, the of prints on the paper delivery tray. • Print ink on the paper delivery tray might stick to the decrease. Therefore, make sure the supply from your electrical outlet is at least 90% of the - Ricoh Priport HQ9000 | Operating Instructions - Page 180
"On" of the "Double Feed Warning" with User Tools. See p.158 "Double Feed Warning". • When the paper feed 6 side plates securely. See p.33 "Using the Paper Feed Tray and Delivery Tray" • When paper onto Various Kinds of Paper". If the problem persists, fan or turn the paper over. • If - Ricoh Priport HQ9000 | Operating Instructions - Page 181
over, an injury might occur. R CAUTION: • If you use the machine in a confined space, make sure there is a continuous air turnover. 6 R CAUTION: • After you move the machine, use the caster fixture to fix it in place. Other- wise the machine might move - Ricoh Priport HQ9000 | Operating Instructions - Page 182
another local computer. Power Connection R WARNING: • Connect the power cord directly into a wall outlet and never use an ex- tension cord. • Only connect the machine to the power source describe in the manual. • Do not damage, break or make any modifications to the power cord. Do not place heavy - Ricoh Priport HQ9000 | Operating Instructions - Page 183
than 60 cm, 23.7" 3. More than 60 cm, 23.7" 4. More than 60 cm, 23.7" 6 Note ❒ For the required space when options are installed, contact your service representative. 171 - Ricoh Priport HQ9000 | Operating Instructions - Page 184
in this manual. Such parts should be cleaned by your 6 service representative. AM1P0100 Cleaning the Exposure Glass A Lift the exposure glass cover or ADF. B Clean A and B. Note ❒ If you do not clean the exposure glass cover, marks on the cover will be printed. Note ❒ When using the exposure - Ricoh Priport HQ9000 | Operating Instructions - Page 185
paper feed roll- er with a damp cloth, and then wipe it with a dry cloth. AM1D600 Note ❒ If you do not clean the sheet, marks on the sheet will be printed. Cleaning the paper feed roller (paper feed tray) A Wipe dust off the paper feed roll- er with a damp cloth, and then wipe - Ricoh Priport HQ9000 | Operating Instructions - Page 186
sure to contact your service engineer to verify the following: ❖ Machine Maintenance/Repair Enquiry information is displayed. • Telephone No. Printing Enquiry information • Serial No. of Machine ❖ Sales Representative A Press [Print Enquiry List]. • Telephone No. A Press the {User Tools} key - Ricoh Priport HQ9000 | Operating Instructions - Page 187
Changing the Display Language You can change the language used on the display. English is set as default setting. A Press the {User Tools} key. AJK435S B Press [Español]. The display language is changed to Spanish. C Press [Salir]. The menu appears in Spanish. Note ❒ If you want to - Ricoh Priport HQ9000 | Operating Instructions - Page 188
of total sheets using counter, and check the number of sheet after resetting. You can also reset the resettable counter. A Press the {User Tools} key. Counter / Data Print]. 6 Reference p.69 "Class Settings" A Press the {User Tools} key. B Press [Counter / Data Print]. Reset the Counter A - Ricoh Priport HQ9000 | Operating Instructions - Page 189
character is shown before that character. Available Characters • Alphabetic characters ABCDEFGHIJKLMNOPQRSTUVWXYZabcdefghijklmnopqrstuvwxyz • Symbols • Numerals 0123456789 Keys AFU110S Note ❒ When entering uppercase or lowercase letters continuously, use [Shift Lock] to lock the case. 177 - Ricoh Priport HQ9000 | Operating Instructions - Page 190
Entering Text Entering Text Entering letters A Press [Shift] to switch between uppercase and lowercase. B Press the letters you want to enter. Deleting characters A Press [Backspace] or [Delete All] to delete characters. 7 178 - Ricoh Priport HQ9000 | Operating Instructions - Page 191
8. Specifications Main Unit ❖ Configuration: Floor standing ❖ Printing Process: Full automatic one drum system ❖ Original Type: Sheet/Book ❖ Original Size: Maximum 300 mm × 432 mm, 11.8" × 17.0" ❖ Pixel Density: • Type 1 600 × 600 dpi (dots per inch) • Type 2 400 × - Ricoh Priport HQ9000 | Operating Instructions - Page 192
(A4, 81/2" × 11"K) • Type 2 Less than 16 seconds (A3, 11" × 17"L) Less than 12 seconds (A4, 81/2" × 11"K) ❖ Color Printing: Drum unit replacement system ❖ Image Position: • Vertical: • Inch version: ± 10 mm, ± 0.4" • Metric version: ± 15 mm, ± 0.6" • Side: 180 ± 10 mm, ± 0.4" (for either - Ricoh Priport HQ9000 | Operating Instructions - Page 193
More than 100 masters • 11" × 17" drum 90 masters • A4 drum 140 masters ❖ Dimensions (W × D × H) Width Stored 750 mm, 29.5" Stored with ADF 750 mm, 29.5" Set up 1420 mm, 55.9" Set up with cabinet 1420 mm, 55.9" Set up with cabinet and ADF (when you use A3, 11" × 17" or larger paper) 1420 - Ricoh Priport HQ9000 | Operating Instructions - Page 194
Specifications ❖ Power Consumption: • Making a master: Type1: Less than 0.340 kW Type2: Less than 0.355 kW • Printing: Less than 0.285kW (when printing speed is 135 cpm) 8 182 - Ricoh Priport HQ9000 | Operating Instructions - Page 195
mm, 11.6" × 17.0" Minimum: 70 mm × 250 mm, 2.8" × 9.8" ❖ Print Paper Weight: • 52.3 - 209.3 g/m2, 13.9 - 55.6 lb ❖ Print Speed: 90 - 120 cpm (3 increments) ❖ Color Printing: Drum unit replacement system ❖ Paper Feed Tray Capacity: 1,000 sheets (80 g/m2, 20 lb) Options 8 183 - Ricoh Priport HQ9000 | Operating Instructions - Page 196
21.9" ❖ Weight: • Machine: Less than 88 kg, 194 lb ❖ Power Consumption: • Printing: 0.55kW(Max) ❖ Optional Equipment: • Drum unit: Metric version: Drum Type 90 / Inch version: Drum Type 90 (81/2" × 11") / Note ❒ Specifications are subject to change without notice. Large - Ricoh Priport HQ9000 | Operating Instructions - Page 197
22" × 20.1" × 30.6") ❖ Weight: • LCIT: Less than 45 kg, 99 lb. • LCOT: Less than 30 kg, 66 lb. Other Options • Drum Unit Metric version: Drum Type 90 / Inch version: Drum Type 90 (81/2" × 11") / • Platen Cover Type 1018 • Key Counter • PostScript3 Board Type 2 • IEEE 1284 - Ricoh Priport HQ9000 | Operating Instructions - Page 198
A4 drum 320 masters can be made per roll Ink-Black 1,000ml/pack Environmental conditions: -5 to 40°C 10 - 95% RH Ink-Red 1,000ml/pack Ink-Blue Ink-Green Ink-Brown Ink-Purple Ink-Yellow Ink-Navy Ink-Maroon Ink-Teal 8 Ink-Orange Ink-Gray Ink-Violet Ink-Hunter green Ink-Burgundy Ink - Ricoh Priport HQ9000 | Operating Instructions - Page 199
sided originals, 66 4 one-sided originals, 66 A Adding ink, 128 ADF, 16 Adjusting the position of printed images, 56 for each user code, 165 Display Language Changing, 175 Display panel, 20 Double feed, 102 Down button, 16, 17 Drum size, 116 Drum unit, 13 Drum unit handle B2, 112 Drum unit lock - Ricoh Priport HQ9000 | Operating Instructions - Page 200
155 Guide to Components, 12 H Higher security, 100 Hold Data-in key, 18 I Image position key, 18 Image rotation, 53 Indicators, 16, 18 Initial position key, 19 Ink, 128, 186 Ink holder Paper or master wrapped around the drum, 134 Paper type, 49, 50 Password Changing, 105 Setting or changing, 105 - Ricoh Priport HQ9000 | Operating Instructions - Page 201
167 Removing the used master, 146 Repeat, 74 Replacing master roll, 130 S Safety information, 9 Saving energy, 48 Screen contrast knob, 18 Security, 100 Service call, 120 Set Date, 155 Set Time, 155 Setting or changing Password, 105 Setting up the paper delivery tray, 34 Side guide adjustment knob - Ricoh Priport HQ9000 | Operating Instructions - Page 202
U Up button, 16, 17 User Code, 164 User Name Changing, 105 User Tools, 149 Changing defaults, 154 Quitting User Tools, 154 User Tools key, 18 W Web browser Storing files, 108 What you can do with this machine, ii When the image density is too light, 121 Where - Ricoh Priport HQ9000 | Operating Instructions - Page 203
provided. Caution (In case of USB2.0 environment): Use a commercially available shielded USB cable. Declaration of Conformity Product Name: Duplicator Model Number: CP6346/LDD280/HQ9000/3590DNP CP6334/LDD250/HQ7000/3580DNP Responsible Party: Ricoh Corporation Address: 5 Dedrick Place, West Caldwell - Ricoh Priport HQ9000 | Operating Instructions - Page 204
Operating Instructions Type for CP6346/LDD280/HQ9000/3590DNP Type for CP6334/LDD250/HQ7000/3580DNP EN USA C262-0756A
-
 1
1 -
 2
2 -
 3
3 -
 4
4 -
 5
5 -
 6
6 -
 7
7 -
8
-
9
-
10
-
11
-
12
-
13
-
14
-
15
-
16
-
17
-
18
-
19
-
20
-
21
-
22
-
23
-
24
-
25
-
26
-
27
-
28
-
29
-
30
-
31
-
32
-
33
-
34
-
35
-
36
-
37
-
38
-
39
-
40
-
41
-
42
-
43
-
44
-
45
-
46
-
47
-
48
-
49
-
50
-
51
-
52
-
53
-
54
-
55
-
56
-
57
-
58
-
59
-
60
-
61
-
62
-
63
-
64
-
65
-
66
-
67
-
68
-
69
-
70
-
71
-
72
-
73
-
74
-
75
-
76
-
77
-
78
-
79
-
80
-
81
-
82
-
83
-
84
-
85
-
86
-
87
-
88
-
89
-
90
-
91
-
92
-
93
-
94
-
95
-
96
-
97
-
98
-
99
-
100
-
101
-
102
-
103
-
104
-
105
-
106
-
107
-
108
-
109
-
110
-
111
-
112
-
113
-
114
-
115
-
116
-
117
-
118
-
119
-
120
-
121
-
122
-
123
-
124
-
125
-
126
-
127
-
128
-
129
-
130
-
131
-
132
-
133
-
134
-
135
-
136
-
137
-
138
-
139
-
140
-
141
-
142
-
143
-
144
-
145
-
146
-
147
-
148
-
149
-
150
-
151
-
152
-
153
-
154
-
155
-
156
-
157
-
158
-
159
-
160
-
161
-
162
-
163
-
164
-
165
-
166
-
167
-
168
-
169
-
170
-
171
-
172
-
173
-
174
-
175
-
176
-
177
-
178
-
179
-
180
-
181
-
182
-
183
-
184
-
185
-
186
-
187
-
188
-
189
-
190
-
191
-
192
-
193
-
194
-
195
-
196
-
197
-
198
-
199
-
200
-
201
-
202
-
203
-
204
 |
 |
Operating Instructions
Read this manual carefully before you use this machine and keep it handy for future reference. For safe and correct use, be sure to read the
Safety Information before using the machine.
Before Using the Machine
Basics
Printing Functions
Troubleshooting
User Tools
Remarks
Entering Text
Specifications
1
2
3
4
5
6
7
8