Samsung SCX4521F User Manual (ENGLISH) - Page 41
Adjusting the Document Resolution, Sending a Fax Automatically, Resolution, Enter, Start - printer scx
 |
UPC - 635753616040
View all Samsung SCX4521F manuals
Add to My Manuals
Save this manual to your list of manuals |
Page 41 highlights
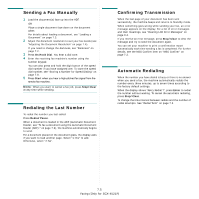
Adjusting the Document Resolution The default document settings produce good results when using typical text-based documents. However, if you send documents that are of a poor quality, or contain photographs, you can adjust the resolution to produce a higher quality fax. 1 Press Resolution on the control panel. 2 By pressing Resolution or the scroll button ( or ), you can choose from Standard, Fine, Super Fine, Photo, and Color. 3 When the mode you want to use displays, press Enter to make your selection. The document types recommended for the resolution settings are described in the table below: Mode Recommended for: Standard Documents with normal sized characters. Fine Super Fine Documents containing small characters or thin lines or documents printed using a dot-matrix printer. Documents containing extremely fine detail. Super Fine mode is enabled only if the machine with which you are communicating also supports the Super Fine resolution. See the notes below. Photo Documents containing shades of gray or photographs. Color Documents with colors. Sending a color fax is enabled only if the machine with which you are communicating supports color fax reception and you send the fax manually. In this mode, memory transmission is not available. NOTES: • For memory transmission, Super Fine mode is not available. The resolution setting is automatically changed to Fine. • When your machine is set to Super Fine resolution and the fax machine with which you are communicating does not support Super Fine resolution, the machine transmits using the highest resolution mode supported by the other fax machine. Sending a Fax Automatically 1 Load the document(s) face up into the ADF. OR Place a single document face down on the document glass. For details about loading a document, see "Loading a Document" on page 7.3. 2 Adjust the document resolution to suit your fax needs (see "Adjusting the Document Resolution" on page 7.4). If you need to change the darkness, see "Darkness" on page 7.2. 3 Enter the remote fax phone number using the number keypad. You can also press and hold the digit button of the speed dial number if you have assigned one. To store the speed dial number, see "Storing a Number for Speed Dialing" on page 7.8. 4 Press Start. 5 When a document is placed on the document glass, the display shows "Another Page?" on the top line after the document is scanned into the memory. If you have the next page, remove the scanned page and place the next page on the glass and select "1:Yes". Repeat as necessary. After all of the pages are scanned, select "2:No" when the display shows "Another Page?". 6 The number is dialed and then the machine begins sending the fax when the receiving fax machine is ready. NOTE: When you want to cancel a fax job, press Stop/Clear at any time while sending. 7.4 Faxing (Only for SCX-4521F)
-
 1
1 -
2
-
3
-
4
-
5
-
6
-
7
-
8
-
9
-
10
-
11
-
12
-
13
-
14
-
15
-
16
-
17
-
18
-
19
-
20
-
21
-
22
-
23
-
24
-
25
-
26
-
27
-
28
-
29
-
30
-
31
-
32
-
33
-
34
-
35
-
 36
36 -
 37
37 -
 38
38 -
 39
39 -
 40
40 -
 41
41 -
 42
42 -
 43
43 -
 44
44 -
 45
45 -
 46
46 -
47
-
48
-
49
-
50
-
51
-
52
-
53
-
54
-
55
-
56
-
57
-
58
-
59
-
60
-
61
-
62
-
63
-
64
-
65
-
66
-
67
-
68
-
69
-
70
-
71
-
72
-
73
-
74
-
75
-
76
-
77
-
78
-
79
-
80
-
81
-
82
-
83
-
84
-
85
-
86
-
87
-
88
-
89
-
90
-
91
-
92
-
93
-
94
-
95
-
96
-
97
-
98
-
99
-
100
-
101
-
102
-
103
-
104
-
105
-
106
-
107
-
108
-
109
-
110
-
111
-
112
-
113
-
114
-
115
-
116
-
117
 |
 |
