Samsung SCX4521F User Manual (ENGLISH) - Page 47
Searching with a Particular First Letter, Printing a Phonebook List, Sending Broadcast Faxes - scx scan
 |
UPC - 635753616040
View all Samsung SCX4521F manuals
Add to My Manuals
Save this manual to your list of manuals |
Page 47 highlights
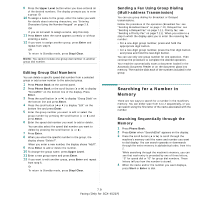
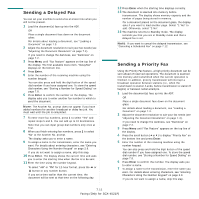
Searching with a Particular First Letter 1 Press Phone Book. 2 Press Enter when "Search&Dial" appears on the display. 3 Press the button labeled with the letter you want to search for. A name beginning with the letter displays. For example, if you want to find the name "MOBILE" press the 6 button, which is labeled with "MNO". 4 Press the scroll button ( or ) to display the next name. 5 When the name and/or the number you want displays, press Start or Enter to dial. Printing a Phonebook List You can check your automatic dial setting by printing a Phonebook list. 1 Press Phone Book. 2 Press Phone Book or the scroll button ( or ) until "Print" appears on the bottom line and press Enter. A list showing your speed dial, and group dial entries prints out. Other Ways to Fax Sending Broadcast Faxes Using the Broadcasting button on the control panel, you can use the broadcast fax feature, which allows you to send a document to multiple locations. Documents are automatically stored in memory and sent to a remote station. After transmission, the documents are automatically erased from memory. 1 Load the document(s) face up into the ADF. OR Place a single document face down on the document glass. For details about loading a document, see "Loading a Document" on page 7.3. 2 Adjust the document resolution to suit your fax needs (see "Adjusting the Document Resolution" on page 7.4). If you need to change the darkness, see "Darkness" on page 7.2. 3 Press Broadcasting on the control panel. 4 Enter the number of the first receiving machine using the number keypad. You can also press and hold the digit button of the speed dial number if you have assigned one. To store the speed dial number, see "Storing a Number for Speed Dialing" on page 7.8. 5 Press Enter to confirm the number. The display asks you to enter another fax number to send the document. NOTE: The Another No. prompt does not appear if you have added numbers for another broadcast or delay fax job. You must wait until the job is completed. 6 To enter more fax numbers, press 1 to select "Yes" and repeat steps 4 and 5. You can add up to 10 destinations. Note that you can input group dial numbers only once at first. 7 When you finish entering fax numbers, press 2 to select "No" at the Another No. prompt. The document is scanned into memory before transmission. The display shows memory capacity and the number of pages being stored in memory. For a document placed on the document glass, the display asks if you want to load another page. Select "1:Yes" to add. Otherwise, select "2:No". 8 The machine begins sending the document to the numbers you entered in the order in which you entered them. 7.10 Faxing (Only for SCX-4521F)
-
 1
1 -
2
-
3
-
4
-
5
-
6
-
7
-
8
-
9
-
10
-
11
-
12
-
13
-
14
-
15
-
16
-
17
-
18
-
19
-
20
-
21
-
22
-
23
-
24
-
25
-
26
-
27
-
28
-
29
-
30
-
31
-
32
-
33
-
34
-
35
-
36
-
37
-
38
-
39
-
40
-
41
-
 42
42 -
 43
43 -
 44
44 -
 45
45 -
 46
46 -
 47
47 -
 48
48 -
 49
49 -
 50
50 -
 51
51 -
 52
52 -
53
-
54
-
55
-
56
-
57
-
58
-
59
-
60
-
61
-
62
-
63
-
64
-
65
-
66
-
67
-
68
-
69
-
70
-
71
-
72
-
73
-
74
-
75
-
76
-
77
-
78
-
79
-
80
-
81
-
82
-
83
-
84
-
85
-
86
-
87
-
88
-
89
-
90
-
91
-
92
-
93
-
94
-
95
-
96
-
97
-
98
-
99
-
100
-
101
-
102
-
103
-
104
-
105
-
106
-
107
-
108
-
109
-
110
-
111
-
112
-
113
-
114
-
115
-
116
-
117
 |
 |
