Samsung SNB-5000 User Manual
Samsung SNB-5000 Manual
 |
View all Samsung SNB-5000 manuals
Add to My Manuals
Save this manual to your list of manuals |
Samsung SNB-5000 manual content summary:
- Samsung SNB-5000 | User Manual - Page 1
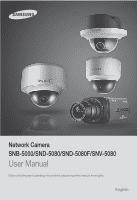
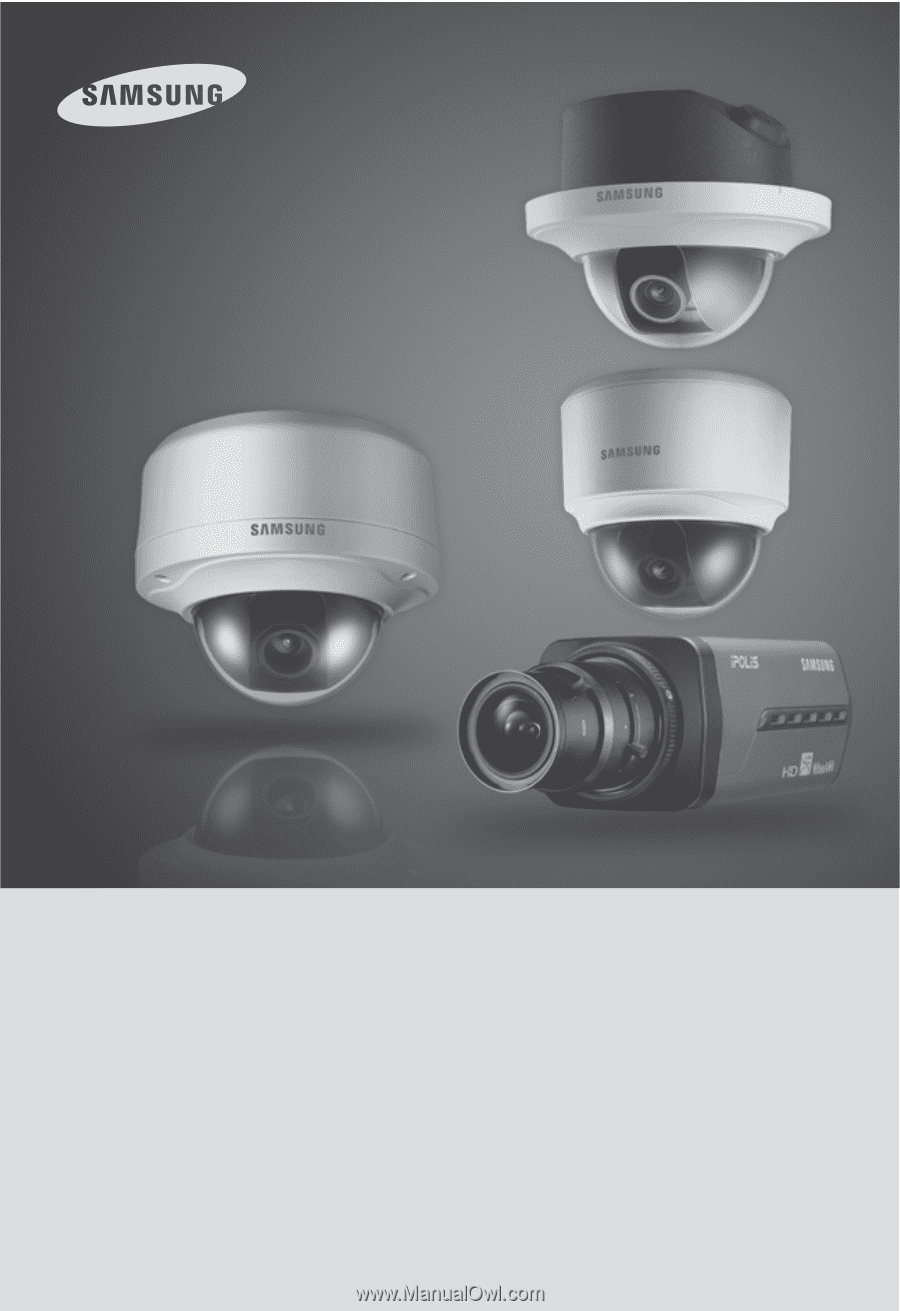
Network Camera SNB-5000/SND-5080/SND-5080F/SNV-5080 User Manual Before installing and operating this product, please read this manual thoroughly. English - Samsung SNB-5000 | User Manual - Page 2
block any ventilation openings, Install in accordance with the manufacturer's instructions. 8. Do not install near any heat sources such as radiators unused for long periods of time. 14. Refer all servicing to qualified service personnel. Servicing is required when the apparatus has been damaged in - Samsung SNB-5000 | User Manual - Page 3
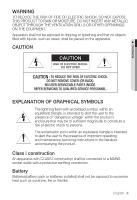
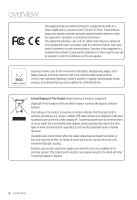
electric shock to persons. The exclamation point within an equilateral triangle is intended to alert the user to the presence of important operating and maintenance (servicing) instructions in the literature accompanying the product. Class construction An apparatus with CLASS construction shall be - Samsung SNB-5000 | User Manual - Page 4
reduce the risk of electric shock do not perform any servicing other than that contained in the operating instructions unless you are qualified to do so. The BNC output port is used to monitor the installation process of the network camera. If you keep the BNC cable connected, a risk of lightening - Samsung SNB-5000 | User Manual - Page 5
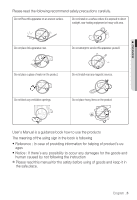
not place this apparatus near. Do not attempt to service this apparatus yourself. Do not place a glass Do not place heavy items on the product. User's Manual is a guidance book how to use the products The following the instruction Ú Please read this manual for the safety before using of goods - Samsung SNB-5000 | User Manual - Page 6
accordance with the instruction manual, may cause harmful interference to radio communications. Operation of this equipment in a residential area is likely to cause harmful interference in which case the user will be required to correct the interference at his own expense. Samsung - Samsung SNB-5000 | User Manual - Page 7
to a PPPoE Modem 45 Connecting the Camera to an IP Router with the PPPoE/Cable Modem 46 IP Address Setup 47 Static IP Setup 50 Dynamic IP Setup 51 Port Range Forward (Port Mapping) Setup 52 Connecting to the Camera from a Shared Local PC 52 Connecting to the Camera from a Remote PC via the Internet - Samsung SNB-5000 | User Manual - Page 8
Screen Menu 68 Playback SETUP SCREEN 70 70 Setup 70 Audio & Video Setup 73 Network Setup 77 Event Setup 83 System Setup APPENDIX 87 87 Camera Specification 89 Network Specification 91 Troubleshooting 93 GPL/LGPL Software License 8_ overview - Samsung SNB-5000 | User Manual - Page 9
264/MPEG-4/MJPEG Multi-Streaming This network camera supports the H.264/MPEG-4/MJPEG codec and can display videos in different resolutions and qualities simultaneously with different Codecs. y Support various communication protocols Supports TCP/IP, UDP, RTP/RTSP, email, and FTP protocols as well as - Samsung SNB-5000 | User Manual - Page 10
overview WHAT'S INCLUDED Please check if your camera and accessories are all included in the product package. Appearance Item Name Quantity Description Model Name User Manual/ IP Installer DVD 1 User Manual 1 SNB-5000 SND-5080/5080F SNV-5080 Power Adapter 1 Used for connecting to the - Samsung SNB-5000 | User Manual - Page 11
4 For fixing a screw, Inserted in a hole (reinforced anchoring force) Tapping Screw Bracket Safety Lens Options (not included) CS Lens C Lens Optional lens to be inserted in a camera SND-5080F SNB-5000 M The Test Monitor Cable is connected to a portable displayer and used for testing the - Samsung SNB-5000 | User Manual - Page 12
AT A GLANCE (SNB-5000) Front Side SwNwwB.s-a5m0s0un0gcctv.com Item Camera Holder (Mount) Holes Auto Iris Lens (Optional) Auto Iris Lens Connector Description Used when you mount the camera onto the bracket by fixing the camera holder (mount) adaptor with the bracket. Installed on the lens adaptor - Samsung SNB-5000 | User Manual - Page 13
M OVERVIEW Rear Side SD CARD AUDIO OUT AUDIO IN SD SYSTEM POWER VIDEO RESET 1 2 3 4 5 NETWORK 1 : ALARM IN 4 : 2 : ALARM OUT 5 space, or inserted abnormally. OFF : Camera is off, camera is restarting, or memory card is not in place. ON : The camera is turned on and connected to the - Samsung SNB-5000 | User Manual - Page 14
Resets the camera settings to the default. Press and hold it for about 5 seconds to turn off the system indicator and restart the system. J Resetting the camera requires reconfiguration of network settings (IP address, subnet mask, gateway address etc.) using the IP Installer software application - Samsung SNB-5000 | User Manual - Page 15
Dome Cover Main unit Power Port Video Out Port Network Port Audio In Jack Audio Out Jack Description Dome cover for the lens and unit protection. Main unit includes the lens, switch board, PCB boards and screws. Used to plug the power cable. Video signal output port connected to the monitor. Used - Samsung SNB-5000 | User Manual - Page 16
. Resets the camera settings to the default. Press and hold it for about 5 seconds to turn off the system indicator and restart the system. J Resetting the camera requires reconfiguration of network settings (IP address, subnet mask, gateway address etc.) using the IP Installer software application - Samsung SNB-5000 | User Manual - Page 17
the knob clockwise to lock the focus. Compartment for the SD memory card. Using the test monitor cable, you can connect to a mobile display for camera test. If you drill a hole in the wiring cover for wiring, remove the cover and attach the provided dustproof plate to it, and arrange the - Samsung SNB-5000 | User Manual - Page 18
Dome Cover Main unit Power Port Video Out Port Network Port Audio In Jack 7 Audio Out Jack Description Dome cover for the lens and unit protection. Main unit includes the lens, switch board, PCB boards and screws. Used to plug the power cable. Video signal output port connected to the monitor. Used - Samsung SNB-5000 | User Manual - Page 19
. Resets the camera settings to the default. Press and hold it for about 5 seconds to turn off the system indicator and restart the system. J Resetting the camera requires reconfiguration of network settings (IP address, subnet mask, gateway address etc.) using the IP Installer software application - Samsung SNB-5000 | User Manual - Page 20
to adjust the focus, and turn the knob clockwise to lock the focus. Using the test monitor cable, you can connect to a mobile display for camera test. 20_ overview - Samsung SNB-5000 | User Manual - Page 21
Dome Cover Main unit Power Port Video Out Port Network Port Audio In Jack Audio Out Jack Description Dome cover for the lens and unit protection. Main unit includes the lens, switch board, PCB boards and screws. Used to plug the power cable. Video signal output port connected to the monitor. Used - Samsung SNB-5000 | User Manual - Page 22
. Resets the camera settings to the default. Press and hold it for about 5 seconds to turn off the system indicator and restart the system. J Resetting the camera requires reconfiguration of network settings (IP address, subnet mask, gateway address etc.) using the IP Installer software application - Samsung SNB-5000 | User Manual - Page 23
to adjust the focus, and turn the knob clockwise to lock the focus. Using the test monitor cable, you can connect to a mobile display for camera test. English _23 - Samsung SNB-5000 | User Manual - Page 24
instructions before installing the camera: y Select an installation site (ceiling or wall) that can endure at least 5 times of the camera And put aside personal belongings from the site, just in case. Installing the camera 1. Hold down the bottom lock lever while removing the cover with the other - Samsung SNB-5000 | User Manual - Page 25
> label of the bracket, and turn the unit in the direction. Wiring Cover 7. Adjust the lens in a desired direction. For adjusting the lens direction, refer to "Adjusting the monitoring direction for the camera". (page 31) 8. Secure the inner cover to the main unit. Fit the two holes of the - Samsung SNB-5000 | User Manual - Page 26
. Removing the cover reveals the main unit and inner cover. 2. To fix the camera position, hold down both hooks of the inner cover while lifting it up. Ceiling Mount 1. Use the provided template to drill one hole for the camera, and one for the screw (5 mm in diameter, at least 35 mm in - Samsung SNB-5000 | User Manual - Page 27
the PCB. 4. Connect and arrange the necessary cables (power, video, etc) lest that they should be damaged or caught while installing the camera. Then, install the camera assembly in the reverse order of the disassembly. 5. Adjust the lens in a desired direction and close the dome cover. English _27 - Samsung SNB-5000 | User Manual - Page 28
installation & connection INSTALLATION (SNV-5080) Disassembling To connect the alarm in/out, the dome cover and lens cover are to be separated. 1. Using the L-wrench provided, loosen 3 screws by turning them counterclockwise and separate the dome cover. 2. Lift up the inner cover - Samsung SNB-5000 | User Manual - Page 29
, you can purchase appropriate optional accessories available. 1. WALL MOUNT ADAPTOR(SCX-300WM)/ HANGING MOUNT(SCX-300HM) This adaptor is used when installing the dome camera onto a wall. 2. CEILING MOUNT ADAPTOR(SCX-300CM)/ HANGING MOUNT(SCX-300HM) This adaptor is used when installing the dome - Samsung SNB-5000 | User Manual - Page 30
. 2. Loosen 3 screws by turning them counterclockwise, press both left and right lock releases inwards (in arrow direction) to unlock the stopper, and then separate the camera from the case. 30_ installation & connection - Samsung SNB-5000 | User Manual - Page 31
to connect the alarm cables, refer to the installation instructions of SND-5080F. (pages 26~27) Adjusting the monitoring direction for the camera (SND-5080/SND5080F/SNV-5080) Panning Tilting Lens rotation You can adjust the camera direction only when the camera is fixed on the ceiling. Then, turning - Samsung SNB-5000 | User Manual - Page 32
power before proceeding. M The C lens and CS lens are not included in the product package. You must use the mega lens only for this purpose. Mounting the CS lens Turn the optional CS lens clockwise to insert it. SwNwwB.s-a5m0s0un0gcctv.com CS Lens Mounting the C lens Turn the C mount adaptor - Samsung SNB-5000 | User Manual - Page 33
M INSTALLATION & CONNECTION Connecting the Auto Iris Lens connector Insert the lens connector into the corresponding hole of the camera. SwNwwB.s-a5m0s0un0gcctv.com Focusing Turn the lens left or right to control the zoom and focus the lens so that you can view a clear, sharp object. INSERTING/ - Samsung SNB-5000 | User Manual - Page 34
installation & connection J Do not insert the SD memory card while it's upside down by force. Otherwise, it may damage the SD memory card. Removing an SD Memory Card Gently press down on the exposed end of the memory card as shown in the diagram to eject the memory card from the slot. 34_ - Samsung SNB-5000 | User Manual - Page 35
will cause damage to the data stored in the card. If the SD memory is inserted, the SD LED indicator on the rear of the camera will turn on. If there occurs a problem in the SD memory, the SD LED indicator will blink. English _35 - Samsung SNB-5000 | User Manual - Page 36
offer an entirely new way to record and share video, audio, and text data using digital devices. Selecting a memory card that's suitable for you Your camera supports SDHC memory cards. You may, however, experience compatibility issues depending on the model and make of the memory card. For your - Samsung SNB-5000 | User Manual - Page 37
M INSTALLATION & CONNECTION CONNECTING WITH OTHER DEVICE SD CARD AUDIO OUT AUDIO IN SD SYSTEM POWER VIDEO RESET 1 2 3 4 5 NETWORK Monitor 1 : ALARM IN 4 : 2 : ALARM OUT 5 : GND ACT 3 : ALARM COM LINK GND AC 24V DC 12V Power Network Monitor Out Power Network Monitor English _37 - Samsung SNB-5000 | User Manual - Page 38
port of the camera to the video input port of the monitor. M In the initial installation of the camera, you can connect the camera to the monitor each line (+, -) of the power cable to the corresponding power port of the camera. J Be careful not to reverse the polarity when you connect the power - Samsung SNB-5000 | User Manual - Page 39
Connecting to Audio Input/Output M INSTALLATION & CONNECTION Microphone PC Network wSwNwB.s-a5m0su0n0gcctv.com Speaker Amp Amp Microphone Amp Microphone Microphone Speaker Amp English _39 - Samsung SNB-5000 | User Manual - Page 40
the microphone directly or LINE OUT port of the amplifier that the microphone is connected to. 2. Connect the AUDIO OUT port of the camera with the LINE IN port of the speaker. 3. Check the specifications for audio input. y Audio Codec G.711 PCM. μ-law 64kbps 8kHz sampling y Full duplex - Samsung SNB-5000 | User Manual - Page 41
OUT 5 : GND 3 : ALARM COM SD CARD AUDIO OUT AUDIO IN SD SYSTEM POWER VIDEO RESET 1 2 3 4 5 NETWORK 1 : ALARM IN 4 : 2 : ALARM OUT 5 : GND ACT 3 : ALARM COM LINK GND AC 24V DC 12V 5 4 3 2 1 1 : ALARM IN 4 : 2 : ALARM OUT 5 : GND 3 : ALARM COM - Samsung SNB-5000 | User Manual - Page 42
Enter the IP address of the camera in the address bar of the browser. SwNwwB.s-a5m0s0un0gcctv.com Camera SwNwwB.s-a5m0s0un0gcctv.com Camera INTERNET Firewall of the LAN network may not be able to connect to the camera installed in the intranet if the port-forwarding is not properly set or a fi - Samsung SNB-5000 | User Manual - Page 43
PC DDNS Server (Data Center, KOREA) 1. Use the cross LAN cable to connect the network cable directly to your PC. 2. Run the IP Installer and change the IP address of the camera so that you can use the web browser on your desktop to connect to the Internet. 3. Use the Internet browser to connect - Samsung SNB-5000 | User Manual - Page 44
PC DDNS Server (Data Center, KOREA) 1. Use the cross LAN cable to connect the network cable directly to your PC. 2. Run the IP Installer and change the IP address of the camera so that you can use the web browser on your desktop to connect to the Internet. 3. Use the Internet browser to connect - Samsung SNB-5000 | User Manual - Page 45
the following IP address>. y Follow the instructions below if you select : ex1) If the address (LAN IP) of the IP router is 192.168.1.1 IP address : 192.168.1.100 Subnet Mask : 255.255.255.0 Default Gateway : 192.168.1.1 ex2) If the address (LAN IP) of the IP router is - Samsung SNB-5000 | User Manual - Page 46
stopped if clicked during the search. IP address. Click the column to sort the list by IP address. However, search will be stopped if clicked during the search. The factory default is "192.168.1.100" Network setting for the camera. The factory default is "IPv4". Cameras with the IPv6 setting will be - Samsung SNB-5000 | User Manual - Page 47
the rear of the camera. Both the [Auto Set] and [Manual Set] buttons will be activated. 2. Click [Manual Set]. The Manual Setting dialog appears. The default values of , , , and of the camera will be displayed. The default is 4321 - Samsung SNB-5000 | User Manual - Page 48
to the user manual of the applicable router. If not using an IP router : For setting , , and , contact your network administrator. 4. In the pane, provide necessary information. y HTTP Port : Used to access the camera using the Internet browser, defaulted to - Samsung SNB-5000 | User Manual - Page 49
] and [Manual Set] buttons will be activated. 2. Click [Auto Set]. The Auto Setting dialog appears. The , , and will be set automatically. 3. Enter the password. This is the login password for the "admin" user who accesses the camera. The default password is "4321 - Samsung SNB-5000 | User Manual - Page 50
connection and setup DYNAMIC IP SETUP Dynamic IP Environment Setup y Example of the dynamic IP environment - If an IP router, with cameras connected, is assigned an IP address by the DHCP server - If connecting the camera directly to modem using the DHCP protocols - If IPs are assigned by the - Samsung SNB-5000 | User Manual - Page 51
that a remote PC can access the camera in it. Manual Port Range Forwarding 1. From the Setup menu of the IP router, select . For setting the port range forward for a third-party IP router, refer to the user guide of that IP router. 2. Select and - Samsung SNB-5000 | User Manual - Page 52
network, you should have set the port range forward for the IP router. 2. From the remote PC, launch the Internet browser and type the DDNS URL address of the camera, or the IP address of the IP router in the address bar. ex) http://www.samsungipolis.com/[Product ID] 52_ network connection and - Samsung SNB-5000 | User Manual - Page 53
contains sub items. J If is enabled, camera's OSD menu operation can be set as an event. CAMERA MENU SETUP You can change the camera settings according to the environment where the camera is located. SSDR (Samsung Super Dynamic Range) Setup In a scene where the difference - Samsung SNB-5000 | User Manual - Page 54
be optimized to the outdoor environment. y INDOOR : Automatically corrects the video colors of the camera to be optimized to the indoor environment. 2. To adjust it manually, select . WHITE BAL MANUAL SETUP 3. Specify the and values as necessary. 4. When completed, select - Samsung SNB-5000 | User Manual - Page 55
M CAMERA SETUP Custom Backlight Setup You can specify a desired area on the video manually and set the area to be displayed more clearly. ENTER ENTER 1. Move to . 2. Select . MAIN SETUP SSDR WHITE BAL BACKLIGHT EXPOSURE SPECIAL EXIT - Samsung SNB-5000 | User Manual - Page 56
(Highlight Compensation) Setup When a strong light such as streetlamp or headlight faces forward to the camera, you can mask that exposed area in order to protect it from being saturated. ENTER ENTER night operation, HLC will not function in too a bright or too a dark scene. 56_ camera setup - Samsung SNB-5000 | User Manual - Page 57
. y BRIGHTNESS : Adjust the screen brightness. y IRIS : If set to , you can adjust the iris of the camera manually. y SHUTTER : Adjust the electronic shutter of the camera. - MANUAL : Adjust the shutter speed of the camera manually. EXPOSURE SETUP BRIGHTNESS IRIS SHUTTER AGC SSNR3 SENS-UP - Samsung SNB-5000 | User Manual - Page 58
camera setup y SENS-UP : Automatically senses the darkness level at night or in a low contrast scene and extends the accumulation time accordingly for a bright and sharp image. If you set the shutter mode to MANUAL/ FLICKERLESS, SENS-UP mode will be deactivated. SENS-UP LIMIT SETUP LIMIT 2X - Samsung SNB-5000 | User Manual - Page 59
and specify where to display the camera title. When the camera title is displayed, use the direction buttons to specify the position; Click OK to return to the previous menu. CAMERA TITLE SETUP ABCDE FGH I J KLM NOPQR S T U V W X Y Z abcde f gh i - Samsung SNB-5000 | User Manual - Page 60
camera setup Day/Night Mode Setup You can switch the mode to adjust the black and white level as well as the colors. ENTER ENTER 1. the video in colors. y BW : Always displays the video in black and white. 3. When completed, select to return to the previous screen. 60_ camera setup - Samsung SNB-5000 | User Manual - Page 61
M CAMERA SETUP Image Adjustment You can configure the sharpness, gamma level, and color settings of an image to your preference. ENTER ENTER 1. Select . MAIN SETUP - Samsung SNB-5000 | User Manual - Page 62
:abcd:ffff:0000 :0000:ffff:1111] If the HTTP port is other than 80 1. Launch the Internet browser. 2. Type the IP address and HTTP port number of the camera in the address bar. ex) IP address : 192.168.1.100:Port number(10000) € http://192.168.1.100:10000 - the Login dialog should appear. Using URL - Samsung SNB-5000 | User Manual - Page 63
device. To add the IP address to the server, visit www.samsungipolis.com and register your device, and set the DDNS option to before providing the user ID and password for the DDNS server. LOGIN The default user ID is "admin", and the default password is "4321". 1. Enter "admin - Samsung SNB-5000 | User Manual - Page 64
web viewer This network camera uses Microsoft Silverlight for displaying the video. INSTALLING SILVERLIGHT RUNTIME If your PC has not installed Silverlight Runtime or has just installed an old runtime - Samsung SNB-5000 | User Manual - Page 65
M WEB VIEWER 5. When done, click . 6. Close and restart the web browser, and try to access the Web Viewer. When Siverlight Runtime is properly installed, you will see the Live screen. J For normal installation, set the Block Popup setting as follows: Internet Explorer l Tools l Block Popup - Samsung SNB-5000 | User Manual - Page 66
video on the screen. Activate the Alarm Out port. Display the audio Listen and Talk toggle button on the screen. Reset the alarm output settings. Used to retrieve and customize the Camera Setup menu. For selecting and saving each menu item, refer to "How to use the menu key". (page 53) You - Samsung SNB-5000 | User Manual - Page 67
Capture Video Format Saves the snapshot as an image file in the .jpeg or .bmp format. You can select a profile type in under the setup menu. To capture the snapshot 1. Click [ ] on the scene to capture. The Capture dialog should appear. 2. Click [Save] button. The - Samsung SNB-5000 | User Manual - Page 68
Capture dialog should appear. 2. Click [Save]. The screenshot will be saved in the specified path. J If you are using the Internet Explorer as the default web browser, select "ToolsInternet Options-Security" and uncheck "Use protected mode". 68_ web viewer - Samsung SNB-5000 | User Manual - Page 69
M WEB VIEWER To check the information of the searched video Click the [About ( )] button. To back up the searched video 1. Click [ ] on the scene to back up. The Capture dialog should appear. 2. Click [Save]. The screenshot will be backed up to the specified path. To download SlimPlayer You can - Samsung SNB-5000 | User Manual - Page 70
You can configure the audio & video, network, event and system settings of the camera in the network. Video Profile 1. From the Setup menu, select the - Samsung SNB-5000 | User Manual - Page 71
the video communication port. - TTL : Set the TTL for the VNP packet. y Multicast (RTP) : Specify the use of the RTP protocol. - IPv4 : Enter an IPv4 address with which you can connect to the IPv4 network. - Port : Specify the video communication port. - TTL : You can set the TTL for the RTP packet - Samsung SNB-5000 | User Manual - Page 72
will not be output via the VIDEO OUT port. 6. When done, click [Apply]. To set the privacy zone You can specify a certain area of the camera video to be protected for your privacy. 1. Set it to . 2. Place the cursor at a point in the video and drag it to whatever you - Samsung SNB-5000 | User Manual - Page 73
: Specify the DNS1, DNS2, ID and password. - DHCP : Specify the DNS1 and DNS2. If you set it to , you should specify the IP, Subnet Mask, Gateway, DNS 1 & 2 manually. y MAC Address : Shows the MAC address. y IP Address : Displays the current IP address. y Subnet Mask : Displays the - Samsung SNB-5000 | User Manual - Page 74
Domain Name Service that converts the IP address of a camera into a general Host Name so that the user can easily remember it. 1. From the Setup menu, select the tab. 2. Click . 3. Select . 4. Type in the DDNS items according to the selected type. y Samsung DDNS : Select - Samsung SNB-5000 | User Manual - Page 75
Name : Enter the user name for the DDNS service. (i.e., user ID that is registered with Dyndns) - Password : Enter the password for the DDNS service. (i.e., password that is registered with Dyndns) 5. When done, click [Apply]. M SETUP SCREEN IP Filtering You can create a list of IPs that you want - Samsung SNB-5000 | User Manual - Page 76
setup screen Registering with DDNS To register your product with the Samsung DDNS 1. Visit the iPOLiS web site(www. samsungipolis.com) and sign in with a registered account. 2. From the top menu bar, select -. 3. Click [PRODUCT REGISTRATION]. 4. Enter the product domain. You - Samsung SNB-5000 | User Manual - Page 77
a desired value. y FTP Configuration - Server Address : Enter the IP address of the FTP server that you transfer the alarm images to. - User ID : Enter the user ID with which you will log in to the FTP server. - Password : Enter the user account password for logging into the FTP server. - Upload - Samsung SNB-5000 | User Manual - Page 78
- Server Address : Enter the IP address of the email server that you use for the email transfer. ex) SMTP. hotmail. com - User ID : Enter the user ID for logging into the email server. - Password : Enter the user account password for logging into the email server. - Port : The default port of - Samsung SNB-5000 | User Manual - Page 79
M SETUP SCREEN To make recording on the SD memory 1. Check the and the . 2. If the SD memory has a sufficient free space, set to On. Otherwise, check the stored data and if you find them not important, then click to format the SD memory. If your SD memory - Samsung SNB-5000 | User Manual - Page 80
. If you set it to Enable, the event rules will be shown on the screen. 5. Specify the object size. 6. Select a sensitivity level at which the camera detects the object. 7. Select an event rule. You can select a total of 3 rules including the virtual line and the specified area. 8. Specify the - Samsung SNB-5000 | User Manual - Page 81
M SETUP SCREEN To use the IV analysis function according to the virtual line based rule 1. Set to . 2. Set the event rule to . 3. Click a desired area in the video and drag it to the end point, and right-click it. 4. Select a desired - Samsung SNB-5000 | User Manual - Page 82
setup screen To use the IV analysis function according to the whole area based rule 1. Set to . 2. Set the event rule to . 3. Select a desired . y Appearing : An event where an object that has not existed suddenly appears - Samsung SNB-5000 | User Manual - Page 83
& Time 1. From the Setup menu, select the tab. 2. Click . 3. Specify the time and date that will be applied to the camera. y Current system time : Displays the current time settings of your system. y Timezone : Specify the local time zone based on the GMT. y Use Daylight - Samsung SNB-5000 | User Manual - Page 84
of the specified server address. - Synchronize with PC viewer : Synchronize the time with the connected PC. 4. When done, click [Apply]. User 1. From the Setup menu, select the tab. 2. Click . 3. Provide the necessary user information. y Administrator Password Change : Change the - Samsung SNB-5000 | User Manual - Page 85
the other settings except for the interface/ port/DDNS/IP filtering settings. - All : Resets all settings including the camera settings. (however, the log information will not be reset) If you reset all settings, the IP address will be defaulted to 192.168.1.100. y Configuration backup & Restore - Samsung SNB-5000 | User Manual - Page 86
setup screen 4. Select a backup file and click [Open]. Log You can check the system log or event log. 1. From the Setup menu, select the tab. 2. Click . 3. Select a log type. y Syslog : You can check the system logs where any system changes are recorded including the time - Samsung SNB-5000 | User Manual - Page 87
Zones) Color / BW / AUTO(IR Cut Filter) BLC / HLC / SSDR / Off Auto (1/30 ~ 30,000sec) / A.FLK / Manual Off / Low / Medium / High / Manual Off / Auto (Seletable up to 60X) Off / On (Level Adjusment) ATW / AWC / Manual / Indoor / Outdoor Yes (Camera Title Support) English, French, Germany, Spanish - Samsung SNB-5000 | User Manual - Page 88
appendix Items SNB-5000 SND-5080/F SNV-5080 Focal Length - 2.8~10mm Zoom ratio - Aperature Ratio - Lens Tele - Viewing Angle Wide - Lens Drive Type Manual / DC x3.6 F1.2 28.8˚(H) x 21.6˚(V) 94.6˚(H) x 68.4˚(V) AI(DC) Mount Type CS/C Board Type Environmental Operating - Samsung SNB-5000 | User Manual - Page 89
M APPENDIX NETWORK SPECIFICATION Network Board Alarm Video Audio Motion Detection Items OS Flash memory RAM Ethernet Hardware Video Out Audio SD Memory Slot PoE Input Output Compression SXGA HD (16:9) Resolution SVGA VGA QVGA Max Frame Rate H.264 / MPEG4 Quality MJPEG Quality Bitrate Control - Samsung SNB-5000 | User Manual - Page 90
(TCP), RTSP, NTP HTTP, HTTPS, SSL, DHCP, FTP, SMTP, ICMP, IGMP SNMPv1/v2c/v3(MIB-2), ARP, DNS, DDNS TCP/IP, HTTP, HTTPS, SSL, DHCP Unicast, Multicast HTTPS(SSL) Login Authentication Digest Login Authentication IP Address Filtering, User access Log Supporting Samsung DDNS and Public DDNS services Max - Samsung SNB-5000 | User Manual - Page 91
M APPENDIX TROUBLESHOOTING PROBLEM I can't access the camera from a web browser. Viewer got disconnected during monitoring. I cannot connect to the system using a tab browser of Internet Explorer 7.0. The camera connected to the network is not detected in the IP installer program. Images overlap. - Samsung SNB-5000 | User Manual - Page 92
appendix PROBLEM SOLUTION No JPEG file is transferred via e-mail on occurrence of intelligent video analysis event of camera even when the is set to . y Verify the settings in the following sequence: A. Check settings. B. The - Samsung SNB-5000 | User Manual - Page 93
of this product by sending email to [email protected]. If you want to obtain the complete software, we are referring to freedom, not price. Our General Public Licenses are designed to make sure that you have the freedom to distribute copies of free software (and charge for this service - Samsung SNB-5000 | User Manual - Page 94
program is threatened constantly by software patents. We wish to in the term "modification".) Each licensee is addressed as "you". Activities other than copying, distribution provide a warranty) and that users may redistribute the program under these conditions, and telling the user how to view a copy - Samsung SNB-5000 | User Manual - Page 95
the complete corresponding machine-readable source code, which must be distributed under the terms of Sections 1 and 2 above on a medium customarily used for software interchange ; or, b) Accompany it with a written offer, valid for at least three years, to give any third party, for a charge no more - Samsung SNB-5000 | User Manual - Page 96
as if written in the body of this License. 9. The Free Software Foundation may publish revised and/or new versions of the General Public License in spirit to the present version, but may differ in detail to address new problems or concerns. Each version is given a distinguishing version number. If - Samsung SNB-5000 | User Manual - Page 97
software which is copyrighted by the Free Software Foundation,write to the Free Software Foundation ; we sometimes make exceptions for this. Our decision will be guided THE PROGRAMPROVE DEFECTIVE, YOU ASSUME THE COST OF ALL NECESSARY SERVICING, REPAIR OR CORRECTION. 12. IN NO EVENT UNLESS REQUIRED - Samsung SNB-5000 | User Manual - Page 98
License for more details. You should have received a copy of the GNU General Public License along with this program ; if not, write to the Free Software Foundation, Inc.,51 Franklin Street, Fifth Floor, Boston, MA 02110-1301, USA. Also add information on how to contact you by electronic and paper - Samsung SNB-5000 | User Manual - Page 99
Work that displays copyright notices during execution, include the copyright notice for the Library among these notices, as well as a reference directing the user to the copies of the GNU GPL and this license document. ƒ d) Do one of the following: Convey the Minimal Corresponding Source under the - Samsung SNB-5000 | User Manual - Page 100
in spirit to the present version, but may differ in detail to address new problems or concerns. Each version is given a distinguishing version number. If of that published version or of any later version published by the Free Software Foundation. If the Library as you received it does not specify a - Samsung SNB-5000 | User Manual - Page 101
TECHWIN CO., LTD. 701, Sampyong-dong, Bundang-gu, Seongnam-si Gyeonggi-do, Korea, 463-400 TEL : +82-70-7147-8771~8 FAX : +82-31-8018-3745 SAMSUNG TECHWIN AMERICA Inc. 1480 Charles Willard St, Carson, CA 90746, UNITED STATES Tol Free : +1-877-213-1222 FAX : +1-310-632-2195 www.samsungcctvusa.com
-
 1
1 -
 2
2 -
 3
3 -
 4
4 -
 5
5 -
 6
6 -
 7
7 -
8
-
9
-
10
-
11
-
12
-
13
-
14
-
15
-
16
-
17
-
18
-
19
-
20
-
21
-
22
-
23
-
24
-
25
-
26
-
27
-
28
-
29
-
30
-
31
-
32
-
33
-
34
-
35
-
36
-
37
-
38
-
39
-
40
-
41
-
42
-
43
-
44
-
45
-
46
-
47
-
48
-
49
-
50
-
51
-
52
-
53
-
54
-
55
-
56
-
57
-
58
-
59
-
60
-
61
-
62
-
63
-
64
-
65
-
66
-
67
-
68
-
69
-
70
-
71
-
72
-
73
-
74
-
75
-
76
-
77
-
78
-
79
-
80
-
81
-
82
-
83
-
84
-
85
-
86
-
87
-
88
-
89
-
90
-
91
-
92
-
93
-
94
-
95
-
96
-
97
-
98
-
99
-
100
-
101
 |
 |
Network Camera
SNB-5000/SND-5080/SND-5080F/SNV-5080
User Manual
Before installing and operating this product, please read this manual thoroughly.
English