Samsung SNB-5000 User Manual - Page 49
Auto Network Setup
 |
View all Samsung SNB-5000 manuals
Add to My Manuals
Save this manual to your list of manuals |
Page 49 highlights
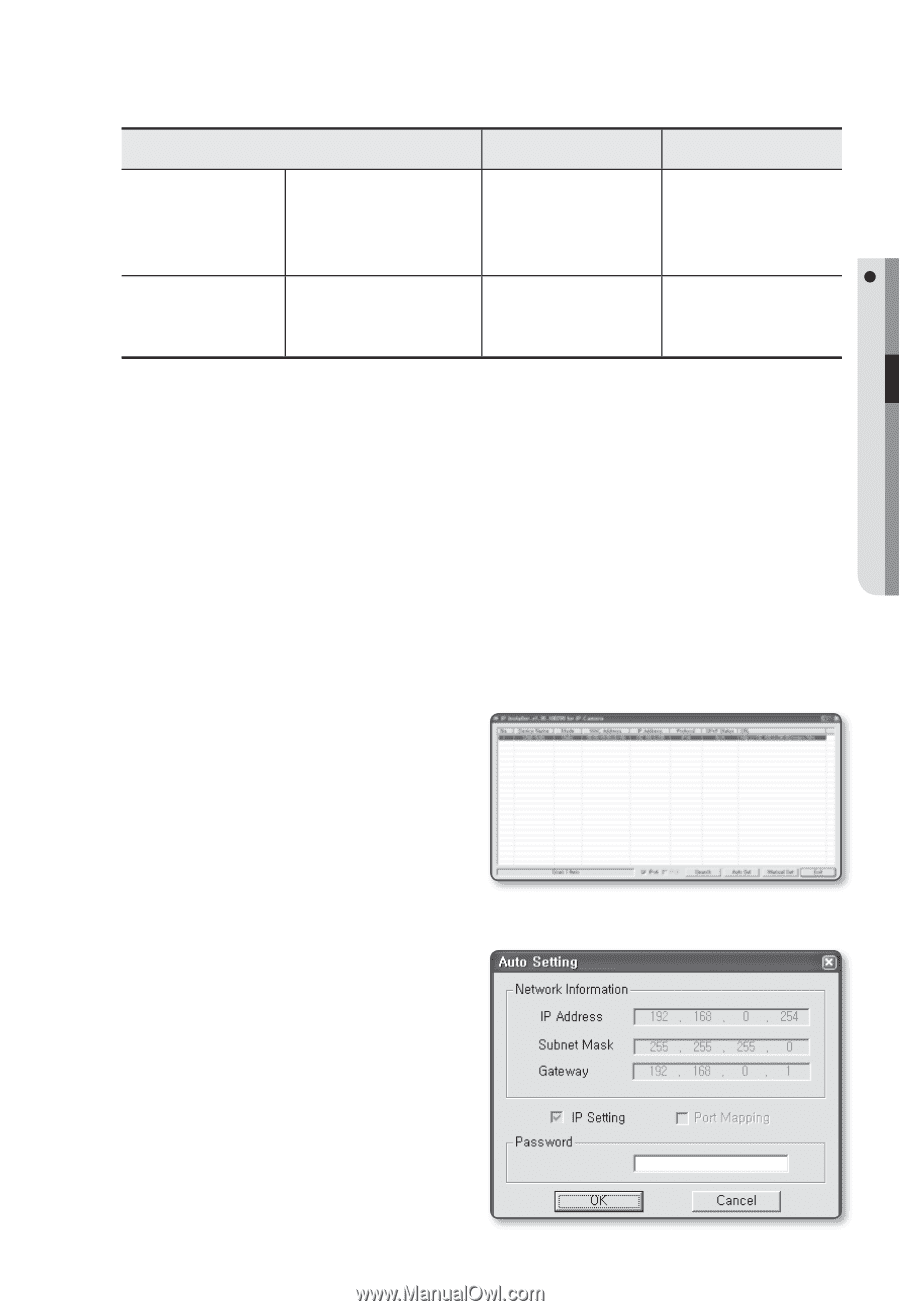
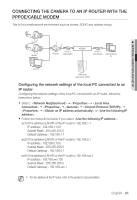
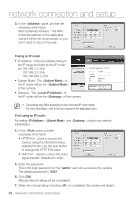
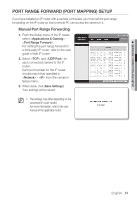
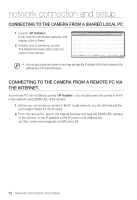
M NETWORK CONNECTION AND SETUP If the IP router has more than one camera connected Configure the IP related settings and the Port related settings distinctly with each other. Category Camera #1 Camera #2 IP related settings IP Address Subnet Mask Gateway 192.168.1.200 255.255.255.0 192.168.1.1 192.168.1.201 255.255.255.0 192.168.1.1 Port related settings HTTP Port VNP Port 80 4520 10000 4530 M If the is set other than 80, you must provide the number in the address bar of the Internet browser before you can access the camera. ex) http://IP address : HTTP Port http://192.168.1.201:10000 Auto Network Setup Run to display the camera search list. At the initial startup, both [Auto Set] and [Manual Set] will be grayed out. M For cameras found with the IPv6 setting, these buttons will be grayed out as the cameras do not support this function. 1. Select a camera in the search list. Find the MAC (Ethernet) address labeled on the rear of the camera. Both the [Auto Set] and [Manual Set] buttons will be activated. 2. Click [Auto Set]. The Auto Setting dialog appears. The , , and will be set automatically. 3. Enter the password. This is the login password for the "admin" user who accesses the camera. The default password is "4321". 4. Click [OK]. Auto network setup will be completed. 5. The camera will automatically complete the network setting and restart. English _49
-
 1
1 -
2
-
3
-
4
-
5
-
6
-
7
-
8
-
9
-
10
-
11
-
12
-
13
-
14
-
15
-
16
-
17
-
18
-
19
-
20
-
21
-
22
-
23
-
24
-
25
-
26
-
27
-
28
-
29
-
30
-
31
-
32
-
33
-
34
-
35
-
36
-
37
-
38
-
39
-
40
-
41
-
42
-
43
-
 44
44 -
 45
45 -
 46
46 -
 47
47 -
 48
48 -
 49
49 -
 50
50 -
 51
51 -
 52
52 -
 53
53 -
 54
54 -
55
-
56
-
57
-
58
-
59
-
60
-
61
-
62
-
63
-
64
-
65
-
66
-
67
-
68
-
69
-
70
-
71
-
72
-
73
-
74
-
75
-
76
-
77
-
78
-
79
-
80
-
81
-
82
-
83
-
84
-
85
-
86
-
87
-
88
-
89
-
90
-
91
-
92
-
93
-
94
-
95
-
96
-
97
-
98
-
99
-
100
-
101
 |
 |