Samsung SNB-5000 User Manual - Page 48
Address, If using an IP router, Subnet Mask, Local IP Address, Gateway, If not using an IP router, - password
 |
View all Samsung SNB-5000 manuals
Add to My Manuals
Save this manual to your list of manuals |
Page 48 highlights
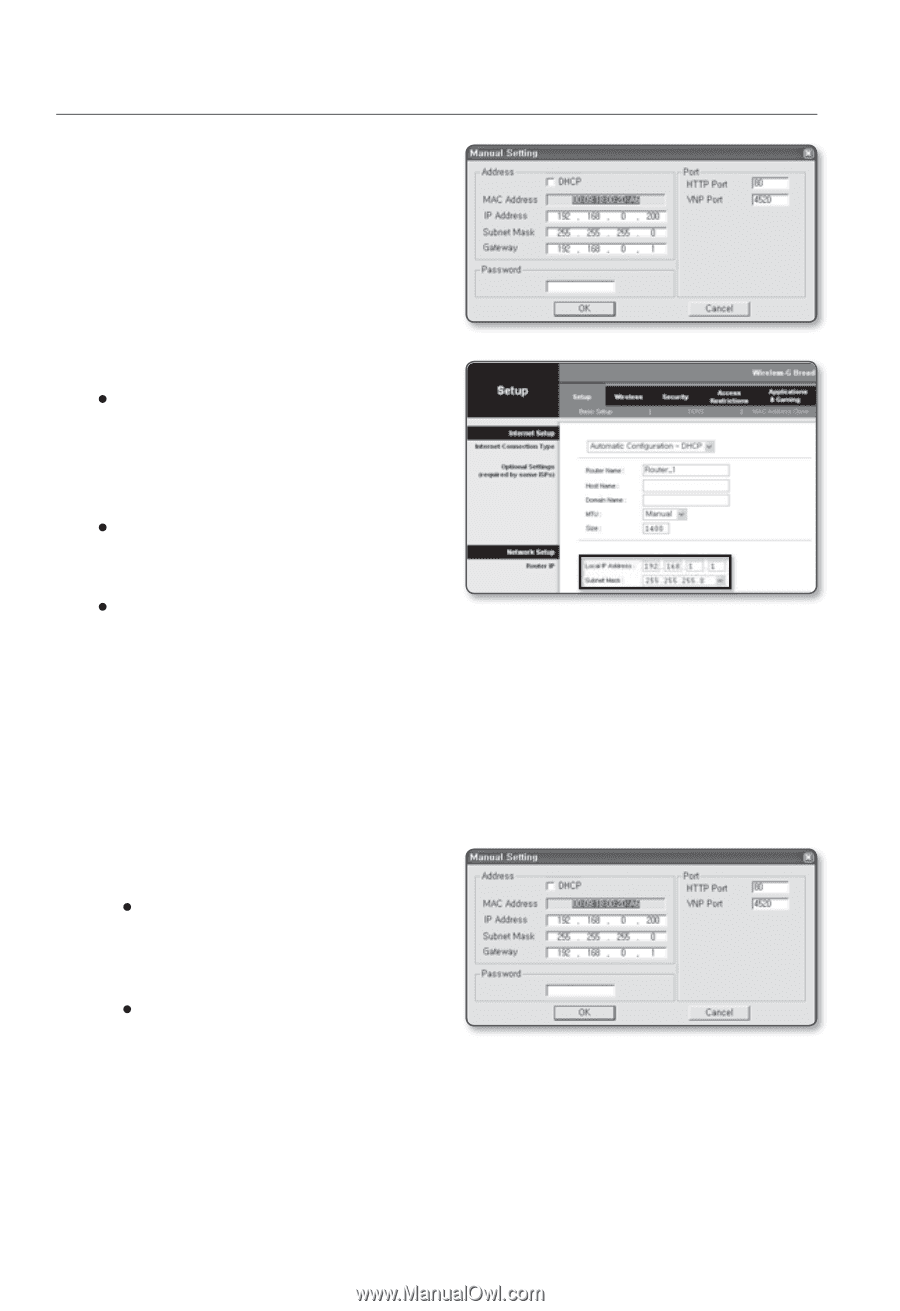
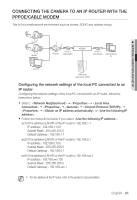
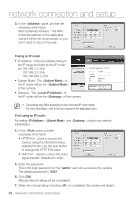
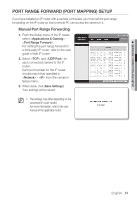
network connection and setup 3. In the pane, provide the necessary information. MAC (Ethernet) Address : The MAC (Ethernet) address of the applicable camera will be set automatically so you don't need to input it manually. If using an IP router y IP Address : Enter an address falling in the IP range provided by the IP router. ex) 192.168.1.2~254, 192.168.0.2~254, 192.168.XXX.2~254 y Subnet Mask : The of the IP router will be the of the camera. y Gateway : The of the IP router will be the of the camera. M The settings may differ depending on the connected IP router model. For more information, refer to the user manual of the applicable router. If not using an IP router : For setting , , and , contact your network administrator. 4. In the pane, provide necessary information. y HTTP Port : Used to access the camera using the Internet browser, defaulted to 80. Use the spin button to change the HTTP Port value. y VNP Port : Used to control the video signal transfer, defaulted to 4520. 5. Enter the password. This is the login password for the "admin" user who accesses the camera. The default password is "4321". 6. Click [OK]. Manual network setup will be completed. 7. When the manual setup including is completed, the camera will restart. 48_ network connection and setup
-
 1
1 -
2
-
3
-
4
-
5
-
6
-
7
-
8
-
9
-
10
-
11
-
12
-
13
-
14
-
15
-
16
-
17
-
18
-
19
-
20
-
21
-
22
-
23
-
24
-
25
-
26
-
27
-
28
-
29
-
30
-
31
-
32
-
33
-
34
-
35
-
36
-
37
-
38
-
39
-
40
-
41
-
42
-
 43
43 -
 44
44 -
 45
45 -
 46
46 -
 47
47 -
 48
48 -
 49
49 -
 50
50 -
 51
51 -
 52
52 -
 53
53 -
54
-
55
-
56
-
57
-
58
-
59
-
60
-
61
-
62
-
63
-
64
-
65
-
66
-
67
-
68
-
69
-
70
-
71
-
72
-
73
-
74
-
75
-
76
-
77
-
78
-
79
-
80
-
81
-
82
-
83
-
84
-
85
-
86
-
87
-
88
-
89
-
90
-
91
-
92
-
93
-
94
-
95
-
96
-
97
-
98
-
99
-
100
-
101
 |
 |