Sharp UX-K02 UXCD600 Operation Manual - Page 12
Machine display
 |
UPC - 074000033801
View all Sharp UX-K02 manuals
Add to My Manuals
Save this manual to your list of manuals |
Page 12 highlights
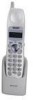
15 INTERCOM/CONFERENCE key Press this key to page or locate a cordless handset (page 55). During a phone call, press the key to transfer the call to a cordless handset or begin a conference call (page 57). 16 Left and right arrow keys Auto-dial numbers: When sending a fax or making a phone call, press these keys to scroll through your auto-dial numbers (page 91), the "REVIEW CALLS" list (only available if you have Caller ID) (page 111), and the last number dialed (redial; page 93). FUNCTION key settings: Press the right arrow key after scrolling with the up and down arrow keys to select a FUNCTION key setting. 17 FUNCTION key Press this key followed by the arrow keys to select special functions and settings. 18 REPEAT key Press this key while listening to a message to play it again (page 66). 19 SKIP key Press this key while listening to a message to skip to the next message (page 66). 20 DELETE key Press this key to erase recorded messages (page 67). 21 Number keys Use these keys to dial numbers, and enter numbers and letters when storing auto-dial numbers. Machine display Line1 Line2 TEL This appears when the machine is using line 1. This appears when the machine is using line 2. Note: The Line 1 or Line 2 icon does not appear when a cordless handset is using Line 1 or Line 2. 10 This appears when the reception mode is set to Auto Attendant. This appears when the reception mode is set to TEL. This appears when the reception mode is set to TAD (the answering system is turned on).
-
 1
1 -
2
-
3
-
4
-
5
-
6
-
 7
7 -
 8
8 -
 9
9 -
 10
10 -
 11
11 -
 12
12 -
 13
13 -
 14
14 -
 15
15 -
 16
16 -
 17
17 -
18
-
19
-
20
-
21
-
22
-
23
-
24
-
25
-
26
-
27
-
28
-
29
-
30
-
31
-
32
-
33
-
34
-
35
-
36
-
37
-
38
-
39
-
40
-
41
-
42
-
43
-
44
-
45
-
46
-
47
-
48
-
49
-
50
-
51
-
52
-
53
-
54
-
55
-
56
-
57
-
58
-
59
-
60
-
61
-
62
-
63
-
64
-
65
-
66
-
67
-
68
-
69
-
70
-
71
-
72
-
73
-
74
-
75
-
76
-
77
-
78
-
79
-
80
-
81
-
82
-
83
-
84
-
85
-
86
-
87
-
88
-
89
-
90
-
91
-
92
-
93
-
94
-
95
-
96
-
97
-
98
-
99
-
100
-
101
-
102
-
103
-
104
-
105
-
106
-
107
-
108
-
109
-
110
-
111
-
112
-
113
-
114
-
115
-
116
-
117
-
118
-
119
-
120
-
121
-
122
-
123
-
124
-
125
-
126
-
127
-
128
-
129
-
130
-
131
-
132
-
133
-
134
-
135
-
136
-
137
-
138
-
139
-
140
-
141
-
142
-
143
-
144
-
145
-
146
-
147
-
148
-
149
-
150
-
151
-
152
-
153
-
154
-
155
-
156
 |
 |
