Sharp XG-P10XU XGP10XU Operation Manual - Page 21
Digital Image Adjustments, Setting up the Screen, Lens Adjustment, Digital Shift - reset
 |
View all Sharp XG-P10XU manuals
Add to My Manuals
Save this manual to your list of manuals |
Page 21 highlights
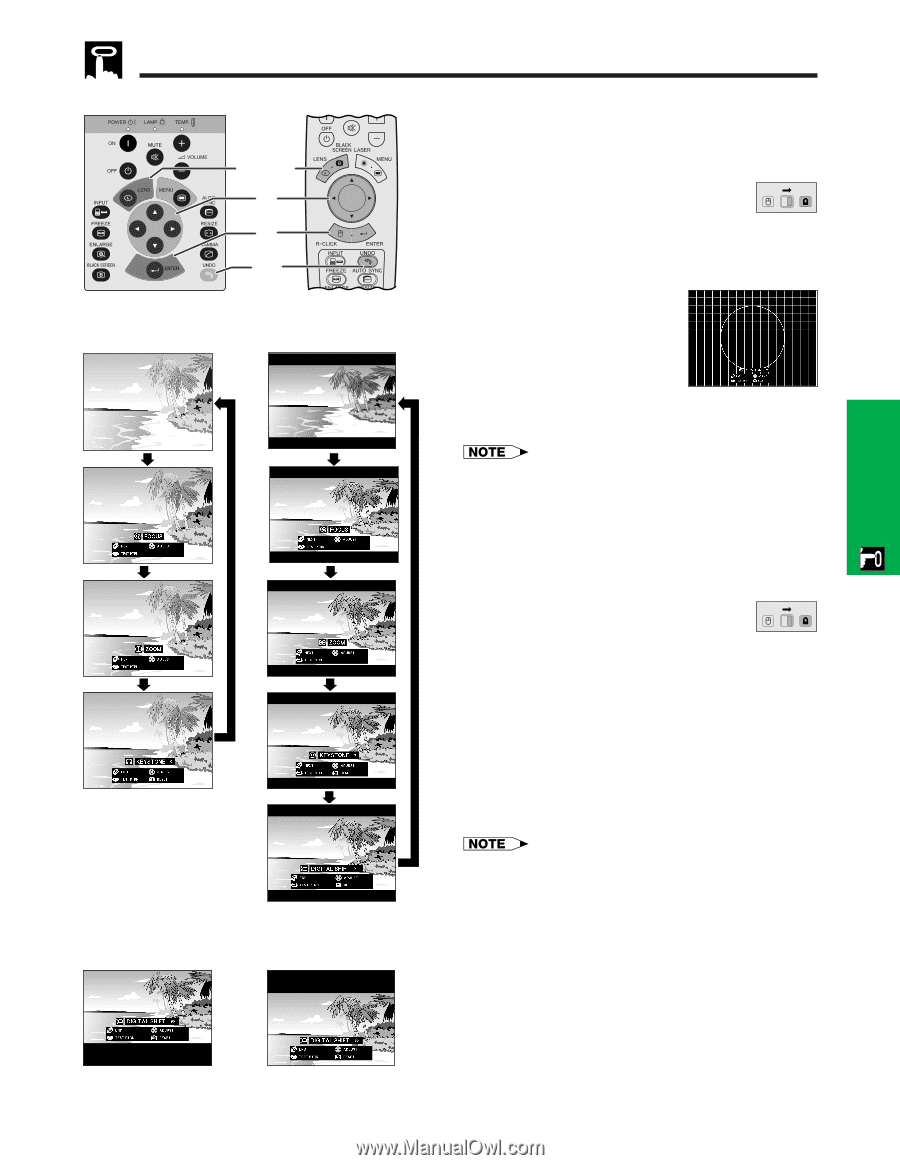
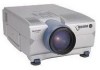
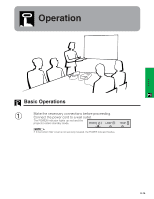
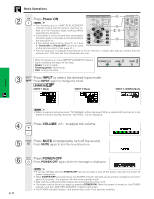
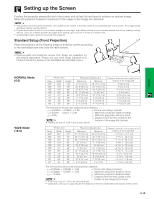
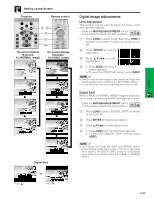
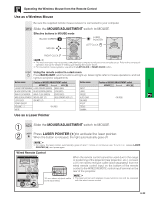
Setting up the Screen Projector Remote control 1, 4a 3 2 4b On-screen Display (Example: 4:3 NORMAL image) On-screen Display (Example: 16:9 WIDE image) Press ∂. Digital Shift or Press ƒ. Digital Image Adjustments Lens Adjustment This function can be used to adjust the focus, zoom and keystone settings. (Slide the MOUSE/ADJUSTMENT switch MOUSE ADJ. on the remote control to the ADJ. position.) 1 Press LENS to select mode. Each time LENS is pressed, the screen changes as shown on the left. 2 Press ENTER to display test pattern. 3 Press to make adjustments. 4 a. Press LENS until normal screen appears. b. To reset the KEYSTONE setting, press UNDO. • Straight lines and the edges of the displayed image may appear jagged, when adjusting the KEYSTONE setting. • Do not touch the lens when adjusting the focus or zoom. Digital Shift When a WIDE or NORMAL (WIDE) image is projected, this function can be used to shift the image up or down. (Slide the MOUSE/ADJUSTMENT switch MOUSE ADJ. on the remote control to the ADJ. position.) 1 Press LENS to select "DIGITAL SHIFT" as shown on the near left. 2 Press ENTER to display test pattern. 3 Press to make adjustments. 4 a. Press LENS until normal screen appears. b. To reset the DIGITAL SHIFT setting, press UNDO. • This function only works with WIDE and NORMAL (WIDE) picture display modes during video or DTV input. (See page 36 for details.) The DIGITAL SHIFT screen is not displayed when projecting images other than WIDE or NORMAL (WIDE). E-20 Operation
-
 1
1 -
2
-
3
-
4
-
5
-
6
-
7
-
8
-
9
-
10
-
11
-
12
-
13
-
14
-
15
-
 16
16 -
 17
17 -
 18
18 -
 19
19 -
 20
20 -
 21
21 -
 22
22 -
 23
23 -
 24
24 -
 25
25 -
 26
26 -
27
-
28
-
29
-
30
-
31
-
32
-
33
-
34
-
35
-
36
-
37
-
38
-
39
-
40
-
41
-
42
-
43
-
44
-
45
-
46
-
47
-
48
-
49
-
50
-
51
-
52
-
53
-
54
-
55
-
56
-
57
-
58
-
59
-
60
-
61
-
62
-
63
-
64
-
65
 |
 |