Sharp XG-P10XU XGP10XU Operation Manual - Page 29
I/P Conversion, Audio Adjustments
 |
View all Sharp XG-P10XU manuals
Add to My Manuals
Save this manual to your list of manuals |
Page 29 highlights
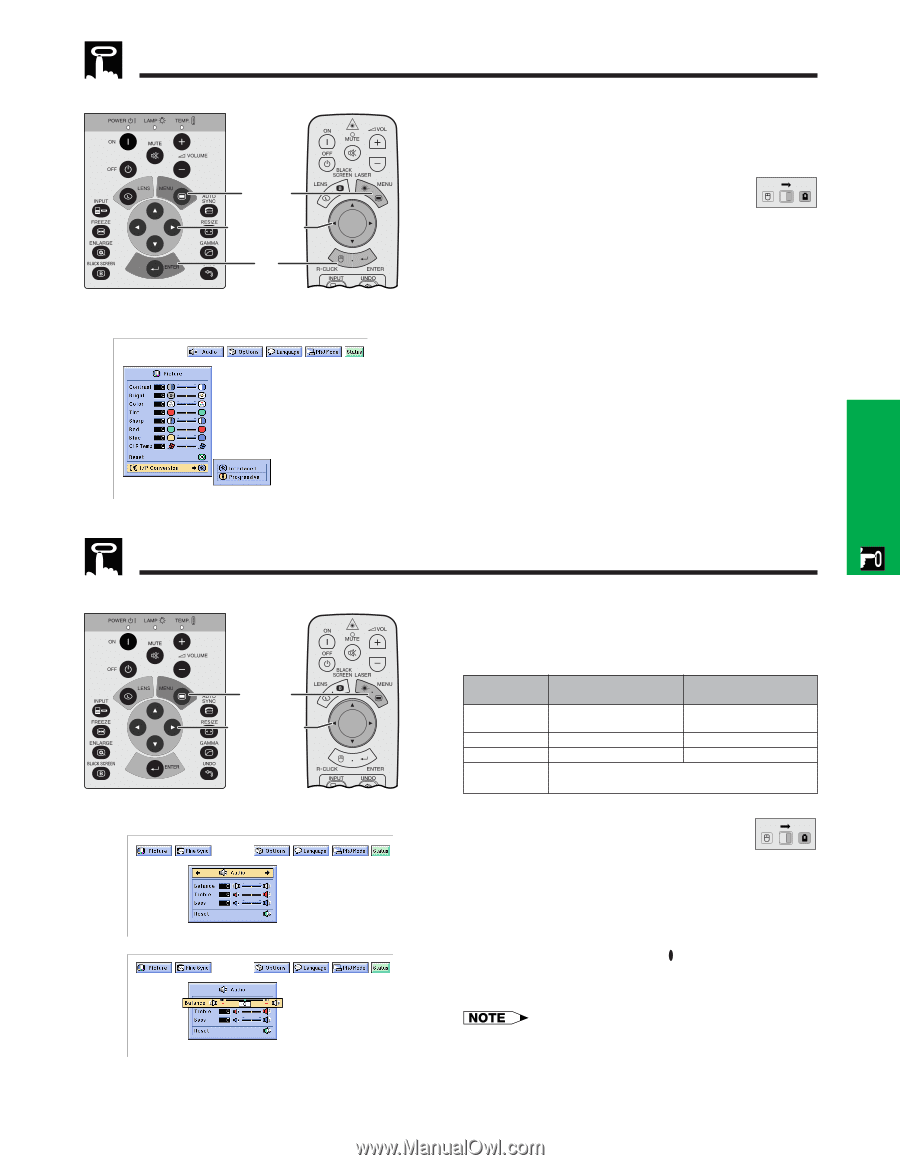
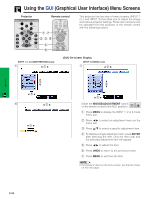
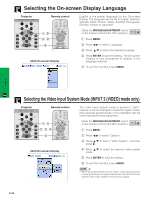
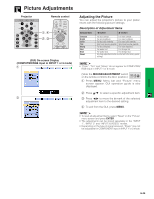
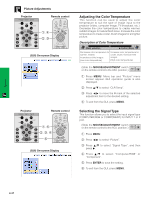
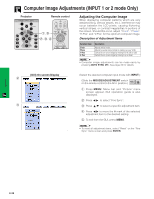
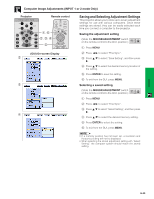
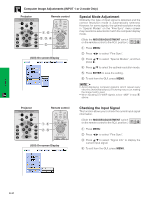
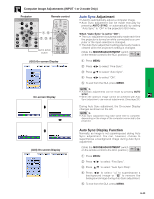
Operation Picture Adjustments Projector Remote control 1, 6 2, 3, 4 5 (GUI) On-screen Display Audio Adjustments Projector Remote control 1, 5 2, 3, 4 (GUI) On-screen Display 2 3 I/P Conversion This function allows you to select either an interlaced display or a progressive display of a video signal. The progressive display projects a smoother video image. (Slide the MOUSE/ADJUSTMENT switch MOUSE ADJ. on the remote control to the ADJ. position.) 1 Press MENU. 2 Press ß/© to select "Picture". 3 Press ∂/ƒ to select "I/P Conversion", and then press ©. 4 Press ∂/ƒ to select "Interlaced" or "Progressive". 5 Press ENTER to save the setting. 6 To exit from the GUI, press MENU. Interlaced mode Interlaced mode creates a single image through the activation of scanning lines in two fields. Use this mode when projecting moving images. Progressive mode Progressive mode creates a single image using all available scanning lines. Use this mode when projecting still images to avoid flicker and stripes that result from interlaced source still images. This projector's audio is factory preset to standard settings. However, you can adjust it to suit your own preferences by adjusting the following audio settings. Description of Adjustment Items Selected item Balance Treble Bass Reset ß button © button Increased audio from the left Increased audio from the right speaker speaker For weaker treble For stronger treble For weaker bass For stronger bass All audio adjustment items are returned to the factory preset settings. (Slide the MOUSE/ADJUSTMENT switch MOUSE ADJ. on the remote control to the ADJ. position.) 1 Press MENU. Menu bar and "Picture" menu screen appear. GUI operation guide is also displayed. 2 Press ß/© to select "Audio". 3 Press ∂/ƒ to select a specific adjustment item. 4 Press ß/© to move the mark of the selected adjustment item to the desired setting. 5 To exit from the GUI, press MENU. • To reset all adjustment items, select "Reset" on the "Audio" menu screen and press ENTER. E-28
-
 1
1 -
2
-
3
-
4
-
5
-
6
-
7
-
8
-
9
-
10
-
11
-
12
-
13
-
14
-
15
-
16
-
17
-
18
-
19
-
20
-
21
-
22
-
23
-
 24
24 -
 25
25 -
 26
26 -
 27
27 -
 28
28 -
 29
29 -
 30
30 -
 31
31 -
 32
32 -
 33
33 -
 34
34 -
35
-
36
-
37
-
38
-
39
-
40
-
41
-
42
-
43
-
44
-
45
-
46
-
47
-
48
-
49
-
50
-
51
-
52
-
53
-
54
-
55
-
56
-
57
-
58
-
59
-
60
-
61
-
62
-
63
-
64
-
65
 |
 |