Sharp XG-P10XU XGP10XU Operation Manual - Page 31
Saving and Selecting Adjustment Settings, Saving the adjustment setting, Selecting a saved setting
 |
View all Sharp XG-P10XU manuals
Add to My Manuals
Save this manual to your list of manuals |
Page 31 highlights
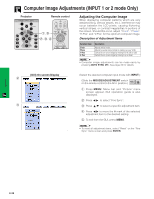
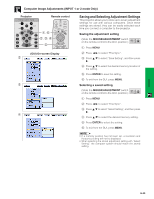
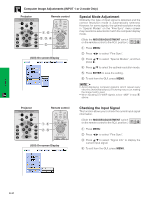
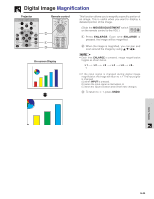
Computer Image Adjustments (INPUT 1 or 2 mode Only) Projector Remote control 1, 6 2, 3, 4 5 (GUI) On-screen Display 2 3 4 Saving and Selecting Adjustment Settings This projector allows you to store up to seven adjustment settings for use with various computers. Once these settings are stored, they can be easily selected each time you connect a computer to the projector. Saving the adjustment setting (Slide the MOUSE/ADJUSTMENT switch MOUSE ADJ. on the remote control to the ADJ. position.) 1 Press MENU. 2 Press ß/© to select "Fine Sync". 3 Press ∂/ƒ to select "Save Setting", and then press ©. 4 Press ∂/ƒ to select the desired memory location of the setting. 5 Press ENTER to save the setting. 6 To exit from the GUI, press MENU. Selecting a saved setting (Slide the MOUSE/ADJUSTMENT switch MOUSE ADJ. on the remote control to the ADJ. position.) 1 Press MENU. 2 Press ß/© to select "Fine Sync". 3 Press ∂/ƒ to select "Select Setting", and then press ©. 4 Press ∂/ƒ to select the desired memory setting. 5 Press ENTER to select the setting. 6 To exit from the GUI, press MENU. • If a memory position has not been set, a resolution and frequency setting will not be displayed. • When selecting the stored adjustment setting with "Select Setting", the computer system should match the stored setting. Operation E-30
-
 1
1 -
2
-
3
-
4
-
5
-
6
-
7
-
8
-
9
-
10
-
11
-
12
-
13
-
14
-
15
-
16
-
17
-
18
-
19
-
20
-
21
-
22
-
23
-
24
-
25
-
 26
26 -
 27
27 -
 28
28 -
 29
29 -
 30
30 -
 31
31 -
 32
32 -
 33
33 -
 34
34 -
 35
35 -
 36
36 -
37
-
38
-
39
-
40
-
41
-
42
-
43
-
44
-
45
-
46
-
47
-
48
-
49
-
50
-
51
-
52
-
53
-
54
-
55
-
56
-
57
-
58
-
59
-
60
-
61
-
62
-
63
-
64
-
65
 |
 |
