Sony ICD-SX750 Operating Instructions - Page 23
Step 4: Preparations Required before Recording, Recording at a meeting, Recording a musical - ic recorder manual
 |
UPC - 027242777729
View all Sony ICD-SX750 manuals
Add to My Manuals
Save this manual to your list of manuals |
Page 23 highlights
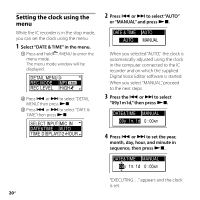
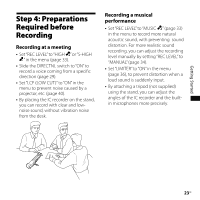
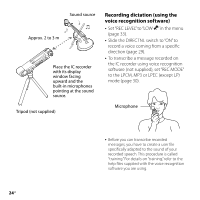
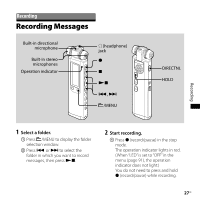
Getting Started Step 4: Preparations Required before Recording Recording at a meeting Set "REC LEVEL" to "HIGH " or "S‑HIGH " in the menu (page 33). Slide the DIRECTNL switch to "ON" to record a voice coming from a specific direction (page 29). Set "LCF (LOW CUT)" to "ON" in the menu to prevent noise caused by a projector, etc. (page 40). By placing the IC recorder on the stand, you can record with clear and lownoise sound, without vibration noise from the desk. Recording a musical performance Set "REC LEVEL" to "MUSIC " (page 33) in the menu to record more natural acoustic sound, with preventing sound distortion. For more realistic sound recording, you can adjust the recording level manually by setting "REC LEVEL" to "MANUAL" (page 34). Set "LIMITER" to "ON" in the menu (page 36), to prevent distortion when a loud sound is suddenly input. By attaching a tripod (not supplied) using the stand, you can adjust the angles of the IC recorder and the builtin microphones more precisely. 23GB
-
 1
1 -
2
-
3
-
4
-
5
-
6
-
7
-
8
-
9
-
10
-
11
-
12
-
13
-
14
-
15
-
16
-
17
-
 18
18 -
 19
19 -
 20
20 -
 21
21 -
 22
22 -
 23
23 -
 24
24 -
 25
25 -
 26
26 -
 27
27 -
 28
28 -
29
-
30
-
31
-
32
-
33
-
34
-
35
-
36
-
37
-
38
-
39
-
40
-
41
-
42
-
43
-
44
-
45
-
46
-
47
-
48
-
49
-
50
-
51
-
52
-
53
-
54
-
55
-
56
-
57
-
58
-
59
-
60
-
61
-
62
-
63
-
64
-
65
-
66
-
67
-
68
-
69
-
70
-
71
-
72
-
73
-
74
-
75
-
76
-
77
-
78
-
79
-
80
-
81
-
82
-
83
-
84
-
85
-
86
-
87
-
88
-
89
-
90
-
91
-
92
-
93
-
94
-
95
-
96
-
97
-
98
-
99
-
100
-
101
-
102
-
103
-
104
-
105
-
106
-
107
-
108
-
109
-
110
-
111
-
112
-
113
-
114
-
115
-
116
-
117
-
118
-
119
-
120
-
121
-
122
-
123
-
124
-
125
-
126
-
127
-
128
-
129
-
130
-
131
-
132
-
133
-
134
-
135
-
136
 |
 |