Sony RDR GX257 Operating Instructions - Page 36
Timer Recording From Connected Equipment, Select [NEW] and press ENTER.
 |
UPC - 027242731318
View all Sony RDR GX257 manuals
Add to My Manuals
Save this manual to your list of manuals |
Page 36 highlights
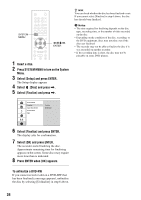
Timer Recording From Connected Equipment +RW -RWVR -RWVideo +R -R You can set the timer for a total of 16 programs, up to one month in advance. b Note While recording, you cannot set additional timer recordings. Z OPEN/ CLOSE 123 456 789 0 '/1 CLEAR TIMER O RETURN
-
 1
1 -
2
-
3
-
4
-
5
-
6
-
7
-
8
-
9
-
10
-
11
-
12
-
13
-
14
-
15
-
16
-
17
-
18
-
19
-
20
-
21
-
22
-
23
-
24
-
25
-
26
-
27
-
28
-
29
-
30
-
 31
31 -
 32
32 -
 33
33 -
 34
34 -
 35
35 -
 36
36 -
 37
37 -
 38
38 -
 39
39 -
 40
40 -
 41
41 -
42
-
43
-
44
-
45
-
46
-
47
-
48
-
49
-
50
-
51
-
52
-
53
-
54
-
55
-
56
-
57
-
58
-
59
-
60
-
61
-
62
-
63
-
64
-
65
-
66
-
67
-
68
-
69
-
70
-
71
-
72
-
73
-
74
-
75
-
76
-
77
-
78
-
79
-
80
-
81
-
82
-
83
-
84
 |
 |

36
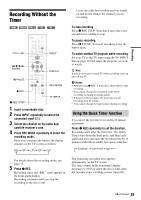
Timer Recording From
Connected Equipment
You can set the timer for a total of 16 programs, up
to one month in advance.
b
Note
While recording, you cannot set additional timer
recordings.
1
Press
Z
OPEN/CLOSE, and place a
recordable disc on the disc tray.
2
Press
Z
OPEN/CLOSE to close the disc
tray.
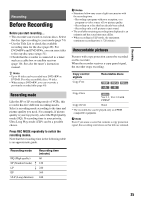
Wait until “REAd” disappears from the front
panel display.
For details on how to insert and format a new
disc, see “Inserting and Formatting a Disc”
(page 26).
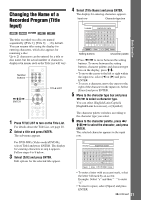
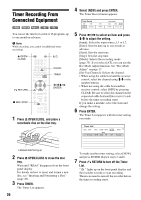
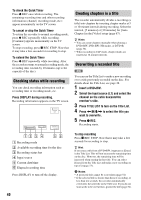
3
Press TIMER.
The Timer List appears.
4
Select [NEW] and press ENTER.
The Timer Record menu appears.
5
Press
<
/
,
to select an item and press
M
/
m
to adjust the setting.
[Input]: Select the input source, L1 or L2.
[Date]: Sets the date up to one month in
advance.
[Start]: Sets the start time.
[Stop]: Sets the stop time.
[Mode]: Selects the recording mode
(page 35). If you select [AT], you can use the
Rec Mode Adjust function. See “Rec Mode
Adjust” on page 37.
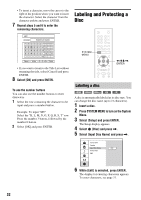
[Set-Top Channel]: Selects the channel.
• When using the cable box/satellite receiver
control, select the channel using
M
/
m
or the
number buttons.
• When not using the cable box/satellite
receiver control, select [OFF] by pressing
CLEAR. Be sure to select the channel on the
connected cable box/satellite receiver’s side
before the timer recording starts.
If you make a mistake, select the item and
change the setting.
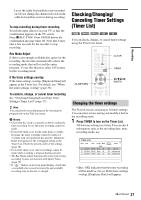
6
Press ENTER.
The Timer List appears with the timer setting
you made.
To make another timer setting, select [NEW]
and press ENTER. Repeat steps 5 and 6.
7
Press
O
RETURN to turn off the Timer
List.
“
” lights up on the front panel display and
the recorder is ready to start recording.
There is no need to turn off the recorder before
the timer recording starts.
-
RW
VR
-
RW
Video
+
RW
-
R
+
R
1
2
3
4
5
6
7
8
9
0
<
/
M
/
m
/
,
,
ENTER
Z
OPEN/
CLOSE
O
RETURN
x
REC STOP
'/1
TIMER
CLEAR
Labeled side facing up
100 min Remain
L1
Input
Mode
Set-Top
Channel
Timer Record
SP
OFF
Date
10/12 Sun
Start
7:20 PM
Stop
7:50 PM
Timer List
NEW
10/12 Sun
Date
L1
Input
7:20 PM
Start
30min
Length
SP
OFF
Mode
Rec. OK
Check
1/2
Set-Top
Channel