Sony RDR GX257 Operating Instructions - Page 54
Select [Divide], and press ENTER., Select [OK]
 |
UPC - 027242731318
View all Sony RDR GX257 manuals
Add to My Manuals
Save this manual to your list of manuals |
Page 54 highlights
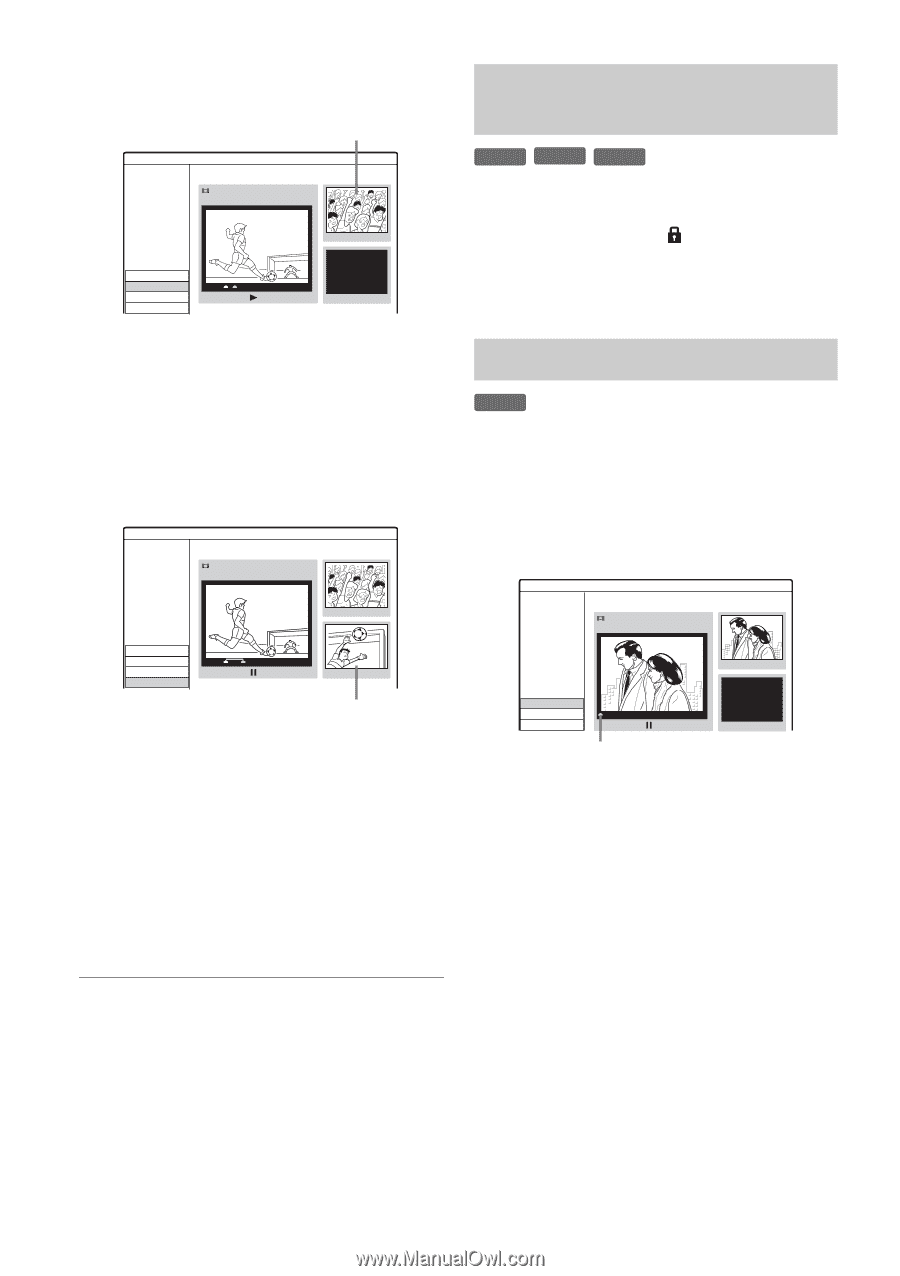
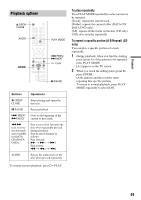
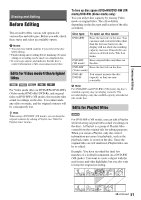
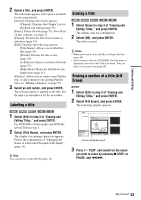
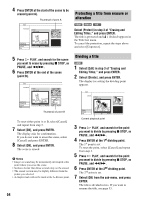
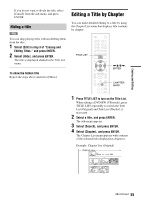
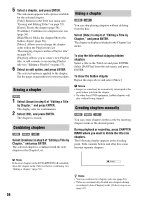
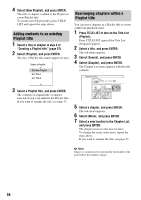
4 Press ENTER at the start of the scene to be erased (point A). Thumbnail of point A Edit A-B Erase Title 1 12/07 0:45:00 Point A 00:15:00 Set Point A Set Point B Cancel OK 00:15:00 Protecting a title from erasure or alteration +RW -RWVR +R Select [Protect] in step 3 of "Erasing and Editing Titles," and press ENTER. The title is protected and [ ] (locked) appears in the Title List menu. To cancel the protection, repeat the steps above and select [Unprotect]. 5 Press H PLAY, and search for the scene you want to erase by pressing x STOP, X PAUSE, and m/M. 6 Press ENTER at the end of the scene (point B). Edit A-B Erase Title 1 12/07 0:45:00 Point A 00:15:00 Set Point A Set Point B Cancel OK 00:15:20 Point B 00:15:20 Thumbnail of point B To reset either point A or B, select [Cancel] and repeat from step 3. 7 Select [OK], and press ENTER. The display asks for confirmation. If you do not want to erase the scene, select [Cancel] and press ENTER. 8 Select [OK], and press ENTER. The scene is erased. b Notes • Images or sound may be momentarily interrupted at the point where you erase the scene. • Sections shorter than three seconds may not be erased. • The erased section may be slightly different from the points you selected. • A chapter mark will not be made at the A-B erase point. 54 Dividing a title +RW 1 Select [Edit] in step 3 of "Erasing and Editing Titles," and press ENTER. 2 Select [Divide], and press ENTER. The display for setting the dividing point appears. Edit Divide Title 2 12/07 0:45:00 #01 00:00:04 Divide Cancel OK 00:00:00 Current playback point 3 Press H PLAY, and search for the point you want to divide by pressing x STOP, X PAUSE, and m/M. 4 Press ENTER at the 1st dividing point. The 1st point is set. To reset the point, select [Cancel] and repeat from step 3. 5 Press H PLAY, and search for the point you want to divide by pressing x STOP, X PAUSE, and m/M. 6 Press ENTER at the 2nd dividing point. The 2nd point is set. 7 Select [OK] from the sub-menu, and press ENTER. The title is divided in two. If you want to rename the title, see page 53.
-
 1
1 -
2
-
3
-
4
-
5
-
6
-
7
-
8
-
9
-
10
-
11
-
12
-
13
-
14
-
15
-
16
-
17
-
18
-
19
-
20
-
21
-
22
-
23
-
24
-
25
-
26
-
27
-
28
-
29
-
30
-
31
-
32
-
33
-
34
-
35
-
36
-
37
-
38
-
39
-
40
-
41
-
42
-
43
-
44
-
45
-
46
-
47
-
48
-
 49
49 -
 50
50 -
 51
51 -
 52
52 -
 53
53 -
 54
54 -
 55
55 -
 56
56 -
 57
57 -
 58
58 -
 59
59 -
60
-
61
-
62
-
63
-
64
-
65
-
66
-
67
-
68
-
69
-
70
-
71
-
72
-
73
-
74
-
75
-
76
-
77
-
78
-
79
-
80
-
81
-
82
-
83
-
84
 |
 |