Sony RDR GX257 Operating Instructions - Page 53
Select [Title Name], and press ENTER., Select [A-B Erase]
 |
UPC - 027242731318
View all Sony RDR GX257 manuals
Add to My Manuals
Save this manual to your list of manuals |
Page 53 highlights
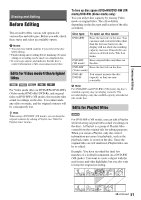
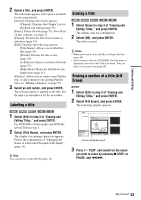
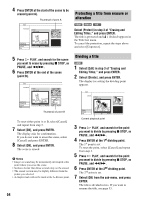
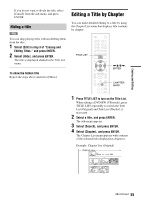
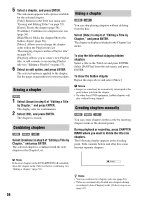
Erasing and Editing 2 Select a title, and press ENTER. The sub-menu appears with options available for the selected title. [Search]: Displays the search options. [Chapter]: Displays the Chapter List for playback and editing (page 55). [Erase]: Erases the title (page 53). For effects on disc capacity, see page 51. [Protect]: Protects the title from erasure or alteration (page 54). [Edit]: Displays the following options. [Title Name]: Allows you to label the title (page 53). [Divide]: Divides the title in two (page 54). [A-B Erase]: Erases a section of the title (page 53). [Hide/Show]: Hides the title/Shows the hidden title (page 55). [Playlist]: Allows you to create a new Playlist title, or add contents to an existing Playlist title (see "Editing a Playlist" on page 57). 3 Select an edit option, and press ENTER. The selected option is applied to the title. See the pages in parentheses for the procedure. Labeling a title +RW -RWVR -RWVideo +R -R 1 Select [Edit] in step 3 of "Erasing and Editing Titles," and press ENTER. For DVD-RWs (Video mode) and DVD-Rs, select [Title] in step 1. 2 Select [Title Name], and press ENTER. The display for entering characters appears. Follow the explanations of "Changing the Name of a Recorded Program (Title Input)" (page 31). z Hint You can label or re-label DVDs (page 32). Erasing a title +RW -RWVR -RWVideo +R -R 1 Select [Erase] in step 3 of "Erasing and Editing Titles," and press ENTER. The display asks for confirmation. 2 Select [OK], and press ENTER. The title is erased. z Hints • When you want to erase all titles, reformat the disc (page 26). • After erasing a title on a DVD+RW, the title name is displayed as erased in the Title List menu. You can select it to record over (page 40). Erasing a section of a title (A-B Erase) -RWVR 1 Select [Edit] in step 3 of "Erasing and Editing Titles," and press ENTER. 2 Select [A-B Erase], and press ENTER. The following display appears. Edit A-B Erase Title 1 12/07 0:45:00 Set Point A Set Point B Cancel OK 00:00:00 Current playback point 3 Press H PLAY, and search for the scene you want to erase by pressing x STOP, X PAUSE, and m/M. ,continued 53
-
 1
1 -
2
-
3
-
4
-
5
-
6
-
7
-
8
-
9
-
10
-
11
-
12
-
13
-
14
-
15
-
16
-
17
-
18
-
19
-
20
-
21
-
22
-
23
-
24
-
25
-
26
-
27
-
28
-
29
-
30
-
31
-
32
-
33
-
34
-
35
-
36
-
37
-
38
-
39
-
40
-
41
-
42
-
43
-
44
-
45
-
46
-
47
-
 48
48 -
 49
49 -
 50
50 -
 51
51 -
 52
52 -
 53
53 -
 54
54 -
 55
55 -
 56
56 -
 57
57 -
 58
58 -
59
-
60
-
61
-
62
-
63
-
64
-
65
-
66
-
67
-
68
-
69
-
70
-
71
-
72
-
73
-
74
-
75
-
76
-
77
-
78
-
79
-
80
-
81
-
82
-
83
-
84
 |
 |
