Sony VPLHS3 Operating Instructions - Page 29
Menu Lists, Menu Configurations, Menu Items
 |
UPC - 027242628793
View all Sony VPLHS3 manuals
Add to My Manuals
Save this manual to your list of manuals |
Page 29 highlights
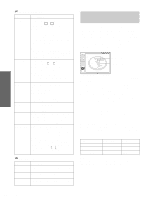
Using the Menus Menu Lists Menu Configurations The projector is equipped with six pages. The items that can be adjusted in each menu are described on page 29 to 32. PICTURE SETTING menu The PICTURE SETTING menu is used for adjusting the picture. You can also adjust the volume. INPUT SETTING menu The INPUT SETTING menu is used to adjust the input signal. You can adjust the size of the picture, and select wide screen mode, etc. SET SETTING menu The SET SETTING menu is used for changing the settings of the projector. MENU SETTING menu The MENU SETTING menu is used to change the onscreen language, display position of the menu screen, etc. INSTALL SETTING menu The INSTALL SETTING menu is used for correcting distortion of the picture. INFORMATION menu The INFORMATION menu is used to display the horizontal and vertical frequencies of the input signal and the used time of the lamp. Menu Items Adjustable items are limited according to the input signals. Items that cannot be adjusted are not displayed in the menu. (1 page 43) PICTURE SETTING Item Description Picture Mode You can select picture viewing mode that best suits the type of picture or the environment. Dynamic: Select for enhanced picture contrast and sharpness. Standard: Recommended for normal viewing condition. Also select to reduce roughness when viewing the picture with Dynamic. Cinema: Select for soft, film-like picture. User 1, 2 and 3: You can adjust the quality of the picture to suit your taste and store the settings. Once the settings are stored, you can view the picture with the adjusted picture quality by pressing the PICTURE MODE. To store the settings 1 Select "User 1", "User 2" or "User 3". 2 Adjust the items you want in the menus. Items that can be stored are: "Adjust Picture..." items other than "Volume," and "Wide Mode" setting Tip You can also adjust the picture quality in "Dynamic", "Standard" or "Cinema" mode. To reset to the factory setting, press RESET. Volume Adjusts the volume. Adjust Picture... Contrast The higher the setting, the greater the contrast. The lower the setting, the lower the cotrast. Brightness The higher the setting, the brighter the picture. The lower the setting, the darker the picture. Color The higher the setting, the greater the intensity. The lower the setting, the lower the intensity. Hue The higher the setting, the more greenish the picture becomes. The lower the setting, the more purplish the picture becomes. Sharpness The higher the setting, the sharper the picture. The lower the setting, the softer the picture. RGB Enhancer Adjusts the picture sharpness when computer signals are input. 29 Menu Lists GB
-
 1
1 -
2
-
3
-
4
-
5
-
6
-
7
-
8
-
9
-
10
-
11
-
12
-
13
-
14
-
15
-
16
-
17
-
18
-
19
-
20
-
21
-
22
-
23
-
 24
24 -
 25
25 -
 26
26 -
 27
27 -
 28
28 -
 29
29 -
 30
30 -
 31
31 -
 32
32 -
 33
33 -
 34
34 -
35
-
36
-
37
-
38
-
39
-
40
-
41
-
42
-
43
-
44
-
45
-
46
-
47
-
48
-
49
-
50
-
51
-
52
-
53
-
54
-
55
-
56
-
57
-
58
-
59
-
60
-
61
-
62
-
63
-
64
-
65
-
66
-
67
-
68
-
69
-
70
-
71
-
72
-
73
-
74
-
75
-
76
-
77
-
78
-
79
-
80
-
81
-
82
-
83
-
84
-
85
-
86
-
87
-
88
-
89
-
90
-
91
-
92
-
93
-
94
-
95
-
96
-
97
-
98
-
99
-
100
-
101
-
102
-
103
-
104
-
105
-
106
-
107
-
108
-
109
-
110
-
111
-
112
-
113
-
114
-
115
-
116
-
117
-
118
-
119
-
120
-
121
-
122
-
123
-
124
-
125
-
126
-
127
-
128
-
129
-
130
-
131
-
132
-
133
-
134
-
135
-
136
-
137
-
138
-
139
-
140
-
141
-
142
-
143
-
144
-
145
-
146
-
147
-
148
 |
 |
