Toshiba 32C120U User Guide - Page 52
Setting the time zone, Viewing the system status, ENTER, Setup, Installation, Time Zone, System Status
 |
View all Toshiba 32C120U manuals
Add to My Manuals
Save this manual to your list of manuals |
Page 52 highlights
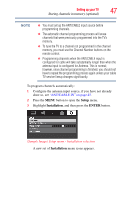
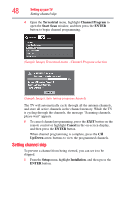
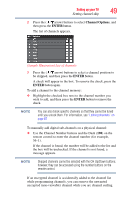
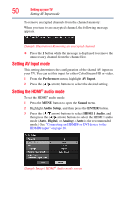
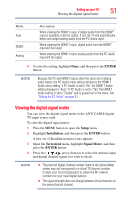
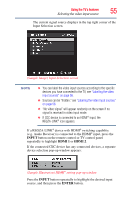
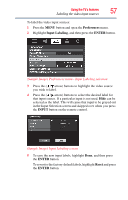
52 Setting up your TV Setting the time zone To close the screen and return to the Terrestrial menu: ❖ Highlight Done, and then press the ENTER button. To return to normal viewing, press the EXIT button. Setting the time zone The Time Zone setup allows you to specify the correct time zone for your region. This feature allows the TV status information to display the correct time zone information for your viewing area. To set the time zone: 1 In the Setup menu, highlight Installation, and then press the ENTER button. 2 Highlight Time Zone, and then press the ENTER button. 3 Press the ( / arrow) buttons to select the region, highlight Done, and then press the ENTER button. After the time zone has been set, you will be asked to set the current Daylight Saving Time status. To set the Daylight Saving Time status: ❖ Press the ( / arrow) buttons to select Yes or No, highlight Done, and then press the ENTER button. Viewing the system status 1 Press the MENU button to open the Setup menu. 2 Highlight Installation, and then press the ENTER button. A new set of Installation menu icons appears. 3 Open the System Status menu, highlight System Information, and then press the ENTER button. 4 Press the ( / arrow) buttons to scroll through the menu bar to select Factory Defaults or Support Information. The related information appears. To close the screen and return to the Installation menu: ❖ Highlight Done in the Support Information screen, and then press the ENTER button. To return to normal viewing, press the EXIT button.
-
 1
1 -
2
-
3
-
4
-
5
-
6
-
7
-
8
-
9
-
10
-
11
-
12
-
13
-
14
-
15
-
16
-
17
-
18
-
19
-
20
-
21
-
22
-
23
-
24
-
25
-
26
-
27
-
28
-
29
-
30
-
31
-
32
-
33
-
34
-
35
-
36
-
37
-
38
-
39
-
40
-
41
-
42
-
43
-
44
-
45
-
46
-
 47
47 -
 48
48 -
 49
49 -
 50
50 -
 51
51 -
 52
52 -
 53
53 -
 54
54 -
 55
55 -
 56
56 -
 57
57 -
58
-
59
-
60
-
61
-
62
-
63
-
64
-
65
-
66
-
67
-
68
-
69
-
70
-
71
-
72
-
73
-
74
-
75
-
76
-
77
-
78
-
79
-
80
-
81
-
82
-
83
-
84
-
85
-
86
-
87
-
88
-
89
-
90
-
91
-
92
-
93
-
94
-
95
-
96
-
97
-
98
-
99
-
100
-
101
-
102
-
103
-
104
-
105
-
106
-
107
-
108
-
109
-
110
-
111
-
112
-
113
-
114
-
115
-
116
-
117
-
118
-
119
-
120
-
121
-
122
-
123
-
124
-
125
-
126
-
127
-
128
-
129
-
130
 |
 |