Tripp Lite SU3000RTXLCD2U Owner's Manual for SU3000RTXLCD2U UPS System 9332C3 - Page 25
Reconnect the DC connector red-to-red, black-to-black
 |
View all Tripp Lite SU3000RTXLCD2U manuals
Add to My Manuals
Save this manual to your list of manuals |
Page 25 highlights
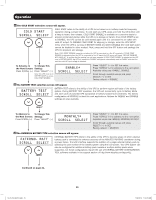
Internal Battery Replacement 4 Remove the batteries using the pull-tab. Note: Please memorize the original battery position and orientation to ensure you install the new batteries correctly. 4 5 Insert the new battery set into the UPS in the same position as the original set. 5 6 Close the battery door. Replace the two battery door screws. 6 7 Reconnect the DC connector (red-to-red, black-to-black) and flip the white connector holder closed. 7 8 Replace the four front screws to secure the bezel. 13-07-015-9332C3.indb 25 8 25 7/26/2013 11:16:35 AM
-
 1
1 -
2
-
3
-
4
-
5
-
6
-
7
-
8
-
9
-
10
-
11
-
12
-
13
-
14
-
15
-
16
-
17
-
18
-
19
-
 20
20 -
 21
21 -
 22
22 -
 23
23 -
 24
24 -
 25
25 -
 26
26 -
 27
27 -
 28
28 -
 29
29 -
 30
30 -
31
-
32
-
33
-
34
-
35
-
36
-
37
-
38
-
39
-
40
-
41
-
42
-
43
-
44
-
45
-
46
-
47
-
48
-
49
-
50
-
51
-
52
-
53
-
54
-
55
-
56
-
57
-
58
-
59
-
60
-
61
-
62
-
63
-
64
-
65
-
66
-
67
-
68
-
69
-
70
-
71
-
72
-
73
-
74
-
75
-
76
-
77
-
78
-
79
-
80
 |
 |

4
5
6
7
8
25
Internal Battery Replacement
4
Remove the batteries using the pull-tab.
Note: Please memorize the original battery position and orientation to ensure you
install the new batteries correctly.
5
Insert the new battery set into the UPS in the same position as
the original set.
6
Close the battery door. Replace the two battery door screws.
7
Reconnect the DC connector (red-to-red, black-to-black) and
flip the white connector holder closed.
8
Replace the four front screws to secure the bezel.
13-07-015-9332C3.indb
25
7/26/2013
11:16:35 AM