Yamaha CVP-94 Owner's Manual - Page 54
Changing the Split Point, Use
 |
View all Yamaha CVP-94 manuals
Add to My Manuals
Save this manual to your list of manuals |
Page 54 highlights
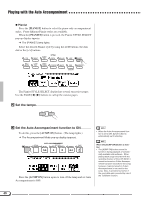
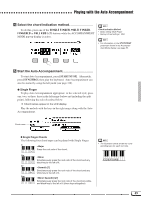
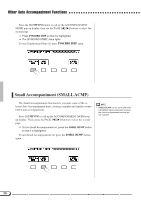
Playing with the Auto Accompaniment FUNCTION MIXER Select the desired part by pressing BASS, CHORD, PAD, PHRASE, or RHYTHM and set the value by using the data dial or [-/+] buttons. The value changes in units of two. You can also select several parts and adjust their volume settings simultaneously. To reset the value to the basic setting of 90, simultaneously press the [-/+] buttons. To exit the function, press the [MIXER] button again (the lamp turns off) and the previous display appears. You can also press the [EXIT] button to return to the previous display. Use the PAGE [] buttons to call up the second page of the MIXER display. On this page you can adjust the volumes of your own keyboard performance and the Harmony sound (see page 53). Volume of Each Part • Range: 0 - 100 (maximum) • Basic setting: KBD (keyboard vol- ume): 100; other parts: 90 • Backup of last settings: OFF Part Volume Relation • [ACMP/SONG VOLUME] is relative to the [MASTER VOLUME]. • Each part volume of the Auto Accom- paniment is relative to the [ACMP/ SONG VOLUME]. • KBD (keyboard volume) is relative to the [MATER VOLUME]. • The Harmony part volume is relative to the KBD part volume. Reverb Depth of Each Part • For details on setting the Reverb Depth for each part, see page 35. Press KBD (keyboard volume) or HARMONY to select the part and use the data dial or [-/+] buttons to set the value. Press PRESET to return the volume values of all parts to the basic setttings. Changing the Split Point The right range and left range for Auto Accompaniment can be divided at any key. Press the desired key while holding the [ACMP ON] to set the split point. (The split point key is included in the left range.) ➔ The keyboard guide lamp of the set split point lights. ACMP ON VIRTUAL ARRANGER INTRO The split point also can be set by using the data dial or [-/+] buttons. To reset the value to the basic setting of F#2, simultaneously press the [-/ +] buttons. • The split point set here for the Auto Accompaniment is the same parameter as set in the Split function (page 30). Split Point • Range: All keys • Basic setting: F#2 • Backup of last settings: OFF • The split point cannot be set when FULL KEYBOARD is selected. 52
-
 1
1 -
2
-
3
-
4
-
5
-
6
-
7
-
8
-
9
-
10
-
11
-
12
-
13
-
14
-
15
-
16
-
17
-
18
-
19
-
20
-
21
-
22
-
23
-
24
-
25
-
26
-
27
-
28
-
29
-
30
-
31
-
32
-
33
-
34
-
35
-
36
-
37
-
38
-
39
-
40
-
41
-
42
-
43
-
44
-
45
-
46
-
47
-
48
-
 49
49 -
 50
50 -
 51
51 -
 52
52 -
 53
53 -
 54
54 -
 55
55 -
 56
56 -
 57
57 -
 58
58 -
 59
59 -
60
-
61
-
62
-
63
-
64
-
65
-
66
-
67
-
68
-
69
-
70
-
71
-
72
-
73
-
74
-
75
-
76
-
77
-
78
-
79
-
80
-
81
-
82
-
83
-
84
-
85
-
86
-
87
-
88
-
89
-
90
-
91
-
92
-
93
-
94
-
95
-
96
-
97
-
98
-
99
-
100
-
101
-
102
-
103
-
104
-
105
-
106
-
107
-
108
-
109
-
110
-
111
-
112
-
113
-
114
-
115
-
116
-
117
-
118
-
119
-
120
-
121
-
122
-
123
-
124
-
125
-
126
-
127
-
128
-
129
-
130
-
131
-
132
-
133
-
134
-
135
-
136
-
137
-
138
-
139
-
140
-
141
-
142
-
143
-
144
-
145
-
146
-
147
-
148
 |
 |
