Yamaha PSR-S900 Owner's Manual
Yamaha PSR-S900 Manual
 |
View all Yamaha PSR-S900 manuals
Add to My Manuals
Save this manual to your list of manuals |
Yamaha PSR-S900 manual content summary:
- Yamaha PSR-S900 | Owner's Manual - Page 1
OWNER'S MANUAL EN - Yamaha PSR-S900 | Owner's Manual - Page 2
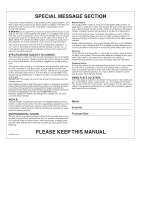
's warranty, and are therefore the owners responsibility. Please study this manual carefully and consult your dealer before requesting service. ENVIRONMENTAL ISSUES: Yamaha strives to produce products that are both user safe and environmentally friendly. We sincerely believe that our products and - Yamaha PSR-S900 | Owner's Manual - Page 3
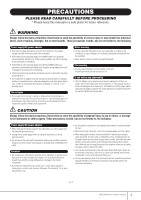
manual PSR-S700) Use the specified adaptor (PA-301/PA-300B/PA-300 or an equivalent recommended by Yamaha user-serviceable parts. If it should appear to be malfunctioning, discontinue use immediately and have it inspected by qualified Yamaha service TV, radio, stereo equipment, mobile some trouble or - Yamaha PSR-S900 | Owner's Manual - Page 4
Yamaha service personnel. • Do not place vinyl, plastic or rubber objects on the instrument, since this might discolor the panel or keyboard be saved all at once. Refer to page 81. Data in the USER tab display (page 27) may be lost due to malfunction or incorrect PSR-S900/S700 Owner's Manual (3)-10 - Yamaha PSR-S900 | Owner's Manual - Page 5
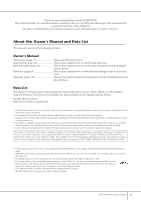
Manual Library http://www.yamaha.co.jp/manual/ • The illustrations and LCD screens as shown in this owner's manual are for instructional purposes only, and may appear somewhat different from those on your instrument. • The example Operation Guide displays shown in this Manual are taken from the PSR - Yamaha PSR-S900 | Owner's Manual - Page 6
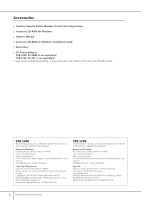
Accessories Guide to Yamaha Online Member Product User Registration Accessory CD-ROM for Windows Owner's Manual Accessory CD-ROM for Windows Installation Guide Music Rest AC Power Adaptor PSR-S900: PA-300B or an equivalent* PSR-S700: PA-301 or an equivalent* * May not be included depending on your - Yamaha PSR-S900 | Owner's Manual - Page 7
Device (USB Flash Memory/Floppy Disk, etc 23 Quick Guide Playing the Demos 24 Operations in Basic Displays 26 Operation of the Main Voice Characteristics 83 Playing Different Voices Simultaneously ........ 84 Keyboard Parts (Right 1, Right 2, Left 84 Playing Two PSR-S900/S700 Owner's Manual 7 - Yamaha PSR-S900 | Owner's Manual - Page 8
VIDEO OUT] terminal) (PSR-S900 194 Connecting a Microphone or Guitar (4 [MIC/LINE IN] Jack) (PSR-S900 194 Using the Receive Settings 208 Setting the Bass Note for Style Playback via MIDI Receive 209 Setting the Chord Type for Style Playback via MIDI Receive 209 8 PSR-S900/S700 Owner's Manual - Yamaha PSR-S900 | Owner's Manual - Page 9
Other Devices Appendix Troubleshooting 210 Specifications 215 Index 217 Panel Button Chart 220 Introduction Quick Guide Basic Operation Reference PSR-S900/S700 Directly to the Internet Using a Microphone (PSR-S900) Using Your Instrument with Other Devices Appendix PSR-S900/S700 Owner's Manual - Yamaha PSR-S900 | Owner's Manual - Page 10
18 • Turning the power on/off ...page 17 Listening to the PSR-S900/S700 • Playing the Demos ...page 24 • Playing songs...page 36 - Playing a Preset Song Style and keyboard page 111 • Playing the Multi Pads ...page 52 Playing the Keyboard • Selecting a Voice (RIGHT1) and playing the keyboard page - Yamaha PSR-S900 | Owner's Manual - Page 11
Lyrics on a separate TV monitor page 59 • Singing with the Guide functions and Song playback page 145 • Using the Talk Setting keyboard pitch to match your singing range page 59 • Tuning the overall sound of the PSR-S900/S700 to match other instruments page 87 • Synchronizing the PSR-S900/S700 - Yamaha PSR-S900 | Owner's Manual - Page 12
backup to your own male voice (or vice versa). 12 PSR-S900/S700 Owner's Manual STYLE Back up your performance with Auto Accompaniment (page 46, record your own keyboard performances, and create your own complete, fully orchestrated compositions - which you can then save to the USER drive or a USB - Yamaha PSR-S900 | Owner's Manual - Page 13
voices (page 30, 83) The PSR-S900/S700 features a wealth of exceptionally authentic and dynamic voices - including piano, strings, woodwinds, and more! the Internet (page 171) Access the special Yamaha website and take advantage of the various music services available there. Multi Pads Add spice to - Yamaha PSR-S900 | Owner's Manual - Page 14
DEMO 6 [DEMO] button P. 24 MIC. 7 [MIC SETTING/VOCAL HARMONY] button (PSR-S900) P. 59 SONG 8 [SELECT] button P. 36 9 [SCORE] button P. 39 0 [LYRICS/TEXT] button (PSR-S900 P. 58 [LYRICS] button (PSR-S700 P. 58 A [REPEAT] button P. 42 B [GUIDE ] button P. 48 14 PSR-S900/S700 Owner's Manual - Yamaha PSR-S900 | Owner's Manual - Page 15
see the alphabetically sorted "Panel Button Chart" on page 220. • For information on the jacks and connectors located on the rear panel, see page 193. PSR-S900/S700 Owner's Manual 15 - Yamaha PSR-S900 | Owner's Manual - Page 16
Keyboard Power Supply 1 WARNING • (PSR-S900) Use the specified adaptor (PA-300B/PA- 2 300 or an equivalent recom- mended by Yamaha) only. • (PSR-S700) Use the speci- fied adaptor (PA-301/PA- 300B/PA-300 or an equiva- lent recommended by Yamaha) only. • (PSR-S900/S700 the PSR-S900/S700 for - Yamaha PSR-S900 | Owner's Manual - Page 17
damage to the speakers or other connected electronic equipment, always switch on the power of the PSR-S900/ S700 before switching on the power of the amplified speakers or mixer and amplifier. Likewise, , and possibly result in the instrument overheating. Air Vents PSR-S900/S700 Owner's Manual 17 - Yamaha PSR-S900 | Owner's Manual - Page 18
high volume for long periods of time. Doing so may cause hearing loss. Using Headphones Connect a pair of headphones to the [PHONES] jack. The internal stereo speaker system is automatically shut off when a pair of head phones is plugged into the [PHONES] jack. 18 PSR-S900/S700 Owner's Manual - Yamaha PSR-S900 | Owner's Manual - Page 19
Contrast of the Display You can adjust the contrast of the display by turning the [LCD CONTRAST] knob located to the left of the display. PSR-S900/S700 Owner's Manual 19 - Yamaha PSR-S900 | Owner's Manual - Page 20
Introduction Adjusting the Brightness of the Display Adjust the brightness of the display. 1 Call up the operation display. [FUNCTION] → [J] UTILITY → TAB[√][®] CONFIG 2 2 Press the [2π†] button to adjust the brightness of the display. 20 PSR-S900/S700 Owner's Manual - Yamaha PSR-S900 | Owner's Manual - Page 21
appear in the opening display (the display that appears when the power is turned on). (Example display from PSR-S900) 1 Call up the operation display. [FUNCTION] → [J] UTILITY → TAB[√][®] OWNER 2 Press the the [EXIT] or [8π†] button to return to the original display. PSR-S900/S700 Owner's Manual 21 - Yamaha PSR-S900 | Owner's Manual - Page 22
-available dry-type head cleaning disk to clean the head about once a month. Ask your Yamaha dealer about the availability of proper headcleaning disks. About Floppy Disks Handle floppy disks with care " position (tab closed). Write-protect tab open (protect position) 22 PSR-S900/S700 Owner's Manual - Yamaha PSR-S900 | Owner's Manual - Page 23
USB storage devices, such as a floppy disk drive, hard disk drive, CD-ROM drive, flash memory reader/writer, etc., can be connected to keyboard or mouse cannot be used. • The instrument does not necessarily support all commercially available USB storage devices. Yamaha PSR-S900/S700 Owner's Manual 23 - Yamaha PSR-S900 | Owner's Manual - Page 24
the [4π†]/[5π†] buttons to select the desired language. 2 Press the [DEMO] button to start the Demos. Demos will play back continuously until stopped. 3 Press the [EXIT] button to stop the Demo playback. When the Demo stops, the display returns to the MAIN display. 24 PSR-S900/S700 Owner's Manual - Yamaha PSR-S900 | Owner's Manual - Page 25
display, press the [J] (Play Overview Demo) button. 2 Press one of the [A]-[H] buttons to show a specific Demo. When the Demo has more than one screen. Press [1π†]-[8π†] buttons corresponding to the screen number. 3 Press the [EXIT] button to exit from the Demos. PSR-S900/S700 Owner's Manual 25 - Yamaha PSR-S900 | Owner's Manual - Page 26
To start with, you should know a little about the basic displays that appear in the Quick Guide. There are three basic displays: Main display ➤ File selection display ➤ Function display ➤ See below : Simply press the [DIRECT ACCESS] button, then the [EXIT] button. 26 PSR-S900/S700 Owner's Manual - Yamaha PSR-S900 | Owner's Manual - Page 27
example here, we'll call up and use the Song Selection display. 2 Quick Guide 1 3, 5 3, 5 4 1 Press the SONG [SELECT] button to call up USER/USB). About PRESET/USER/USB PRESET Internal memory to which the preprogrammed data are installed as preset data. USER PSR-S900/S700 Owner's Manual 27 - Yamaha PSR-S900 | Owner's Manual - Page 28
the display. n On the PSR-S700, "2 S.ART" shown in the illustration at right is displayed as "2 VOLUME." 3 Press the TAB [√][®] buttons to select the KEYBOARD/PANEL tab. When the setting is further divided into additional settings, a list will be shown in the display. 28 PSR-S900/S700 Owner's Manual - Yamaha PSR-S900 | Owner's Manual - Page 29
this manual, arrows are used in the instructions, indicating in shorthand the process of calling up certain displays and functions. For example, the instructions above can be indicated in shorthand as: [FUNCTION] → [D] CONTROLLER → TAB [√][®] KEYBOARD/PANEL → [A] 1 INITIAL TOUCH. PSR-S900/S700 Owner - Yamaha PSR-S900 | Owner's Manual - Page 30
Guide Playing Voices The instrument features a wide variety of exceptionally realistic Voices, including piano, guitar, the [PIANO] button to display various piano Voices. n About the various Voices Refer to the Voice List in the Data List available at the Yamaha website PSR-S900/S700 Owner's Manual - Yamaha PSR-S900 | Owner's Manual - Page 31
[7π] (INFORMATION) button. (PSR-S900 only) • You can instantly jump back to the Main display by "double-clicking" on one of the [A]-[J] buttons. 4 Play the keyboard. Recalling your favorite Voices easily Refer to page 135 for details on Registration Memory operations. PSR-S900/S700 Owner's Manual 31 - Yamaha PSR-S900 | Owner's Manual - Page 32
sounds. • Setting separate Voices for the left and right sections of the keyboard You can play different Voices with the left and right hands. For example, you can set up the keyboard to play the bass Voice with your left hand and the piano Voice with your right hand. 32 PSR-S900/S700 Owner's Manual - Yamaha PSR-S900 | Owner's Manual - Page 33
Guide Setting the touch sensitivity of the keyboard Best for players with a the keyboard. The Pitch Bend is applied to all the keyboard parts KEYBOARD" or "AI FULL KEYBOARD" with the [ACMP] and PART ON/OFF [LEFT] turned on. The maximum pitch bend range can be changed via the following instructions - Yamaha PSR-S900 | Owner's Manual - Page 34
minute. The range is between 5 and 500. The higher the value, the faster the tempo. 3 Press the [EXIT] button to close the Tempo display. 34 PSR-S900/S700 Owner's Manual - Yamaha PSR-S900 | Owner's Manual - Page 35
Quick Guide Set the Popup Display Time 1 Call up the operation display. [FUNCTION] → [J] UTILITY → TAB [√][®] CONFIG 2 2 Select the [B] (2 POPUP Bell On Conventional metronome sound, with bell. TIME SIGNATURE Determines the time signature of the metronome sound. PSR-S900/S700 Owner's Manual 35 - Yamaha PSR-S900 | Owner's Manual - Page 36
Quick Guide Practicing with the Preset Songs n Song In this manual, the button to call up the Song selection display. 2 Press the [A] button to select the Sample Song category. 2 3 3 Press one of the [A]-[E] buttons to select the desired Song button to start playback. 36 PSR-S900/S700 Owner's Manual - Yamaha PSR-S900 | Owner's Manual - Page 37
Guide 5 Press the SONG [J] (STOP) button to stop playback. Playing Songs saved to USER (page 73) 1 Press the SONG [SELECT] button to call up the Song selection display. 2 Press the TAB [√][®] buttons to select the USER button to select "OFF" in the display in step 2. PSR-S900/S700 Owner's Manual 37 - Yamaha PSR-S900 | Owner's Manual - Page 38
Quick Guide Boost the volume of the part to be practiced On the instrument, a single Song can contain separate data for up to sixteen MIDI indicators, which light as the Song plays back. Watching these as you listen can show you which channel you wish to boost. 38 PSR-S900/S700 Owner's Manual - Yamaha PSR-S900 | Owner's Manual - Page 39
Quick Guide Displaying Music Notation (Score) ] button to display the music nota- tion. n The music notation at right is for instructional purposes only, and the song depicted is not one of the preset Songs on your instrument. the items you want not to be displayed. PSR-S900/S700 Owner's Manual 39 - Yamaha PSR-S900 | Owner's Manual - Page 40
of a Song (page 166). Muting the Right- or Left-hand Part Viewing the Score The Guide function indicates the notes you should play, when you should play them, and how long you the [SCORE] button to call up the Score display. 2 Turn the [GUIDE] button on. 2 3 4 40 PSR-S900/S700 Owner's Manual - Yamaha PSR-S900 | Owner's Manual - Page 41
Turn the [GUIDE] button off. Adjusting the volume balance between the Song and the keyboard This lets keyboard parts (Right 1, Right 2, Left) See page 84. Other guide functions The initial setting "Follow Lights" was used in the instructions with your keyboard performance. • Vocal CueTIME (PSR-S900) - Yamaha PSR-S900 | Owner's Manual - Page 42
Press the [REPEAT] button again at the ending point (B). After an automatic lead-in (to help guide you into the phrase), the range from Point A to Point B is played back repeatedly. n Instantly stop playback. 5 Press the [REPEAT] button to turn off Repeat playback. 42 PSR-S900/S700 Owner's Manual - Yamaha PSR-S900 | Owner's Manual - Page 43
Quick Guide Other Methods for Specifying the A-B Repeat Range ● Specifying the repeat range while [REC] button. 4 Start recording. Recording begins automatically as soon as you play a note on the keyboard. 5 Press the SONG [J] (STOP) button to stop recording. A message prompting you to save the - Yamaha PSR-S900 | Owner's Manual - Page 44
Main display during Song playback, letting you easily check whether the Song contains chord data or not. 1 Select a Song (page 36). In these example instructions, use the Songs in the "SampleSongs" folder. 2 Call up the operation display. [FUNCTION] → [B] SONG SETTING 44 PSR-S900/S700 Owner's Manual - Yamaha PSR-S900 | Owner's Manual - Page 45
) on. Quick Guide 4 Press the SONG [F/K] (PLAY/PAUSE) button to start playback. 5 Play the keyboard. The instrument automatically matches your performance on the keyboard to the Song . 7 Press the [8π†] button to turn the [P.A.T.] (Performance Assistant) off. PSR-S900/S700 Owner's Manual 45 - Yamaha PSR-S900 | Owner's Manual - Page 46
wide range of different musical genres including pop, jazz, and many others. Quick Guide Playing "Mary Had a Little Lamb" with the Auto Accompaniment Feature MARY HAD C C 3 21 2 3 G C 2 3 21 1 Ending 1 1 4 1 1 Press the STYLE CONTROL "COUNTRY" button. 46 PSR-S900/S700 Owner's Manual - Yamaha PSR-S900 | Owner's Manual - Page 47
of the [A]-[J] buttons to select a Style "CountryPop." Quick Guide n • The Style type and its defining characteristics are Auto Accompaniment. Use the left-hand section (lower part) of the keyboard to play the chords for sounding the Auto Accompaniment. 3 4 5 PSR-S900/S700 Owner's Manual 47 - Yamaha PSR-S900 | Owner's Manual - Page 48
Guide to the Style List in the Data List available at the Yamaha website. (See page 5.) • Quickly changing the Style tempo To adjust the Style volume, press the [2π†] button. To adjust the keyboard (RIGHT 1) volume, press the [6π†] button. 3 Press the [EXIT [B] 4 TAP 48 PSR-S900/S700 Owner's Manual - Yamaha PSR-S900 | Owner's Manual - Page 49
Quick Guide During Style Playback ● Main This Style anytime you want by simply releasing or playing the keys (in the chord section of the keyboard). This is a great way to add dramatic breaks and accents to your performance. Press the [ you select a Style (page 110). PSR-S900/S700 Owner's Manual 49 - Yamaha PSR-S900 | Owner's Manual - Page 50
Quick Guide About the section button (INTRO/MAIN/ENDING, etc . Non-decaying voices such as strings are held continuously, while decay-type voices such as piano decay more slowly (as if the sustain pedal has been pressed). 1 Press the PART type is selected (page 107). 50 PSR-S900/S700 Owner's Manual - Yamaha PSR-S900 | Owner's Manual - Page 51
Quick Guide Appropriate Panel Settings for the Selected Style-One Touch Setting One Touch Setting is a powerful and convenient feature that automatically each OTS button will be lost if you change the Style or turn the power off without executing the Save operation. PSR-S900/S700 Owner's Manual 51 - Yamaha PSR-S900 | Owner's Manual - Page 52
Guide The Multi Pads The Multi Pads can be used to play a number of short pre-recorded rhythmic and melodic sequences that can be used to add impact and variety to your keyboard performances. Multi Pads are grouped in Banks or four each. The PSR-S900/S700 to stop. 52 PSR-S900/S700 Owner's Manual - Yamaha PSR-S900 | Owner's Manual - Page 53
while playing the Multi Pads. Quick Guide Voice Effects The PSR-S900/S700 features a sophisticated multi-processor effect DSP (Digital Signal Processor) effect on or off for the currently selected keyboard part. • The DSP VARI. (Variation) switch is used to change PSR-S900/S700 Owner's Manual 53 - Yamaha PSR-S900 | Owner's Manual - Page 54
Guide in the Chord section right-hand range of the keyboard. You can also use the Harmony effect with /Echo Type Piano Live! GrandPiano Guitar & Bass Cool! PowerLead Cool! ElectricGtr RockDuet CountryDuet Perc. & Drum Kit Vibraphone Trill Timpani Tremolo 54 PSR-S900/S700 Owner's Manual - Yamaha PSR-S900 | Owner's Manual - Page 55
Quick Guide Calling Up Ideal Setups for Each Song (Music Finder) If you want to play in a certain genre of music but don't know the first record. • BEAT This is the time signature registered to each record. • TEMPO This is the assigned tempo setting for the record. PSR-S900/S700 Owner's Manual 55 - Yamaha PSR-S900 | Owner's Manual - Page 56
Quick Guide 4 Play the keyboard. Notice that the panel settings to a USB storage device. To use the Repertoire function, save the desired Style in "USER" tab. 2 Press the [7π] (REPERTOIRE) button. The panel settings that match the records (ascending or descending). 56 PSR-S900/S700 Owner's Manual - Yamaha PSR-S900 | Owner's Manual - Page 57
, you can sing a song using a microphone. Quick Guide Connecting a Microphone (PSR-S900 only) 1 Make sure you have a conventional dynamic . This lamp lights to indicate that an audio signal is being received. Make sure to adjust the control so the lamp lights in . PSR-S900/S700 Owner's Manual 57 - Yamaha PSR-S900 | Owner's Manual - Page 58
Guide Singing with the Lyrics Display Try singing while playing back a Song containing lyric data 1 Select a Song (page 36). 2 Press the [LYRICS/TEXT] button (PSR-S900) / [LYRICS] button (PSR-S700 The text file, which is copied in the USER tab can be showed. • Line feed ( PSR-S900/S700 Owner's Manual - Yamaha PSR-S900 | Owner's Manual - Page 59
Guide Displaying the lyrics/text on an external TV monitor (PSR-S900) The lyrics indicated on the display can also be output via the VIDEO OUT terminal. 1 Use an appropriate video cable to connect the [VIDEO OUT] connec- tor of the PSR the Mixing Console (page 95). PSR-S900/S700 Owner's Manual 59 - Yamaha PSR-S900 | Owner's Manual - Page 60
Quick Guide Adding Harmony Vocals to Your Voice (PSR-S900) You can also automatically apply various harmony Harmony type. For details on the Vocal Harmony types, refer to the Data List available at the Yamaha website. (See page 5.) 6 Press the [ACMP] button to turn on Auto Accompaniment. 7 Press - Yamaha PSR-S900 | Owner's Manual - Page 61
Quick Guide Adjusting the microphone and Song volume (PSR-S900) You can page 62 page 62 page 146 PSR-S900/S700 PSR-S900 PSR-S900/S700 Changing the Key (Transpose) You can match both the Song and your keyboard performance to a certain key. the TRANSPOSE display. PSR-S900/S700 Owner's Manual 61 - Yamaha PSR-S900 | Owner's Manual - Page 62
Quick Guide Displaying the Music Score on the Instrument and the Lyrics on TV (PSR-S900) This convenient sing-along function lets you have the music score shown on the display of the to add any desired effects to your voice as you speak to your audience (page 191). 62 PSR-S900/S700 Owner's Manual - Yamaha PSR-S900 | Owner's Manual - Page 63
Keyboard parts (Right 1, Right 2, Left), Song parts, Style parts • Input from a microphone, guitar or other instrument (via the [MIC/LINE IN] jack). • Input from another audio device, such as a CD player, MP3 player (USB Flash Memory/Floppy Disk, etc)" on page 23. PSR-S900/S700 Owner's Manual 63 - Yamaha PSR-S900 | Owner's Manual - Page 64
) button to call up the Property display, then check the information of the USB storage device. Quick Guide 5 6,7 The following information is indicated on the PROPERTY display. • DRIVE NAME Number of the USB press the [J] (STOP) button on the Recording display. 64 PSR-S900/S700 Owner's Manual - Yamaha PSR-S900 | Owner's Manual - Page 65
Quick Guide Playing Back the Recorded Performance Play back the Selection Display" on page 72. However, the operation that copies/moves file/folder to the User tab cannot be done here. 3 Press one of the [A]-[J] buttons corresponding to the file " on the previous page. PSR-S900/S700 Owner's Manual 65 - Yamaha PSR-S900 | Owner's Manual - Page 66
or confirmation dialog) sometimes appears on the screen to facilitate operation. When the message appears, simply press the appropriate button. 66 PSR-S900/S700 Owner's Manual In this example, press the [F] (YES) button to start formatting the USB storage device (USB flash memory, floppy disk, etc - Yamaha PSR-S900 | Owner's Manual - Page 67
the Guide function display Press the [DIRECT ACCESS] button, then press the [GUIDE] button. 1 2 Returning to the Main display Here's a convenient way to return to the Main display from any other display: Simply press the [DIRECT ACCESS] button, then the [EXIT] button. PSR-S900/S700 Owner's Manual 67 - Yamaha PSR-S900 | Owner's Manual - Page 68
rest of the keyboard, and "L", which divides the left-hand and right-hand sections. 9 Recording status of USB Audio recorder (PSR-S900) While recording, a "REC" indication appears. ) Registration Sequence Appears when the Registration Sequence is active (page 138). 68 PSR-S900/S700 Owner's Manual - Yamaha PSR-S900 | Owner's Manual - Page 69
can select Voices, Styles, and other data. VOICE category selection buttons SONG SELECT button STYLE category selection buttons REGIST. BANK buttons MULTI PAD SELECT button PSR-S900/S700 Owner's Manual 69 - Yamaha PSR-S900 | Owner's Manual - Page 70
and File Selection Display) File Selection Display Configuration • Location (drive) of data Preset User Location where pre-programmed Location where recorded or (preset) data is stored. edited data files into a folder. Folder File Folder Icon Basic Operation 70 PSR-S900/S700 Owner's Manual - Yamaha PSR-S900 | Owner's Manual - Page 71
the Voice files in a folder. The next highest level - in this case, folder - is shown. Each folder shown in this display contains appropriately categorized Voices. PSR-S900/S700 Owner's Manual 71 - Yamaha PSR-S900 | Owner's Manual - Page 72
[√][®] MEDIA 3 Press the [A]/[B] buttons to select the USB device to be formatted from the device list. 4 Press the [H] button to format the device/media. 3 4 72 PSR-S900/S700 Owner's Manual - Yamaha PSR-S900 | Owner's Manual - Page 73
the File Selection display. Internal memory (User tab displays) capacity The internal memory capacity of the instrument is about 1.4MB (PSR-S900)/560KB (PSR-S700). This capacity applies to all file at the appropriate position among the files in alphabetical order. PSR-S900/S700 Owner's Manual 73 - Yamaha PSR-S900 | Owner's Manual - Page 74
User tab display, Disk Orchestra Collection (DOC) Songs, and Disklavier Piano Soft Songs. These cannot be copied/moved/saved to USB storage device. Prot. 2 Orig Indicates Yamaha be moved/saved only to the USER tab display and USB storage device 5 Select the destination tab (USER, USB) to paste the - Yamaha PSR-S900 | Owner's Manual - Page 75
the Cut operation, press the [8†] (CANCEL) button. 5 Select the destination tab (USER, USB) to which the file is to be pasted, by using the TAB press the [8†] (CANCEL) button. 5 Follow the on-display instructions. YES Delete the file/folder YES ALL Delete all selected PSR-S900/S700 Owner's Manual 75 - Yamaha PSR-S900 | Owner's Manual - Page 76
operation, press the [8†] (CANCEL) button. 7 Press the [8π] (OK) button to apply the selected icon. 8 Press the [8π] (OK) button to actually enter the new name. 76 PSR-S900/S700 Owner's Manual - Yamaha PSR-S900 | Owner's Manual - Page 77
of the new folder (see below). Entering Characters The instructions that follow show you how to enter characters in PSR-S700), but this may differ depending on the length of the file names. The maximum number of files/folders which can be stored in a folder in the USER PSR-S900/S700 Owner's Manual 77 - Yamaha PSR-S900 | Owner's Manual - Page 78
Press the [8†] (CANCEL) button. • Entering the "hiragana" itself (without converting it) Press the [8π] (OK) button. • Canceling the character-entering operation Press the [8†] (CANCEL) button. 78 PSR-S900/S700 Owner's Manual - Yamaha PSR-S900 | Owner's Manual - Page 79
while holding the B5 key (right-most B key on the keyboard). 4 23 3 Checkmark the box of the item to be reset to the factory pro- grammed settings by pressing the [4π] button. 4 Press the [D] button to execute the Factory Reset operation for all checkmarked items. PSR-S900/S700 Owner's Manual 79 - Yamaha PSR-S900 | Owner's Manual - Page 80
Yamaha website. (See page 5.) MIDI SETUP The MIDI settings including the MIDI templates on the User tab display are handled as a single file. USER EFFECT The User Effect settings including the user effect types, user master EQ types, and user vocal harmony types (PSR PSR-S900/S700 Owner's Manual - Yamaha PSR-S900 | Owner's Manual - Page 81
Data Backup For maximum data security Yamaha recommends that you copy or [+] and [-] buttons simultaneously. Voice: Press one of the VOICE buttons. 3 Select the USER tab by using the TAB [√][®] buttons. Data Backup 4 Press the [3†] (COPY) button your data (page 73). PSR-S900/S700 Owner's Manual 81 - Yamaha PSR-S900 | Owner's Manual - Page 82
n • It takes a few minutes to complete the backup/restore operation. • Backup data which has not been created on the PSRS900/S700 cannot be restored. CAUTION Move the Protected Songs which are saved to the USER display before restoring. If the songs are not moved, the operation deletes the data. 82 - Yamaha PSR-S900 | Owner's Manual - Page 83
Guide PSR guitar keyboard. They are primarily designed for use with recorded MIDI sequence data (such as songs and styles). Some of the guitar guitar guitar keyboard sampled in stereo Yamaha keyboard. SFX Various special effect sounds keyboard PSR-S900/S700 using the Mega Voices will not sound properly - Yamaha PSR-S900 | Owner's Manual - Page 84
Different Voices Simultaneously The PSR-S900/S700 keyboard features various functions and example, try playing the bass Voice with your left hand and the piano Voice with your right. Left part Right 1 part Refer to page 86 . 84 PSR-S900/S700 Owner's Manual Left part Right 2 part Right 1 part - Yamaha PSR-S900 | Owner's Manual - Page 85
Using, Creating and Editing Voices 5 5 5 Press one of the [A]-[J] buttons to select a Voice. 6 Play the keyboard. 7 Press the PART ON/OFF [RIGHT 2] button again to turn it off. Switching the Right 2 part on/off turning the Right 2 part on and off while you play. PSR-S900/S700 Owner's Manual 85 - Yamaha PSR-S900 | Owner's Manual - Page 86
. Specifying the split point (the border between the rightand left-hand range) See page 110. Press one of the [A]-[J] buttons to select a Voice. Play the keyboard. Press the PART ON/OFF [LEFT] button again to turn it off. 86 PSR-S900/S700 Owner's Manual - Yamaha PSR-S900 | Owner's Manual - Page 87
-tune the pitch of the entire instrument-useful when you play the PSR-S900/S700 along with other instruments or CD music. 1 Call up the operation display. [FUNCTION] → [A] selected scale is indicated in the keyboard illustration at the upper right of the display. PSR-S900/S700 Owner's Manual 87 - Yamaha PSR-S900 | Owner's Manual - Page 88
the base note is changed, the pitch of the keyboard is transposed, yet maintains the original pitch relationship between the 0 0 -50.0 0 0 0 0 0 0 -50.0 0 0 ARABIC 2 0 0 0 0 -50.0 0 0 0 0 0 0 -50.0 * In the display, the rounded off value is shown. 88 PSR-S900/S700 Owner's Manual - Yamaha PSR-S900 | Owner's Manual - Page 89
keyboard according to the chord specified in the left-hand section of the keyboard keyboard. Echo Types These types apply echo effects to notes played in the right-hand section of the keyboard in the chord range of the keyboard-letting you hear only the Harmony Point (for keyboard Voice) Left Voice - Yamaha PSR-S900 | Owner's Manual - Page 90
parameter is available for all types with the exception of "Multi Assign." This lets you determine the keyboard part via which the harmony/echo notes will be sounded. This parameter is available when one of the the set value). Using, Creating and Editing Voices 90 PSR-S900/S700 Owner's Manual - Yamaha PSR-S900 | Owner's Manual - Page 91
Console gives you intuitive control over aspects of the keyboard parts and Song/Style channels, including volume balance and the It lets you adjust the levels and stereo position (pan) of each Voice to set the optimum balance and stereo image, and lets you set how PSR-S900/S700 Owner's Manual 91 - Yamaha PSR-S900 | Owner's Manual - Page 92
User Voices can be selected. When the Song channels are called up, User Voices cannot be selected. Determines the stereo position of the selected part (channel). Determines the level of each part or channel, giving you fine control over the balance of all the parts. 92 PSR-S900/S700 Owner's Manual - Yamaha PSR-S900 | Owner's Manual - Page 93
is a function that creates a smooth transition in pitch from the first note played on the keyboard to the next. The Portamento Time determines the pitch transition time. Higher values result in a longer of the low EQ band that is attenuated/boosted for each part. PSR-S900/S700 Owner's Manual 93 - Yamaha PSR-S900 | Owner's Manual - Page 94
ALL NO REVOICE: Replaces all of the replaceable XG Voices with the high-quality Voices of the PSR-S900/S700. Replaces only the recommended Voices that are suitable for playing back the song. All Voices are , press the [F] button to set SONG AUTO REVOICE to ON. 94 PSR-S900/S700 Owner's Manual - Yamaha PSR-S900 | Owner's Manual - Page 95
that include additional effects usually used for a specific part, such as distortion and tremolo. RIGHT 1, RIGHT 2, LEFT, SONG CHANNEL 1-16 Microphone sound* (PSR-S900) Any unused DSP blocks are automatically assigned to the appropriate parts (channels) as needed. * Handled only by DSP4. 6 Use the - Yamaha PSR-S900 | Owner's Manual - Page 96
5: Adjust the Effect Return Level by pressing [8π†] button. 13 Press the [I] (SAVE) button to call up the display for saving your origi- nal effect. 96 PSR-S900/S700 Owner's Manual - Yamaha PSR-S900 | Owner's Manual - Page 97
create your own custom EQ settings by adjusting the frequency bands, and save the settings to one of two User Master EQ types. Gain Bandwidth (also called "Shape" or "Q") 0 Freq (Frequency) 5 bands → type to suit your perfor- mance (music style or environment). PSR-S900/S700 Owner's Manual 97 - Yamaha PSR-S900 | Owner's Manual - Page 98
). Up to two types of EQ can be created and saved. When recalling the saved EQ type, use the same procedure as in step 6. 98 PSR-S900/S700 Owner's Manual - Yamaha PSR-S900 | Owner's Manual - Page 99
Voice without saving the settings, the settings will be lost. If you wish to store the settings here, make sure to save the settings as a User Voice before selecting another Voice or turning the power off. PSR-S900/S700 Owner's Manual 99 - Yamaha PSR-S900 | Owner's Manual - Page 100
your playing strength (velocity). OFFSET Determines the amount by which received velocities are adjusted for the actual velocity effect. Shifts the transition in pitch from the first note played on the keyboard to the next. TOUCH SENSE OFFSET Changes to velocity curve PSR-S900/S700 Owner's Manual - Yamaha PSR-S900 | Owner's Manual - Page 101
such as the quick attack and decay of percussion sounds, or the long release of a sustained piano tone. ATTACK Determines how quickly the sound reaches its maximum level after the key is played. . Level Sustain level ATTACK DECAY RELEASE Time Key on Key off PSR-S900/S700 Owner's Manual 101 - Yamaha PSR-S900 | Owner's Manual - Page 102
1] button before you set it. This has the same settings as the display of "Selecting the Harmony/Echo type" on page 89 in step 2. 102 PSR-S900/S700 Owner's Manual - Yamaha PSR-S900 | Owner's Manual - Page 103
Voice Creating-Voice Set Creating Your Original Organ Flutes Voices The PSR-S900/S700 features a variety of lush, dynamic organ Voices that you can call up with 5 4 If you select the EFFECT/EQ tab display, use the [A]/[B] buttons to select the parameter to be edited. PSR-S900/S700 Owner's Manual 103 - Yamaha PSR-S900 | Owner's Manual - Page 104
will be lost. If you wish to store the settings here, make sure to save the settings as a User Voice before selecting another Voice or turning the power off. 5 Use the [A]-[D], [F]-[H] and [1π†]-[8π†] buttons to organ sounds. Using, Creating and Editing Voices 104 PSR-S900/S700 Owner's Manual - Yamaha PSR-S900 | Owner's Manual - Page 105
HARMONY/ECHO parameter to OFF (in the display explained below). You can set these independently by keyboard part and parameter group. 1 Call up the operation display. [FUNCTION] → [E] REGIST.SEQUENCE/ . The Data List is available at the Yamaha website. (See page 5.) PSR-S900/S700 Owner's Manual 105 - Yamaha PSR-S900 | Owner's Manual - Page 106
Accompaniment Styles Reference to Quick Guide pages Playing "Mary Had follows the chords of the player. As a result, your by the chords you play in the chord section of the keyboard. There are seven types of fingerings. 1 Call up the Auto Accompaniment Styles 106 PSR-S900/S700 Owner's Manual - Yamaha PSR-S900 | Owner's Manual - Page 107
recognizes the various chord types which are listed on the Data List available at the Yamaha website (page 5) and can be looked up using the Chord Tutor function (page rhythm simply by playing the keyboard, if Sync Start is enabled (turn on the [SYNC START] button). PSR-S900/S700 Owner's Manual 107 - Yamaha PSR-S900 | Owner's Manual - Page 108
107), you can perform with your own pace while sounding the chord by pressing the chord section of the keyboard with your one finger. Setting the fade in/out time You can set the time of the fade fade out. Using, Creating and Editing the Auto Accompaniment Styles 108 PSR-S900/S700 Owner's Manual - Yamaha PSR-S900 | Owner's Manual - Page 109
Style Playback-related Settings Style Playback-related Settings The PSR-S900/S700 has a variety of Style playback functions which can be accessed in the display below. 1 Call up volume changes in response to your playing strength in the chord section of the keyboard. PSR-S900/S700 Owner's Manual 109 - Yamaha PSR-S900 | Owner's Manual - Page 110
Point Settings These are the settings (there are two Split Points) that separate the different sections of the keyboard: the Chord section, the LEFT part section and the RIGHT 1 and 2 section. The two Split Point (as in the default) or two different notes as desired. 110 PSR-S900/S700 Owner's Manual - Yamaha PSR-S900 | Owner's Manual - Page 111
specify the Split Point of the Voice and chord section of the keyboard by using STYLE in the display, and you can specify the Split Tonal Balance (MIXING CONSOLE)" on page 91, and follow the instructions. Convenient Music Finder feature Music Finder (page 55) is a PSR-S900/S700 Owner's Manual 111 - Yamaha PSR-S900 | Owner's Manual - Page 112
tempo you want to use in your performance by using the [1π†]/[2π†] (TEMPO) buttons. GENRE Select the desired music genre by using the [5π†]/ [6π†] (GENRE) buttons. 112 PSR-S900/S700 Owner's Manual - Yamaha PSR-S900 | Owner's Manual - Page 113
been added. Deleting Records from the FAVORITE Display 1 Select the record you want to delete from the FAVORITE display. 2 Press the [H] (DELETE FROM FAVORITE) button. PSR-S900/S700 Owner's Manual 113 - Yamaha PSR-S900 | Owner's Manual - Page 114
affect the actual Beat setting of the Style itself. The maximum number of records is 2500 (PSR-S900)/ 1200 (PSR-S700), including internal records. 3 Edit the record as desired. • Editing the song name/keyword in the FAVORITE display, the record is overwritten. 114 PSR-S900/S700 Owner's Manual - Yamaha PSR-S900 | Owner's Manual - Page 115
separate files. 1 Call up the Save display. [MUSIC FINDER] → TAB [√][®] ALL → [7π†] (FILES) 2 Press the TAB [√][®] buttons to select the location for saving (USER/ USB). 3 Press the [6†] button to save the file (page 73). All records are saved together as a single file. PSR-S900/S700 Owner's Manual 115 - Yamaha PSR-S900 | Owner's Manual - Page 116
settings (page 79). Calling up Music Finder Records Saved to USER/USB To call up the Music Finder records you've saved to USER/USB, follow the instructions below. 1 Call up the [MUSIC FINDER] display. [MUSIC file. Select "CANCEL" to abort this operation. 2 3 4 4 116 PSR-S900/S700 Owner's Manual - Yamaha PSR-S900 | Owner's Manual - Page 117
Finder Plus) This service provides information on Music . For more details about this service, go to the following website. http://music.yamaha.com/idc 1 Make sure that open the Web page. The available contents of the Music Finder Plus service are subject to change. 3 2 4 4 Press the [EXIT] - Yamaha PSR-S900 | Owner's Manual - Page 118
having to play the parts on the instrument, since you can enter each event manually. ■ Style Assembly ➤ See page 123 This convenient feature lets you create composite 1 Chord 2 Pad Phrase 1 Phrase 2 Rhythm 1 Rhythm 2 Bass Chord 1 Chord 2 Pad Phrase 1 Phrase 2 118 PSR-S900/S700 Owner's Manual - Yamaha PSR-S900 | Owner's Manual - Page 119
for selecting sections, etc. by pressing the [EXIT] the STYLE CREATOR display disappears, you can press the [F] (REC CH) button to re-display it. button. PSR-S900/S700 Owner's Manual 119 - Yamaha PSR-S900 | Owner's Manual - Page 120
press the appropriate numbered button, [1π]-[8π]. You can cancel the deletion by pressing the same numbered button again, before releasing your finger from the [J] button. 120 PSR-S900/S700 Owner's Manual - Yamaha PSR-S900 | Owner's Manual - Page 121
(REC CH) button and press the appropriate [1†]-[8†] button to specify the channel, then play the keyboard. 13 Stop recording by pressing the Style Control [START/STOP] button. 14 Call up the recording. Using, Creating and Editing the Auto Accompaniment Styles PSR-S900/S700 Owner's Manual 121 - Yamaha PSR-S900 | Owner's Manual - Page 122
(delete, copy, or move). You can switch between the two by pressing the [F] button. However, Chord, Lyrics, and System Exclusive data cannot be entered. 122 PSR-S900/S700 Owner's Manual - Yamaha PSR-S900 | Owner's Manual - Page 123
The recorded Style will be lost if you change to another Style or you turn the power off without executing the Save operation (page 73). PSR-S900/S700 Owner's Manual 123 - Yamaha PSR-S900 | Owner's Manual - Page 124
your created Style, you can decide how notes will be converted and sounded for the accompaniment when changing chords in the chord section of the keyboard. 5 Edit the selected Style. 124 PSR-S900/S700 Owner's Manual - Yamaha PSR-S900 | Owner's Manual - Page 125
change to another Style or you turn the power off without executing the Save operation (page 73). Using, Creating and Editing the Auto Accompaniment Styles PSR-S900/S700 Owner's Manual 125 - Yamaha PSR-S900 | Owner's Manual - Page 126
selected section/channel. Values above 100% boost the overall velocity, while values below 100% reduce it. Using, Creating and Editing the Auto Accompaniment Styles 126 PSR-S900/S700 Owner's Manual - Yamaha PSR-S900 | Owner's Manual - Page 127
channel. CAUTION The edited Style will be lost if you change to another Style or you turn the power off without executing the save operation. PSR-S900/S700 Owner's Manual 127 - Yamaha PSR-S900 | Owner's Manual - Page 128
Transposition Table applied to the Chord Type change) The Style File Format (SFF) combines all of Yamaha's auto accompaniment (Style playback) know-how into a single unified format. By using the 1 4 Using, Creating and Editing the Auto Accompaniment Styles 2 3 128 PSR-S900/S700 Owner's Manual - Yamaha PSR-S900 | Owner's Manual - Page 129
setting for channels that contain chord parts. When playing a C major chord. When playing an F major chord. When playing a C major chord. When playing an F major chord. PSR-S900/S700 Owner's Manual 129 - Yamaha PSR-S900 | Owner's Manual - Page 130
transposition. Use this for the Chord 1 and Chord 2 channels, especially when they contain piano or guitar-like chordal parts. MELODIC MINOR When the played chord changes from a major to a minor Notes played C3-E3-G3 C#3-F3-G#3 FM F3-A3-C4 F#M F#2-A#2-C#3 130 PSR-S900/S700 Owner's Manual - Yamaha PSR-S900 | Owner's Manual - Page 131
note of the next chord. However, the octave of the new note remains the same. Style Creator Using, Creating and Editing the Auto Accompaniment Styles PSR-S900/S700 Owner's Manual 131 - Yamaha PSR-S900 | Owner's Manual - Page 132
Multi Pads Reference to Quick Guide pages The Multi Pads page in step 5. 7 Start recording. Recording begins automatically as soon as you play the keyboard. You can also start recording by pressing the STYLE CONTROL [START/ STOP] button. on the EDIT page. 132 PSR-S900/S700 Owner's Manual - Yamaha PSR-S900 | Owner's Manual - Page 133
the USER drive or USB storage device (page 70). Multi Pads indicated with the following icon (hand on fretboard) are created with special note transpositions to produce the natural chord voicing of the guitar. Because by pressing the [F] button. The Multi Pads PSR-S900/S700 Owner's Manual 133 - Yamaha PSR-S900 | Owner's Manual - Page 134
SELECT] button to call up the Multi Pad Bank selection display, then select a Bank to be edited on the USER drive. 2 Press the [8†] button to call up the [MULTI PAD EDIT] display, then select a Pad to be [5†] button then delete the unnecessary Multi Pad (page 75). 134 PSR-S900/S700 Owner's Manual - Yamaha PSR-S900 | Owner's Manual - Page 135
Yamaha website. (See page 5.) 2 Press the REGISTRATION MEMORY [MEMORY] button. The display for selecting the items to be registered appears. Only the items selected here will be registered. (TEXT and MIC SETTING are not shown in the PSR-S700 key on the key- board). PSR-S900/S700 Owner's Manual 135 - Yamaha PSR-S900 | Owner's Manual - Page 136
compatibility In general, Registration Memory data (Bank files) is compatible among the models PSR-S900/ S700. However, the data may not be perfectly compatible, depending on the specifications of -lit numbered buttons ([1]-[8]) in the Registra- tion Memory section. 136 PSR-S900/S700 Owner's Manual - Yamaha PSR-S900 | Owner's Manual - Page 137
76). The number above the file name corresponds to the REGISTRATION MEMORY [1]-[8] buttons. 5 Press the [8π] (UP) button to return to the REGISTRATION BANK Selection display. PSR-S900/S700 Owner's Manual 137 Registering and Recalling Custom Panel Setups - Yamaha PSR-S900 | Owner's Manual - Page 138
when you want to quickly switch between settings - without having to take your hands from the keyboard. The convenient Registration Sequence function lets you call up the eight setups in any order you button to select the pedal for reversing through the sequence. 138 PSR-S900/S700 Owner's Manual - Yamaha PSR-S900 | Owner's Manual - Page 139
data is lost when changing Registration Memory Banks, unless you've saved it with the Registration Memory Bank file. Registering and Recalling Custom Panel Setups PSR-S900/S700 Owner's Manual 139 - Yamaha PSR-S900 | Owner's Manual - Page 140
to Quick Guide Pages you've recorded (page 43, page 147) and saved to the USER/USB display. (USB is available when you connect a USB storage device song data for the instrument can be downloaded from the Yamaha website, and even more titles are available commercially as PSR-S900/S700 Owner's Manual - Yamaha PSR-S900 | Owner's Manual - Page 141
functions related to Song playback which are not covered in the "Quick Guide." ■ Starting/Stopping a Song Press the SONG [F/K] (PLAY/PAUSE You can start playback as soon as you start playing the keyboard. While playback is stopped, simultaneously press the SONG [J] ( PSR-S900/S700 Owner's Manual 141 - Yamaha PSR-S900 | Owner's Manual - Page 142
the same as in the steps 1-2 of the section "Moving back and forth (rewind and fast forward)" (see above). Using, Creating and Editing Songs 142 PSR-S900/S700 Owner's Manual - Yamaha PSR-S900 | Owner's Manual - Page 143
parts of the Song yourself. Try playing chords along with the Song playback as shown in the instructions below. 1 Select a Song (page 36). 2 Select a Style (page 46). 3 Press the ) buttons to turn the Quick Start "OFF." Using, Creating and Editing Songs PSR-S900/S700 Owner's Manual 143 - Yamaha PSR-S900 | Owner's Manual - Page 144
operation of the SETUP (page 166). Make sure to checkmark the "VOICE" item in step 2 of the Setup procedure. Using, Creating and Editing Songs 144 PSR-S900/S700 Owner's Manual - Yamaha PSR-S900 | Owner's Manual - Page 145
→ [B] SONG SETTING 2 Use the [A]/[B] buttons to select the desired Guide function type. The following types are available. 2 1 3 Select a song, call up the Score display (by pressing the [SCORE] but- ton), then play the keyboard. Using, Creating and Editing Songs PSR-S900/S700 Owner's Manual 145 - Yamaha PSR-S900 | Owner's Manual - Page 146
the Yamaha Clavinova series. This function is used for practicing purposes, with built-in lamps on the Clavinova keyboard indicating the notes to be played. Even though the PSR-S900/S700 does playback, press the same button again. 146 PSR-S900/S700 Owner's Manual Using, Creating and Editing Songs - Yamaha PSR-S900 | Owner's Manual - Page 147
User tab displays) capacity The internal memory capacity of the instrument is about 1.4MB (PSR-S900)/560KB (PSR-S700 performance-useful, for example, in recording solo piano pieces. You can record to the [TR a time. This is a non-realtime, manual recording method - similar to writing music notation - Yamaha PSR-S900 | Owner's Manual - Page 148
) button If you start recording in this way, "empty" data is recorded until you play a note on the keyboard. This is useful for starting a Song with a short one-or two-beat pick-up or lead-in. • recording starts simultaneously. Using, Creating and Editing Songs 148 PSR-S900/S700 Owner's Manual - Yamaha PSR-S900 | Owner's Manual - Page 149
message, press the [EXIT] button. See step 7 for instructions on saving your recording. operations shown below. • For recording recording. Press the PART SELECT [RIGHT 2] Select Voices for recording the keyboard parts (RIGHT 1, RIGHT 2, and/or LEFT) (page 30, page PSR-S900/S700 Owner's Manual 149 - Yamaha PSR-S900 | Owner's Manual - Page 150
[EXTRA Normally, the keyboard parts should be TR] to MIDI All incoming data received via any of the MIDI using an external MIDI keyboard or controller to determines which part-keyboard or set the in the section keyboard or controller to [EXIT] button. For instructions on saving Song data, - Yamaha PSR-S900 | Owner's Manual - Page 151
off without executing the Save operation (page 73). About keyboard parts There are three keyboard parts, RIGHT 1, RIGHT 2 and LEFT. As the This is the rhythmic chord backing, commonly used with piano or guitar Voices. PAD This part is used for sustained instruments PSR-S900/S700 Owner's Manual 151 - Yamaha PSR-S900 | Owner's Manual - Page 152
the [G] button to call up the STEP RECORD display. 7 Start Step Recording. For recording melodies See page 153. For recording chords See page 160. 152 PSR-S900/S700 Owner's Manual Using, Creating and Editing Songs - Yamaha PSR-S900 | Owner's Manual - Page 153
in order, according to the notation example. About the items which can be selected via the [G] [H] [I] buttons See page 155. Using, Creating and Editing Songs PSR-S900/S700 Owner's Manual 153 - Yamaha PSR-S900 | Owner's Manual - Page 154
(page 152) to select the data you want to delete. 2 Press the [J] (DELETE) button to delete the selected data. Using, Creating and Editing Songs 154 PSR-S900/S700 Owner's Manual - Yamaha PSR-S900 | Owner's Manual - Page 155
47 31 15 About velocity Velocity is determined by how strongly you play the keyboard. The more strongly you play the keyboard, the higher the velocity value and the louder the sound. The velocity value can , dotted and triplet. Using, Creating and Editing Songs PSR-S900/S700 Owner's Manual 155 - Yamaha PSR-S900 | Owner's Manual - Page 156
mind that one of the steps involves holding down a key on the keyboard while executing the operation. Select the Voice for recording after calling up the [5π†] button to select the half-note length. 5 While holding F3 on the keyboard, press the [7π†] button. Before you go on to step 6, release the F3 - Yamaha PSR-S900 | Owner's Manual - Page 157
"dotted." 12 Press the [5π†] button to select the dotted half-note length. 13 Play the A3 key on the keyboard, as specified in the example. 14 Press the [I] button to select "normal" note type. 15 Press the Save operation (page 73). Using, Creating and Editing Songs PSR-S900/S700 Owner's Manual 157 - Yamaha PSR-S900 | Owner's Manual - Page 158
that one of the steps involves holding down a key on the keyboard while executing the entire operations. Select the Voice for recording after the [7π†] button to select the eighth note. 4 While holding C3 key on the keyboard, press the [7π†] button. Do not release the C3 key yet. Keep holding it - Yamaha PSR-S900 | Owner's Manual - Page 159
Keep holding them while executing the following steps. 6 While holding the C3, E3 and G3 keys on the keyboard, press the [7π†] button. Do not release the C3, E3 and G3 keys yet. Keep holding them while instrument off without executing the Save operation (page 73). PSR-S900/S700 Owner's Manual 159 - Yamaha PSR-S900 | Owner's Manual - Page 160
Ending, and so on) one at a time with precise timing. These instructions show how to record chord changes using the Step Record function. The explanations here chords C, F and G in the chord section of the keyboard. 4 Press the STYLE CONTROL [BREAK] button. 6F G7 4 5 160 PSR-S900/S700 Owner's Manual - Yamaha PSR-S900 | Owner's Manual - Page 161
[4π†] button to select the whole-note length. 9 Play the chord C in the chord section of the keyboard. 10 Press the SONG [J] (STOP) button to move the cursor to the begin- ning of the Song VARIATION (A, B, C, D)] pattern playback.) Using, Creating and Editing Songs PSR-S900/S700 Owner's Manual 161 - Yamaha PSR-S900 | Owner's Manual - Page 162
lets you change the tempo or the time signature. • Editing Lyrics (LYRICS page 170 This lets you change the Song name or lyrics events. 162 PSR-S900/S700 Owner's Manual Using, Creating and Editing Songs - Yamaha PSR-S900 | Owner's Manual - Page 163
over, although you will hear them play back normally to guide you in the Punch In/Out timing. You can specify . 3 Press the SONG [F/K] (PLAY/PAUSE) button to start playback. Play the keyboard at the Punch In point and stop recording at the Punch Out point. 4 Press PSR-S900/S700 Owner's Manual 163 - Yamaha PSR-S900 | Owner's Manual - Page 164
7 8 Play the keyboard to start overwrite recording Stop recording *2 3 4 5 Play the keyboard to start overwrite recording Stop recording *2 3 4 5 6 7 8 Play the keyboard to start overwrite recording can be undone. Using, Creating and Editing Songs 164 PSR-S900/S700 Owner's Manual - Yamaha PSR-S900 | Owner's Manual - Page 165
channel in the Song. Select the channel whose data to be deleted by using the [1π†]-[8π†] buttons, then press the [D] (EXECUTE) button to execute the operation. PSR-S900/S700 Owner's Manual 165 - Yamaha PSR-S900 | Owner's Manual - Page 166
. KEYBOARD VOICE Records the panel settings including the Voice selection of the keyboard parts GUIDE SETTING Records the settings of the Guide functions including the Guide ON/OFF setting. LYRICS SETTING Records the settings in the Lyrics display. MIC SETTING (PSR PSR-S900/S700 Owner's Manual - Yamaha PSR-S900 | Owner's Manual - Page 167
Save operation (page 73). Chord and Section data recorded with Realtime Recording cannot be indicated and edited on this display. Using, Creating and Editing Songs PSR-S900/S700 Owner's Manual 167 - Yamaha PSR-S900 | Owner's Manual - Page 168
unit of note resolution. The Quantize size is the number of clocks per quarter note. On the PSR-S900/S700, one clock is equal to 1/1920th of a quarter note. About the events shown in the display Accompaniment Style S.Vol Overall volume of the Accompaniment Style 168 PSR-S900/S700 Owner's Manual - Yamaha PSR-S900 | Owner's Manual - Page 169
to the "MIDI Data Format" in the Data List for details. The Data List is available at the Yamaha website. (See page 5.) Displays the System Exclusive data in the Song. Keep in mind that you cannot the Save operation (page 73). Using, Creating and Editing Songs PSR-S900/S700 Owner's Manual 169 - Yamaha PSR-S900 | Owner's Manual - Page 170
the Song Selection display for saving your data, then save the data in the Song Selection display (page 73). Using, Creating and Editing Songs 170 PSR-S900/S700 Owner's Manual - Yamaha PSR-S900 | Owner's Manual - Page 171
specific instructions on connecting (as well as information on compatible LAN adaptors, routers, etc.), refer to the Yamaha website (http://music.yamaha.com contract with the provider. This means you cannot connect with the PSR-S900/S700. If in doubt, check your contract or contact your provider. - Yamaha PSR-S900 | Owner's Manual - Page 172
display. Use the DATA ENTRY dial to scroll through the display and view those parts of the page that are not shown. Scroll bar 172 PSR-S900/S700 Owner's Manual Connecting the PSR-S900/S700 Directly to the Internet - Yamaha PSR-S900 | Owner's Manual - Page 173
[ENTER] button. Entering Characters See page 77, "Entering Characters," for instructions on entering characters within the website, for inputting a password or searching ) button, press the [2π†] (FORWARD) button. PSR-S900/S700 Owner's Manual 173 Connecting the PSR-S900/S700 Directly to the Internet - Yamaha PSR-S900 | Owner's Manual - Page 174
special website. For details on purchasing and downloading data, refer to the instructions on the site itself. Operation after purchase and download When downloading is completed the next highest level folder. Connecting the PSR-S900/S700 Directly to the Internet 174 PSR-S900/S700 Owner's Manual - Yamaha PSR-S900 | Owner's Manual - Page 175
the instrument during purchase: The downloaded data is saved in the "MyDownloads" folder in the User tab display of the File Selection display. To close the folder and call up the next the [3π†] (ADD) button. PSR-S900/S700 Owner's Manual 175 Connecting the PSR-S900/S700 Directly to the Internet - Yamaha PSR-S900 | Owner's Manual - Page 176
) button. Opening a Bookmarked Page 1 Press the [4π†] (BOOKMARK) button to call up the Bookmark dis- play. 2 Press the [1 button to select the desired bookmark. Connecting the PSR-S900/S700 Directly to the Internet 23 3 Press the [2π†] (VIEW) button to open the page of the selected bookmark. 176 - Yamaha PSR-S900 | Owner's Manual - Page 177
entering characters, see page 77. 6 Delete Deletes the selected bookmark from the Bookmark list. 7 Close Closes the Bookmark display and returns to the browser display. PSR-S900/S700 Owner's Manual 177 Connecting the PSR-S900/S700 Directly to the Internet - Yamaha PSR-S900 | Owner's Manual - Page 178
the desired display. 3 Select the desired item by pressing the [1 button. Connecting the PSR-S900/S700 Directly to the Internet Entering Characters When the character input display is opened, you can enter This can also be done by using the DATA ENTRY dial. 178 PSR-S900/S700 Owner's Manual 56 - Yamaha PSR-S900 | Owner's Manual - Page 179
. These settings must be made when "Use DHCP" above is set to "ON (set DNS manually)" or "OFF." 3 IP address/Subnet mask/Gateway These settings are available only when DHCP is "Use DHCP" above is set to "OFF." PSR-S900/S700 Owner's Manual 179 Connecting the PSR-S900/S700 Directly to the Internet - Yamaha PSR-S900 | Owner's Manual - Page 180
the Internet Settings displays to their defaults. See "Initializing Internet Settings" on page 182. 5 Connection information Shows detailed information on the current connection. Connecting the PSR-S900/S700 Directly to the Internet 180 PSR-S900/S700 Owner's Manual - Yamaha PSR-S900 | Owner's Manual - Page 181
the selected page as your new Home page. 6 To return to the browser, press the [7π†] (SAVE) button. To cancel, press the [8π†] (CANCEL) button. Connecting the PSR-S900/S700 Directly to the Internet PSR-S900/S700 Owner's Manual 181 - Yamaha PSR-S900 | Owner's Manual - Page 182
after executing the initialize operation above. To delete the cookies or bookmarks, use the appropriate operations in the OTHERS tab display (page 180). Connecting the PSR-S900/S700 Directly to the Internet 182 PSR-S900/S700 Owner's Manual - Yamaha PSR-S900 | Owner's Manual - Page 183
"remembers" certain information such as your user name and password, so you don't business that offers Internet connection services. In order to connect to www.yamaha.com/" is referred to as the Yamaha site. PSR-S900/S700 Owner's Manual 183 Connecting the PSR-S900/S700 Directly to the - Yamaha PSR-S900 | Owner's Manual - Page 184
Using a Microphone (PSR-S900) Reference to Quick Guide pages Singing Along with Song Playback (Karaoke) or Your Own Performance page 57 2 Press the [H] (VOCAL HARMONY TYPE) button to call up the VOCAL HARMONY TYPE selection display. Using a Microphone (PSR-S900) 184 PSR-S900/S700 Owner's Manual - Yamaha PSR-S900 | Owner's Manual - Page 185
The settings here will be lost if you change to another Vocal Harmony type or you turn the power off without executing the Save operation. PSR-S900/S700 Owner's Manual 185 Using a Microphone - Yamaha PSR-S900 | Owner's Manual - Page 186
DELAY Specifies the length of the delay before the vibrato effect begins when a note is produced. Higher values result in a longer delay. Using a Microphone (PSR-S900) 186 PSR-S900/S700 Owner's Manual - Yamaha PSR-S900 | Owner's Manual - Page 187
(lowest), second, and third (highest) harmony notes. Random The stereo position of the sound will change randomly whenever the keyboard is played. This is effective when the Harmony mode (page 190) up the MICROPHONE SET- TING display. Using a Microphone (PSR-S900) PSR-S900/S700 Owner's Manual 187 - Yamaha PSR-S900 | Owner's Manual - Page 188
. • SW (Switch) This turns the Noise Gate on or off. • TH. (Threshold) This adjusts the input level at which the gate begins to open. 188 PSR-S900/S700 Owner's Manual Using a Microphone (PSR-S900) - Yamaha PSR-S900 | Owner's Manual - Page 189
setting is linked to the HARMONY CH setting in the SONG SETTING display (page 145). KEYBOARD OFF Keyboard control over harmony is turned off. UPPER Notes played to the right of the split set to L63>H, only the lead vocal is output. Using a Microphone (PSR-S900) PSR-S900/S700 Owner's Manual 189 - Yamaha PSR-S900 | Owner's Manual - Page 190
chord: chords played in the chord section of the keyboard (with the [ACMP] turned on), chords played in the LEFT Voice section of the keyboard (with the [ACMP] turned off and the [LEFT Adjusts the output volume of the microphone sound. Using a Microphone (PSR-S900) 190 PSR-S900/S700 Owner's Manual - Yamaha PSR-S900 | Owner's Manual - Page 191
- TING display. 3 Press the TAB [√][®] buttons to select the TALK SETTING tab display. 3 4 Using a Microphone (PSR-S900) 6 5 4 Use the [A]/[B] buttons to select the item (parameter) (page 192) to be set. 5 exiting from this display, the settings will be lost. PSR-S900/S700 Owner's Manual 191 - Yamaha PSR-S900 | Owner's Manual - Page 192
Display VOLUME This determines the output volume of the microphone sound. PAN This sets the stereo pan position of the microphone sound. REVERB DEPTH This sets the depth of the reverb DSP effect applied to the microphone sound. Using a Microphone (PSR-S900) 192 PSR-S900/S700 Owner's Manual - Yamaha PSR-S900 | Owner's Manual - Page 193
OUTPUT] jacks) You can connect these jacks to a stereo system to amplify the instrument's sound. The microphone or guitar sound connected to the instrument's [MIC/LINE IN] jack affects the input signal from the [AUX IN] jacks. PSR-S900/S700 Owner's Manual 193 Using Your Instrument with Other Devices - Yamaha PSR-S900 | Owner's Manual - Page 194
like the damper pedal on a piano - press for sustain, release for normal sound. • FOOT PEDAL 2 jack (PSR-S900) Plug an optional Yamaha Footswitch FC4 or FC5 into this jack and use it to control the Super Articulation Voices (page 83). (PSR-S700) Plug an optional Yamaha FC7 foot controller into this - Yamaha PSR-S900 | Owner's Manual - Page 195
off. If necessary, use this setting to reverse the control. Press the [I] (PEDAL POLARITY) button to switch the polarity. Using Your Instrument with Other Devices PSR-S900/S700 Owner's Manual 195 - Yamaha PSR-S900 | Owner's Manual - Page 196
you to use a pedal to control the Sostenuto effect. If you play a note or chord on the keyboard and press the pedal while holding the note(s), the notes will sustain as long as the pedal is held. fill-in. Plays a break. Using Your Instrument with Other Devices 196 PSR-S900/S700 Owner's Manual - Yamaha PSR-S900 | Owner's Manual - Page 197
work. The pedal plays a percussion instrument selected by the [4π†]-[8π†] buttons. You can use the keyboard to select the desired percussion instrument. Same as the PART ON/OFF [RIGHT 1] button. Same assigned to the pedal. Using Your Instrument with Other Devices PSR-S900/S700 Owner's Manual 197 - Yamaha PSR-S900 | Owner's Manual - Page 198
MIDI IN MIDI OUT Receives MIDI messages from USBMIDI driver. The instructions below explain how to the separate Installation Guide (page 4). ( playing notes on the keyboard or playing back a manual of the relevant software. Using Your Instrument with Other Devices 198 PSR-S900/S700 Owner's Manual - Yamaha PSR-S900 | Owner's Manual - Page 199
storage media For details, see page 72. CAUTION The format operation overwrites any previously existing data. Proceed with caution. Using Your Instrument with Other Devices PSR-S900/S700 Owner's Manual 199 - Yamaha PSR-S900 | Owner's Manual - Page 200
(9 [LAN] Port) There are three ways to use the [LAN] port to access special Internet websites, and download song data, etc. See page 171 for instructions on connecting. Using Your Instrument with Other Devices 200 PSR-S900/S700 Owner's Manual - Yamaha PSR-S900 | Owner's Manual - Page 201
in our acoustic example. Here, the player's performance on the keyboard is captured as MIDI song data (see illustration below). In order to record the audio performance on an acoustic piano, special recording equipment is needed. However, since the PSR-S900/S700 features a built-in sequencer that - Yamaha PSR-S900 | Owner's Manual - Page 202
sent to the tone generator. Using these numbers as a basis for sound generation, the tone generator plays the stored sampled note. Example Keyboard Data Voice number (with what voice) 01 (grand piano) Note number (with which key) 60 (C3) Note on (when was it pressed) and note off (when was it - Yamaha PSR-S900 | Owner's Manual - Page 203
keyboard MIDI receive MIDI IN MIDI OUT Instrument MIDI Data Compatibility This section covers basic information on data compatibility: whether or not other MIDI devices can playback the data recorded by PSR-S900/S700, and whether or not the PSR-S900/S700 If you run into problems playing back data, - Yamaha PSR-S900 | Owner's Manual - Page 204
Yamaha's MIDI devices, including the PSR-S900/S700 series instruments. ● GS GS was developed by the Roland Corporation. In the same way as Yamaha templates already saved to the USER display or to edit them Press the TAB [®] button to select the USER display. Press one of PSR-S900/S700 Owner's Manual - Yamaha PSR-S900 | Owner's Manual - Page 205
up the relevant setting display. SYSTEM display TRANSMIT display RECEIVE display BASS display CHORD DETECT display MIDI System Settings ( EXIT] button to return to the MIDI template selection display (PRESET or USER). 6 Select the USER tab display to save the data by using the TAB [√][®] buttons ( - Yamaha PSR-S900 | Owner's Manual - Page 206
part is handled as "LOWER." In this setting, the instrument functions as a "master" keyboard, playing and controlling one or more connected tone generators or other devices (such as a . No MIDI signals are sent or received. Using Your Instrument with Other Devices 206 PSR-S900/S700 Owner's Manual - Yamaha PSR-S900 | Owner's Manual - Page 207
) is applied to the note events received by the instrument via MIDI. ● keyboard part played on the left side of the keyboard from the Split Point for the Voices. This is not affected by the on/off status of the [ACMP] button. Using Your Instrument with Other Devices PSR-S900/S700 Owner's Manual - Yamaha PSR-S900 | Owner's Manual - Page 208
MIDI Receive Settings RECEIVE display • KEYBOARD The received note messages control the instrument's keyboard performance. • EXTRA PART 1-5 There are five parts specially reserved for receiving and playing MIDI data. Normally, these parts are not used by the instrument itself. The PSR-S900/S700 can - Yamaha PSR-S900 | Owner's Manual - Page 209
set all channels to OFF. CHORD DETECT display Setting the Chord Type for Style Playback via MIDI Receive The explanations here apply to the CHORD DETECT display to be called up in step 4 of the change numbers are not shown). Using Your Instrument with Other Devices PSR-S900/S700 Owner's Manual 209 - Yamaha PSR-S900 | Owner's Manual - Page 210
Appendix Troubleshooting Overall The too low. Set it to an appropriate level with the [MASTER VOLUME] dial. • All keyboard parts are set to off. Use the PART ON/OFF [RIGHT 1]/[RIGHT 2]/[LEFT] button . Demo How can I stop the demo? • Press the [EXIT] button. Appendix 210 PSR-S900/S700 Owner's Manual - Yamaha PSR-S900 | Owner's Manual - Page 211
List is available at the Yamaha website. (See page 5.) Keyboard." If either of these is selected, chords are recognized over the entire range of the keyboard, irrespective of the split point setting. If desired, select a different fingering mode (page 107). Appendix PSR-S900/S700 Owner's Manual - Yamaha PSR-S900 | Owner's Manual - Page 212
Voice is the selected User/USB Voice. When a User/USB Voice is saved to the User/USB drive, the Guide function is turned on. (In this case, playback is "waiting" for the correct key to be played.) Press the [GUIDE] button to turn off the guide function. Appendix 212 PSR-S900/S700 Owner's Manual - Yamaha PSR-S900 | Owner's Manual - Page 213
move the song to a USB flash memory device connected to this instrument. Guide The melody still plays back, even when specifying Track 1 as the part in the Step Record display (page 153) may solve the problem. The tempo, beat, measure and music notation is not displayed PSR-S900/S700 Owner's Manual 213 - Yamaha PSR-S900 | Owner's Manual - Page 214
then set the [ACMP] and PART ON/OFF [LEFT] to off. Finally, restart the Song. Video out (PSR-S900) The instrument display contents cannot be sent via video out and do not show on an external monitor. • Make then format it (page 72) and try recording again. Appendix 214 PSR-S900/S700 Owner's Manual - Yamaha PSR-S900 | Owner's Manual - Page 215
OTS Link Music Finder Preset Edit RAM Capacity Preset Songs Guide Song Performance assistant technology Recording Record Channels RAM Capacity USB Audio Recorder Multi Pad Preset Internet Direct Connection PSR-S900 PSR-S700 AWM Stereo Sampling 61 keys (C1-C6 with Initial Touch) 320 - Yamaha PSR-S900 | Owner's Manual - Page 216
manual are for information purposes only. Yamaha Corp. reserves the right to change or modify products or specifications at any time without prior notice. Since specifications, equipment or options may not be the same in every locale, please check with your Yamaha dealer. Appendix 216 PSR-S900/S700 - Yamaha PSR-S900 | Owner's Manual - Page 217
107 AI FULL KEYBOARD 107 Any key 75 D Data List 5 DELETE 75 Demo 24 Demo (Voice 32 [DEMO] button 12 [DIGITAL RECORDING] button 72 FREEZE 138 FULL KEYBOARD 107 Function display 28 G Glossary of Internet Terms System Level 2 204 GROOVE 125 GS 204 Guide 40, 145 H HARMONY 102 HARMONY/ECHO - Yamaha PSR-S900 | Owner's Manual - Page 218
K Karaoke 57 Karao-key 146 Keyboard Parts 84 KEYBOARD/PANEL 33, 61 KIRNBERGER 88 QUICK START 143 R RANDOM 142 Realtime Recording 118 REC MODE 162 RECEIVE 208 Record 43 Record (Song 147 Record (Style 118 REGISTRATION MEMORY 135 Stop ACMP 109 Appendix 218 PSR-S900/S700 Owner's Manual - Yamaha PSR-S900 | Owner's Manual - Page 219
USB Audio Recorder 63 USB Storage Device 23 [USB TO DEVICE] terminal 13 [USB TO HOST] terminal 13 USER 27 V Vibrato 102 VIDEO OUT 59 Vocal CueTIME 146 Vocal Harmony 60, 184 VOCAL HARMONY EDIT 185, 186 171, 183 Wireless LAN 180 X XF 203 XG 204 Appendix PSR-S900/S700 Owner's Manual 219 - Yamaha PSR-S900 | Owner's Manual - Page 220
h [DEMO 6 [DIRECT ACCESS a Drum Kit Icons DSP y E ENDING/rit. [I]/[II]/[III V [ENTER i [EXIT g [EXTRA TR C F [FADE IN/OUT O [FREEZE n [FUNCTION d G [GUIDE B H [HARMONY/ECHO u I [INTERNET f INTRO [I]/[II]/[III S L [LCD CONTRAST Z [LYRICS/TEXT] (PSR-S900 0 [LYRICS] (PSR-S700 0 MAIN - Yamaha PSR-S900 | Owner's Manual - Page 221
products: PSR SERIES OF PORTATONE ELECTRONIC KEYBOARDS If during the first 90 days that immediately follows the purchase date, your new Yamaha product the servicing of your unit and provide a tracking system if needed. 4. Your owners manual contains important safety and operating instructions. It - Yamaha PSR-S900 | Owner's Manual - Page 222
and 2) this device must accept any interference received including interference that may cause undesired operation. See user manual instructions if interference to radio reception is suspected. * This applies only to products distributed by YAMAHA CORPORATION OF AMERICA. (FCC DoC) IMPORTANT. The - Yamaha PSR-S900 | Owner's Manual - Page 223
plus de détails sur les produits, veuillez-vous adresser à Yamaha ou au distributeur le plus proche de vous figurant dans la liste suivante. Die Einzelheiten zu Produkten sind bei Ihrer unten aufgeführten Niederlassung und bei Yamaha Vertragshändlern in den jeweiligen Bestimmungsländern erhältlich - Yamaha PSR-S900 | Owner's Manual - Page 224
Yamaha Home Keyboards Home Page (English only) http://music.yamaha.com/homekeyboard Yamaha Manual Library http://www.yamaha.co.jp/manual/ U.R.G., Pro Audio & Digital Musical Instrument Division, Yamaha Corporation © 2007 Yamaha Corporation WH65940 703APAP4.3-02B1 Printed in China
-
 1
1 -
 2
2 -
 3
3 -
 4
4 -
 5
5 -
 6
6 -
 7
7 -
8
-
9
-
10
-
11
-
12
-
13
-
14
-
15
-
16
-
17
-
18
-
19
-
20
-
21
-
22
-
23
-
24
-
25
-
26
-
27
-
28
-
29
-
30
-
31
-
32
-
33
-
34
-
35
-
36
-
37
-
38
-
39
-
40
-
41
-
42
-
43
-
44
-
45
-
46
-
47
-
48
-
49
-
50
-
51
-
52
-
53
-
54
-
55
-
56
-
57
-
58
-
59
-
60
-
61
-
62
-
63
-
64
-
65
-
66
-
67
-
68
-
69
-
70
-
71
-
72
-
73
-
74
-
75
-
76
-
77
-
78
-
79
-
80
-
81
-
82
-
83
-
84
-
85
-
86
-
87
-
88
-
89
-
90
-
91
-
92
-
93
-
94
-
95
-
96
-
97
-
98
-
99
-
100
-
101
-
102
-
103
-
104
-
105
-
106
-
107
-
108
-
109
-
110
-
111
-
112
-
113
-
114
-
115
-
116
-
117
-
118
-
119
-
120
-
121
-
122
-
123
-
124
-
125
-
126
-
127
-
128
-
129
-
130
-
131
-
132
-
133
-
134
-
135
-
136
-
137
-
138
-
139
-
140
-
141
-
142
-
143
-
144
-
145
-
146
-
147
-
148
-
149
-
150
-
151
-
152
-
153
-
154
-
155
-
156
-
157
-
158
-
159
-
160
-
161
-
162
-
163
-
164
-
165
-
166
-
167
-
168
-
169
-
170
-
171
-
172
-
173
-
174
-
175
-
176
-
177
-
178
-
179
-
180
-
181
-
182
-
183
-
184
-
185
-
186
-
187
-
188
-
189
-
190
-
191
-
192
-
193
-
194
-
195
-
196
-
197
-
198
-
199
-
200
-
201
-
202
-
203
-
204
-
205
-
206
-
207
-
208
-
209
-
210
-
211
-
212
-
213
-
214
-
215
-
216
-
217
-
218
-
219
-
220
-
221
-
222
-
223
-
224
 |
 |
E
N
OWNER'S MANUAL